It has been a long time since I have posted on Old Man in a Boat Tour and much has happened in that interval. Although I have continued to work on the Greta T , it has been sporadic, and it has been hard not to become demoralized over the slow pace of progress. However, in September 2023, time and circumstances caught up with me … big time!
I sailed in a few Laser Masters’ regattas over the summer, but I had noticed that I was losing weight since the Spring – a lot of weight (over 30 pounds). Then I started getting short of breath and somewhat unsteady on my feet.
The merde hit the proverbial fan when I collapsed at home on the 24th of September and was rushed to the local hospital – a syncope (fainting) – caused by a total heart block – i.e. one half of my heart wasn’t getting signals from the other half. I was transferred to Hamilton General for an emergency pacemaker operation and upon returning to Emergency a few days later with severe headache, a very sharp ER doctor diagnosed an autoimmune condition called Giant Cell Arteritis. This was unrelated to the heart issues and explained the weight loss, shortness of breath and unsteadiness of the previous months. The pacemaker situation has fortunately stabilized after a two-month convalescence, but the autoimmune condition is going to take far longer to resolve and may be chronic. Fortunately, I have avoided some of the nastier complications of this condition so far (stroke, blindness) and although I have to take a lot of pills every day and have regular headaches and dizziness (gait ataxia- I walk like a drunken sailor) I am able to function after a fashion. I was extremely fortunate to have landed at the Hamilton General where the expertise in this condition and the medical care was exceptional.
Which brings me to the issue of hubris – WOW… was I being cocky assuming age and health would not slow me down in my proposed trip for the Old Man in a Boat Tour! In less than a week my plans came crashing rudely to earth. Humble pie and egg on my face are other phrases that spring to mind! Still, if the shoe fits…wear it!
So, here’s how I have picked myself up and dusted myself off – owing much to the tremendous care and loving help from my family – to re-imagine my fundraiser.
Realistically, I will not be able to complete the trip as planned and completing the Greta T is not on the cards for perhaps only somewhat late into 2024. So, here’s the new plan:
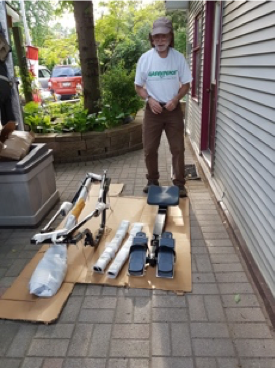
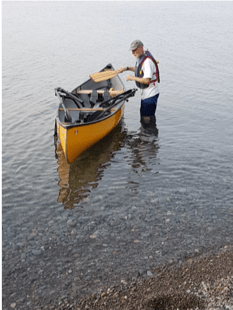
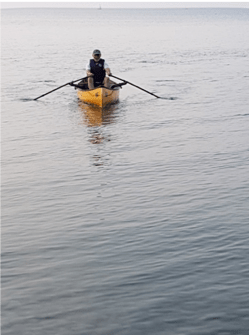
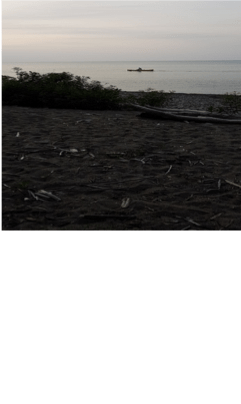
- Fit the oars to my canoe and start rowing along the southern shore of Lake Ontario from Grimsby Beach (conveniently 50 yards down the road from home).
- Row 20 – 30 miles several times a week when the weather is reasonable.
- Continue to work on Greta T
- Repeat until I have completed the mileage of my original plans (somewhere around 1500 kms. )
- If the boat gets finished before I am done the mileage, then I can finish the day trips by sailing as well as rowing!
I owe this new plan to the forward thinking of my daughter Maya who, along with my wife June, has pulled me through this crisis and given me renewed hope about salvaging some of my rather overly ambitious fundraising plans!
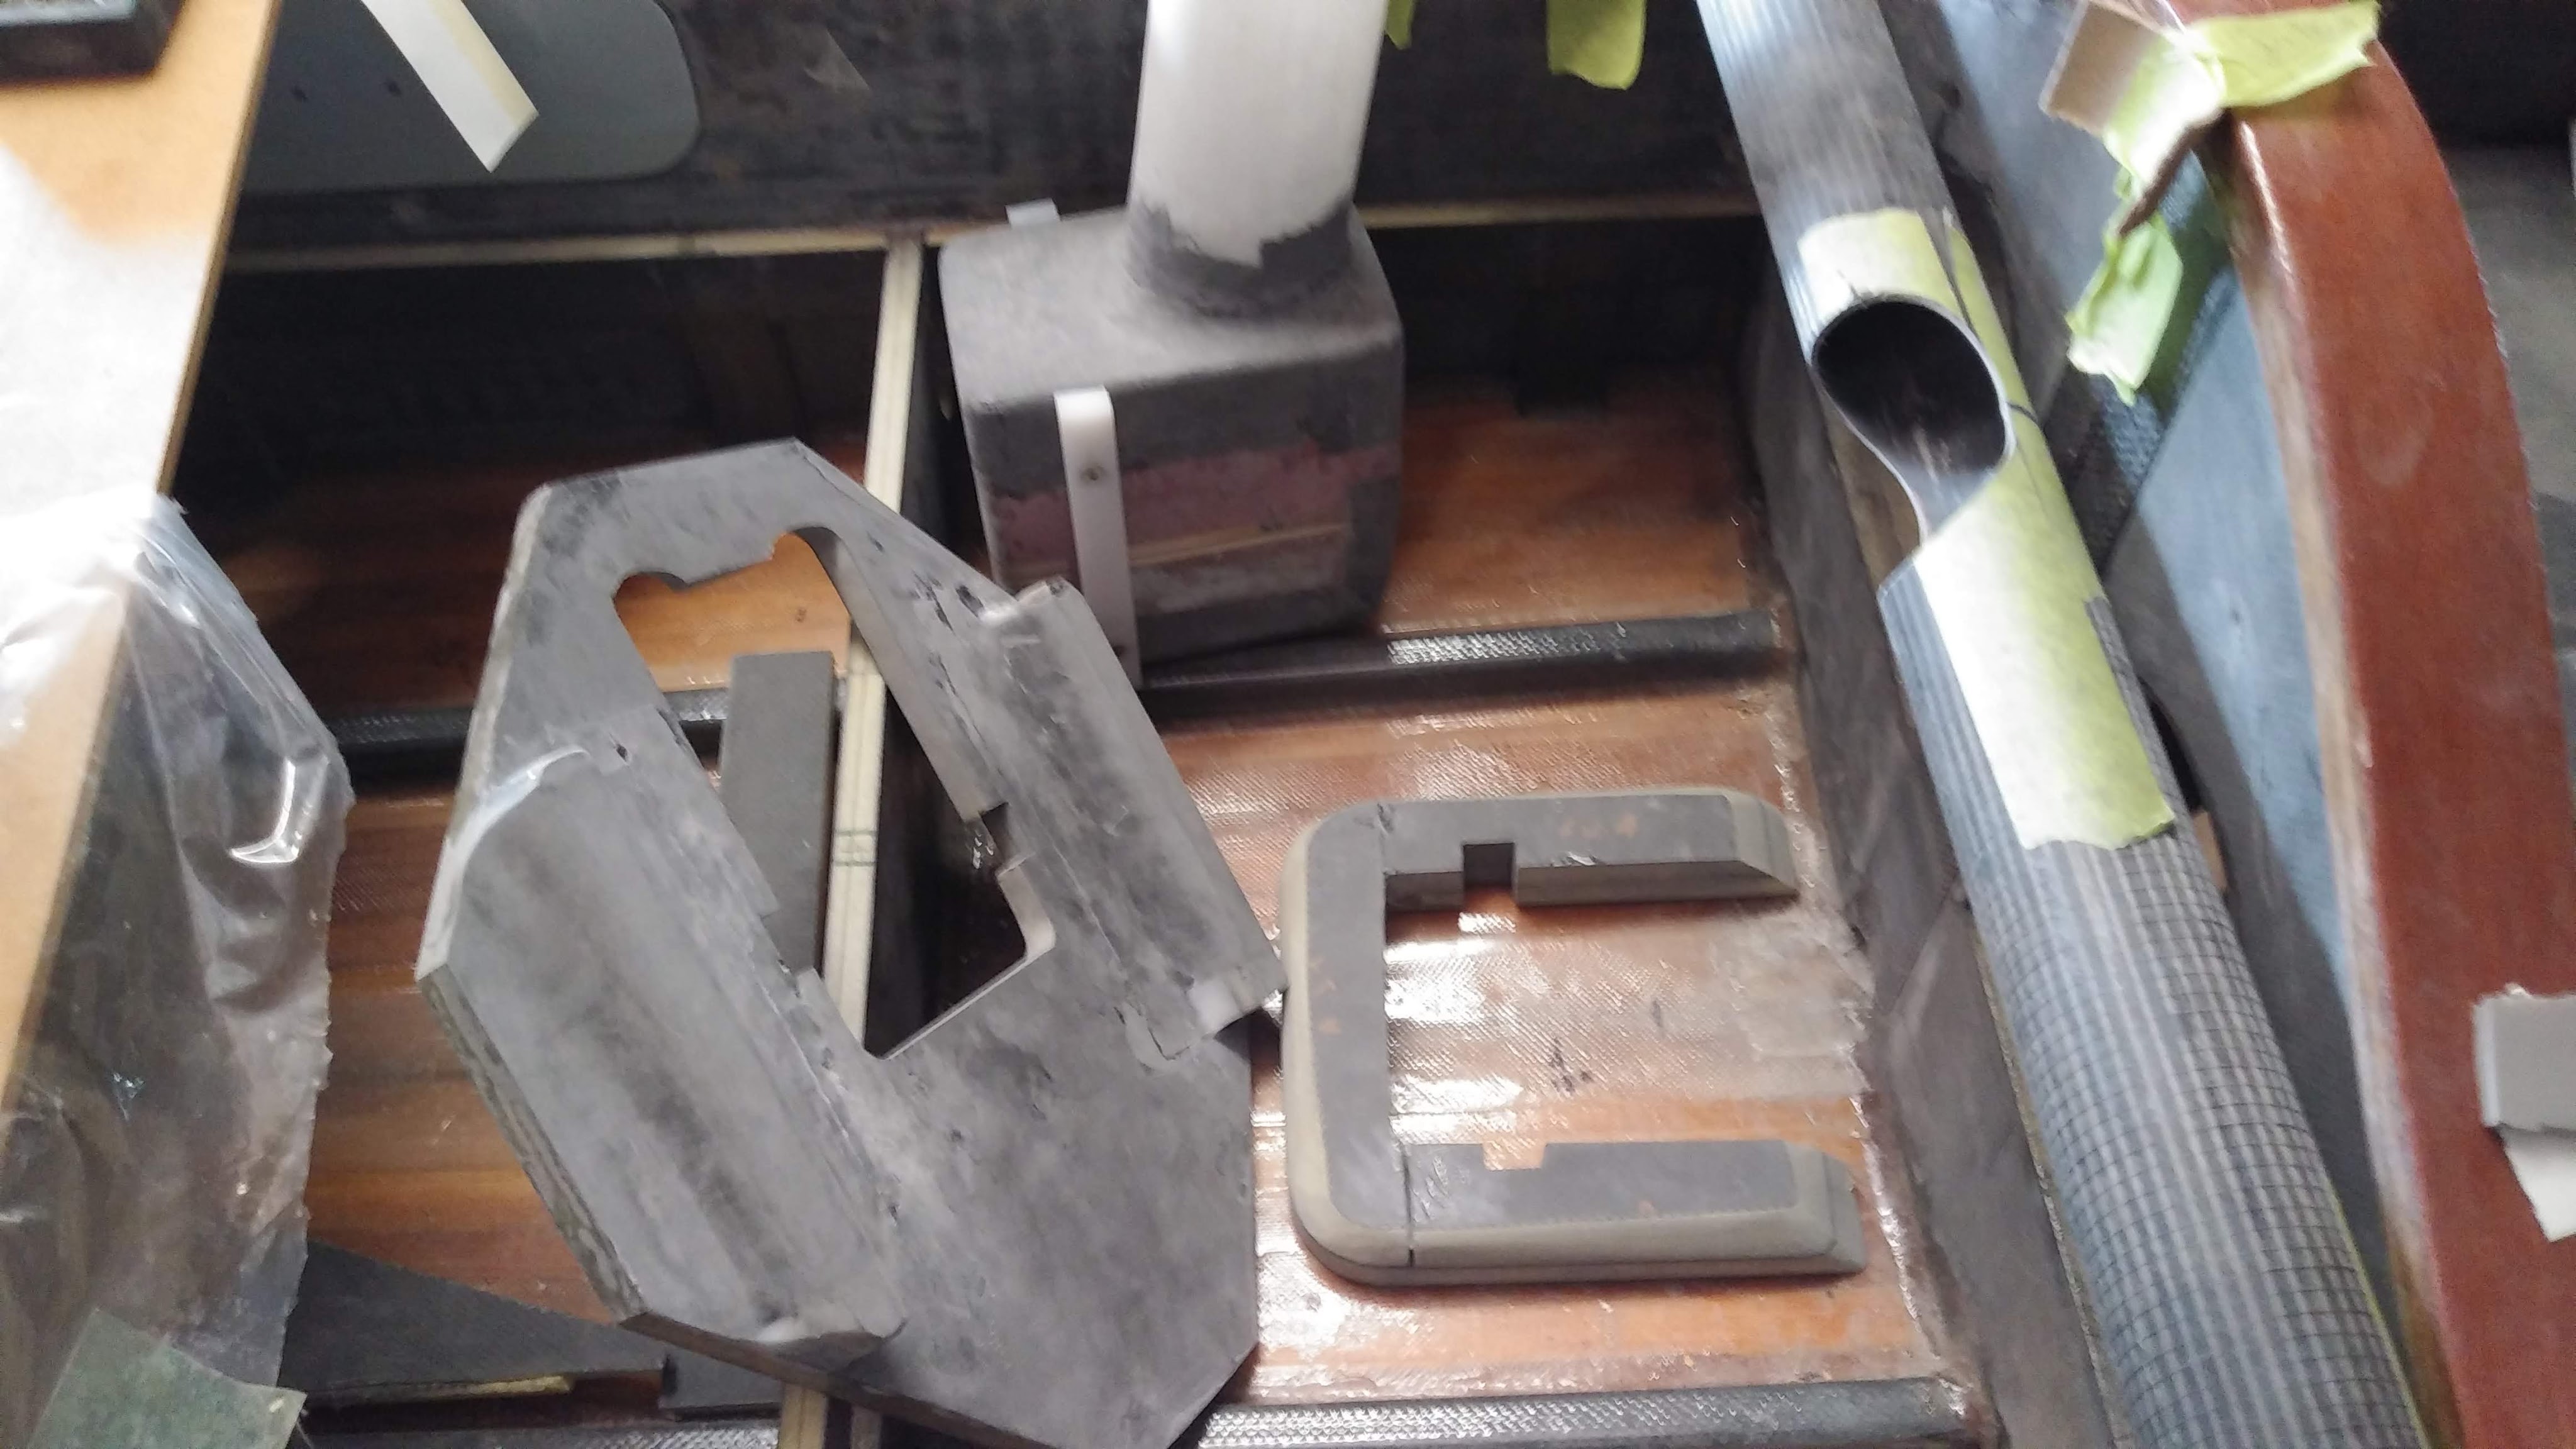
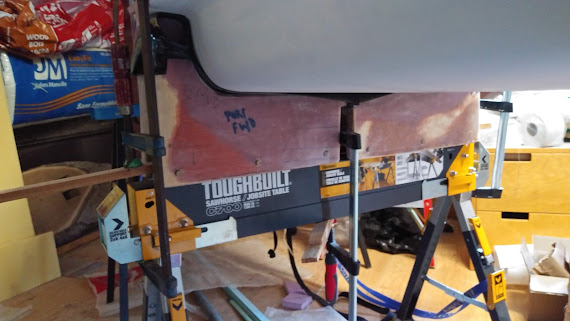
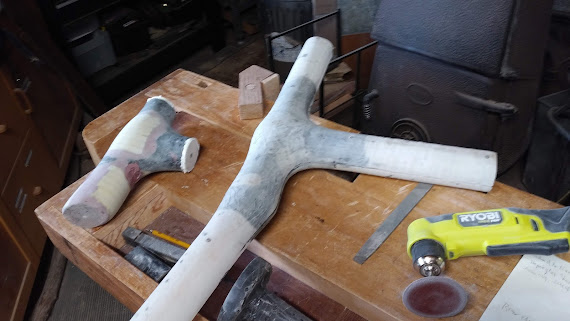
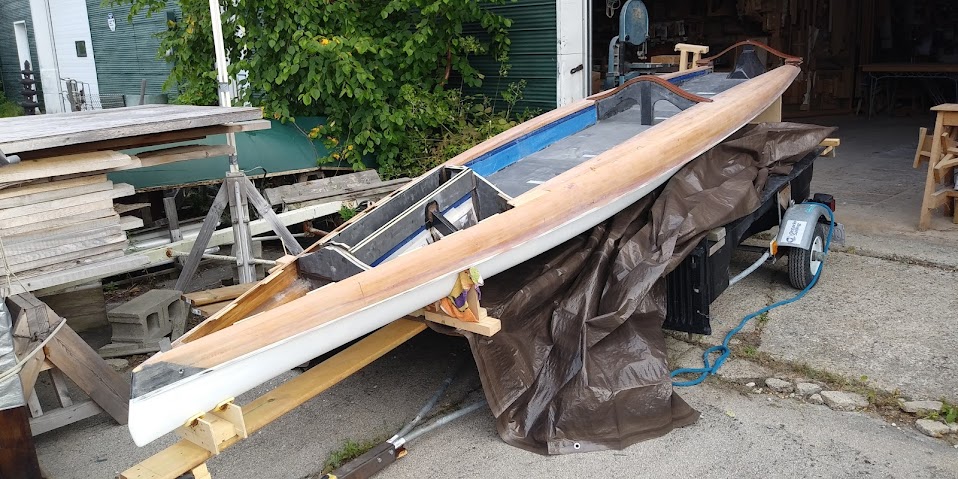
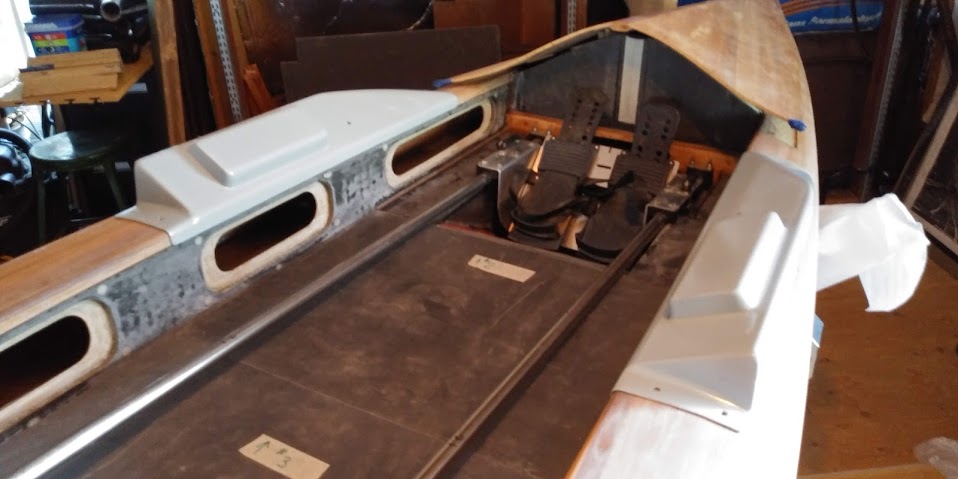
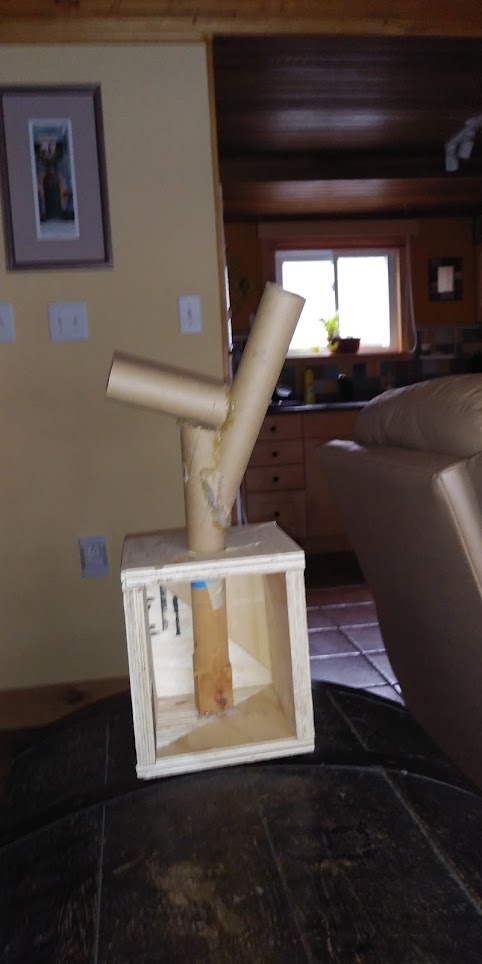
I have included some photos of the state of the latest progress on the Greta T – the deck is almost ready to fasten in place and both mast steps are fabricated and fitted. The leeboards are assembled, ready for carbon fibre laminating and installation and the sail controls and steering controls have been temporarily mocked up.
However, much as I probably should be spending all my time (between resting) working on the boat, I have decided that I also need to have another priority, more in keeping with the state of my health and to keep my mental health in a positive state and also to repay my family for their tremendous support.
In a word, I have decided to begin Dostadning* – The Gentle Art of Swedish Death Cleaning.
Now, before you think I am getting too morbid, let me explain what this is about. It’s based on the simple philosophy that no one is immortal and that one of the greatest gifts you can give to your loved ones is that they don’t have to clean up all your messes when you die and are dealing (hopefully) with their own grief. So, in short, start cleaning up, tidying, getting rid of all that stuff you are never going to use, NOW, in a systematic and timely way without getting too stressed about it and at a pace that is reasonable. In my case, I hope my health situation resolves, but I think I can’t assume that, so Dostadning for me!
I have to say, that once I embarked on this (doing a bit each day, or at least 3 or 4 times a week) I have felt my spirits lift and been more energized than I had been for a long time! The important thing is to maintain a sense of humour and humility all the while doing it. Here’s a portion of a blog post that I wrote last summer, but somehow never quite got around to publishing!
Of Collars and Collets and other details… written June 22, 2022
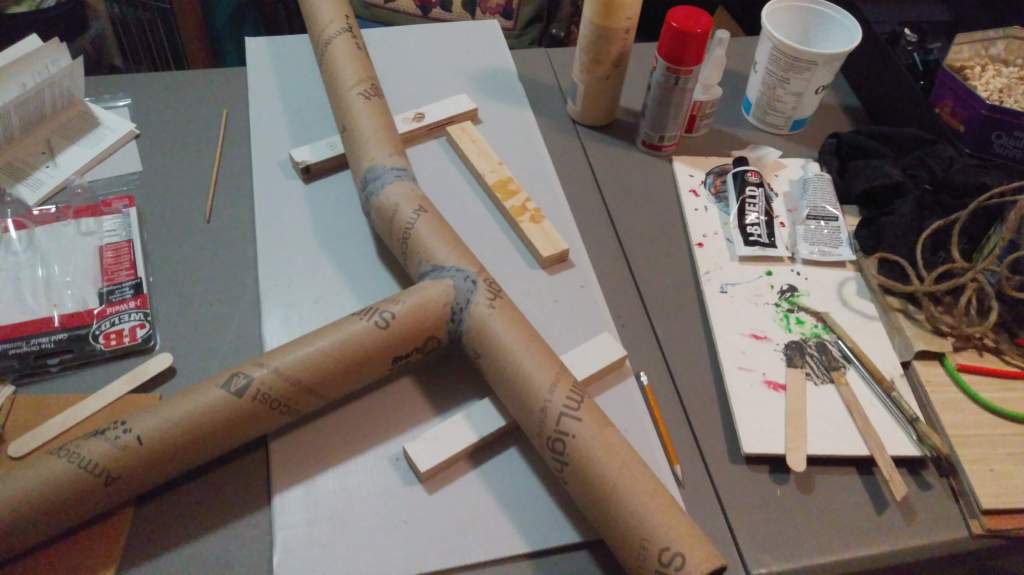
In the early days of building the Greta T the problem of how to let the mast partners rotate easily was vaguely imagined as some form of plastic collars around the partners to rotate inside a larger tube/holder that was fixed in the deck. In a stroke of serendipity, I managed to scrounge some quite sturdy white plastic 3” rigid plastic tubing that was at the side of the road outside a car window tinting shop in St. Catharines. Apparently, the tubing is what the window tinting film comes wrapped around and although the tubes had been cut in half they were still long enough for my purposes. Here’s a picture of the tubing (white) in use in the mast “cartridges” that will receive the mast partners.
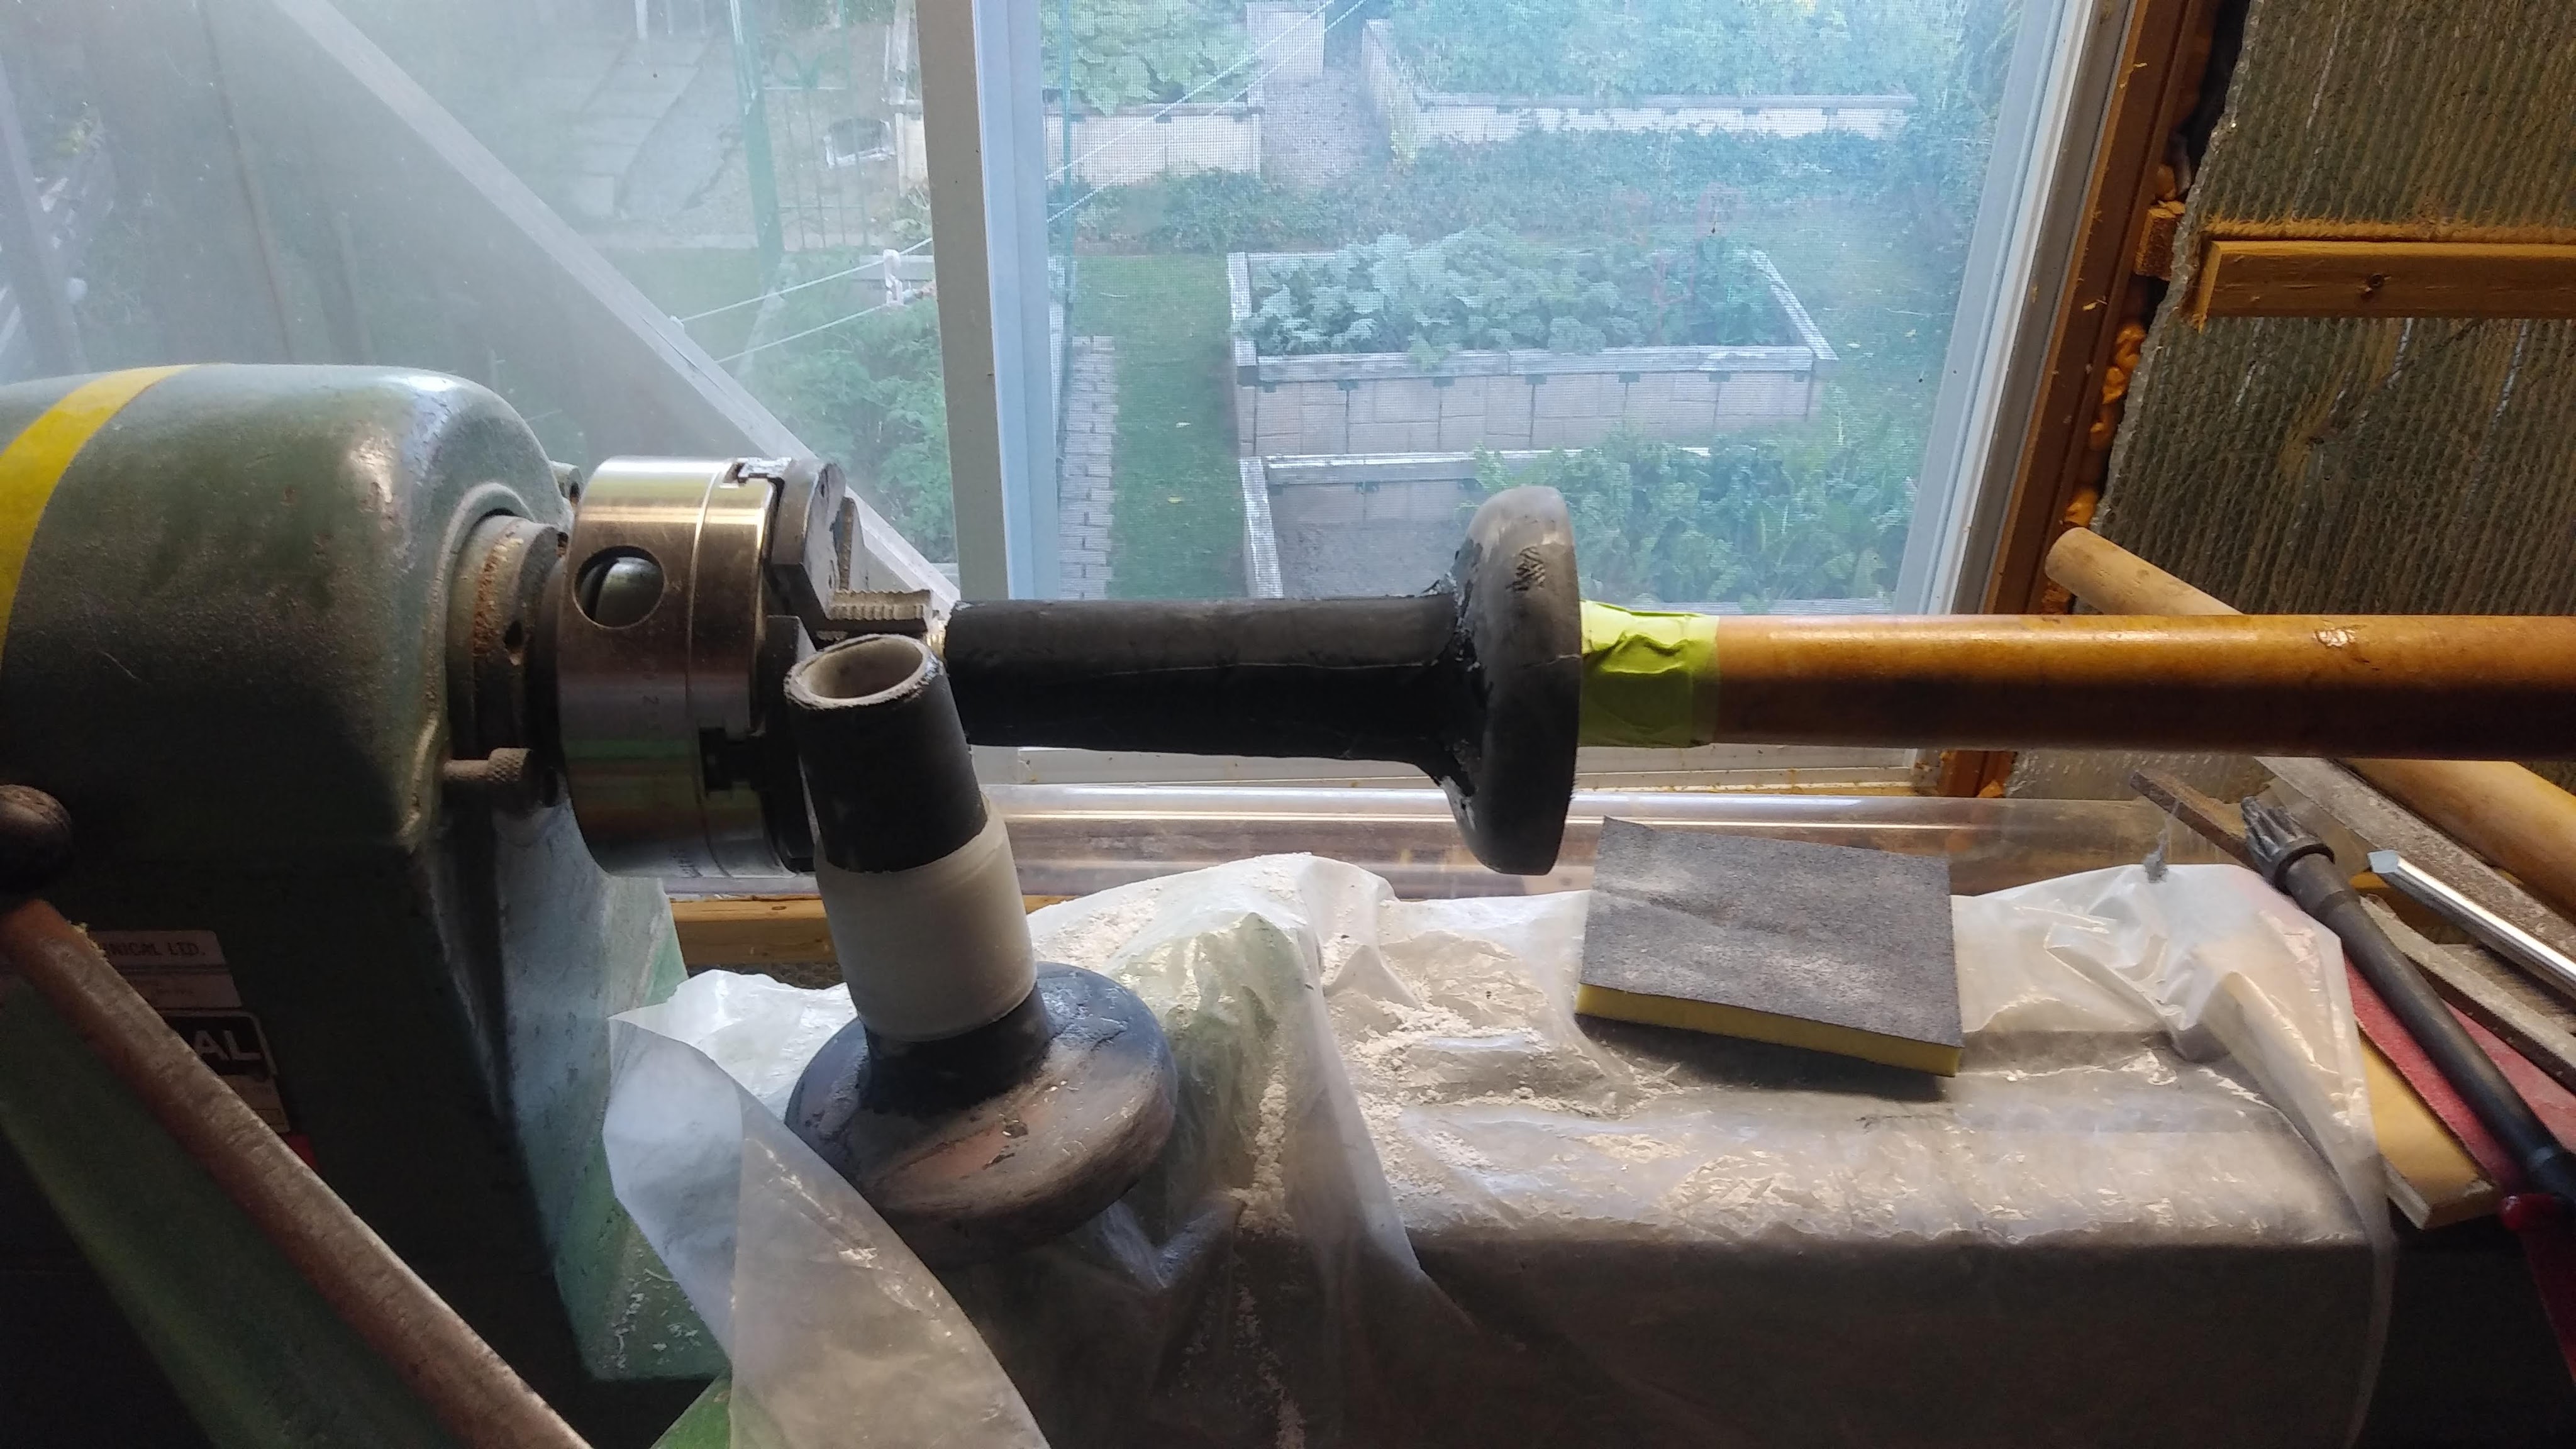
A bit of research led me to a plastic called Acetal/Delrin, which has excellent machining and wear properties, and is highly “slippery”, as the material of choice for the collars around the mast partners that will rotate inside the larger tubes built into the mast cartridges.
My daughter, Maya, put her engineering and CAD drawing skills to good use and produced some drawing of the collars I would need. Here’s a picture of one of them – the top section ( to be fitted just above deck level) which needs to cover the tube and allow a smooth rotation.
I thought I would turn them out on my lathe (a wood turning lathe) however, once I started on this, it become apparent that the Delrin is just too hard for a lathe chisel to cut cleanly – it chattered and cut unevenly producing a bumpy surface – not what one wants for smooth rotation! A metal working lathe will have to be used.
So, I will have to get these collars (the others are similar, but without the flanges at the top) turned at a machine shop. This has also proved to be a challenge as the two local shops I contacted seemed to be too busy to even respond to my e-mails… I guess I’ll have to drop by and collar them! (P.S. – a very kind member of my sailing club, H.B.S.C., is a retired machinist and has kindly agreed to make these up for me – thanks Roy!!!)
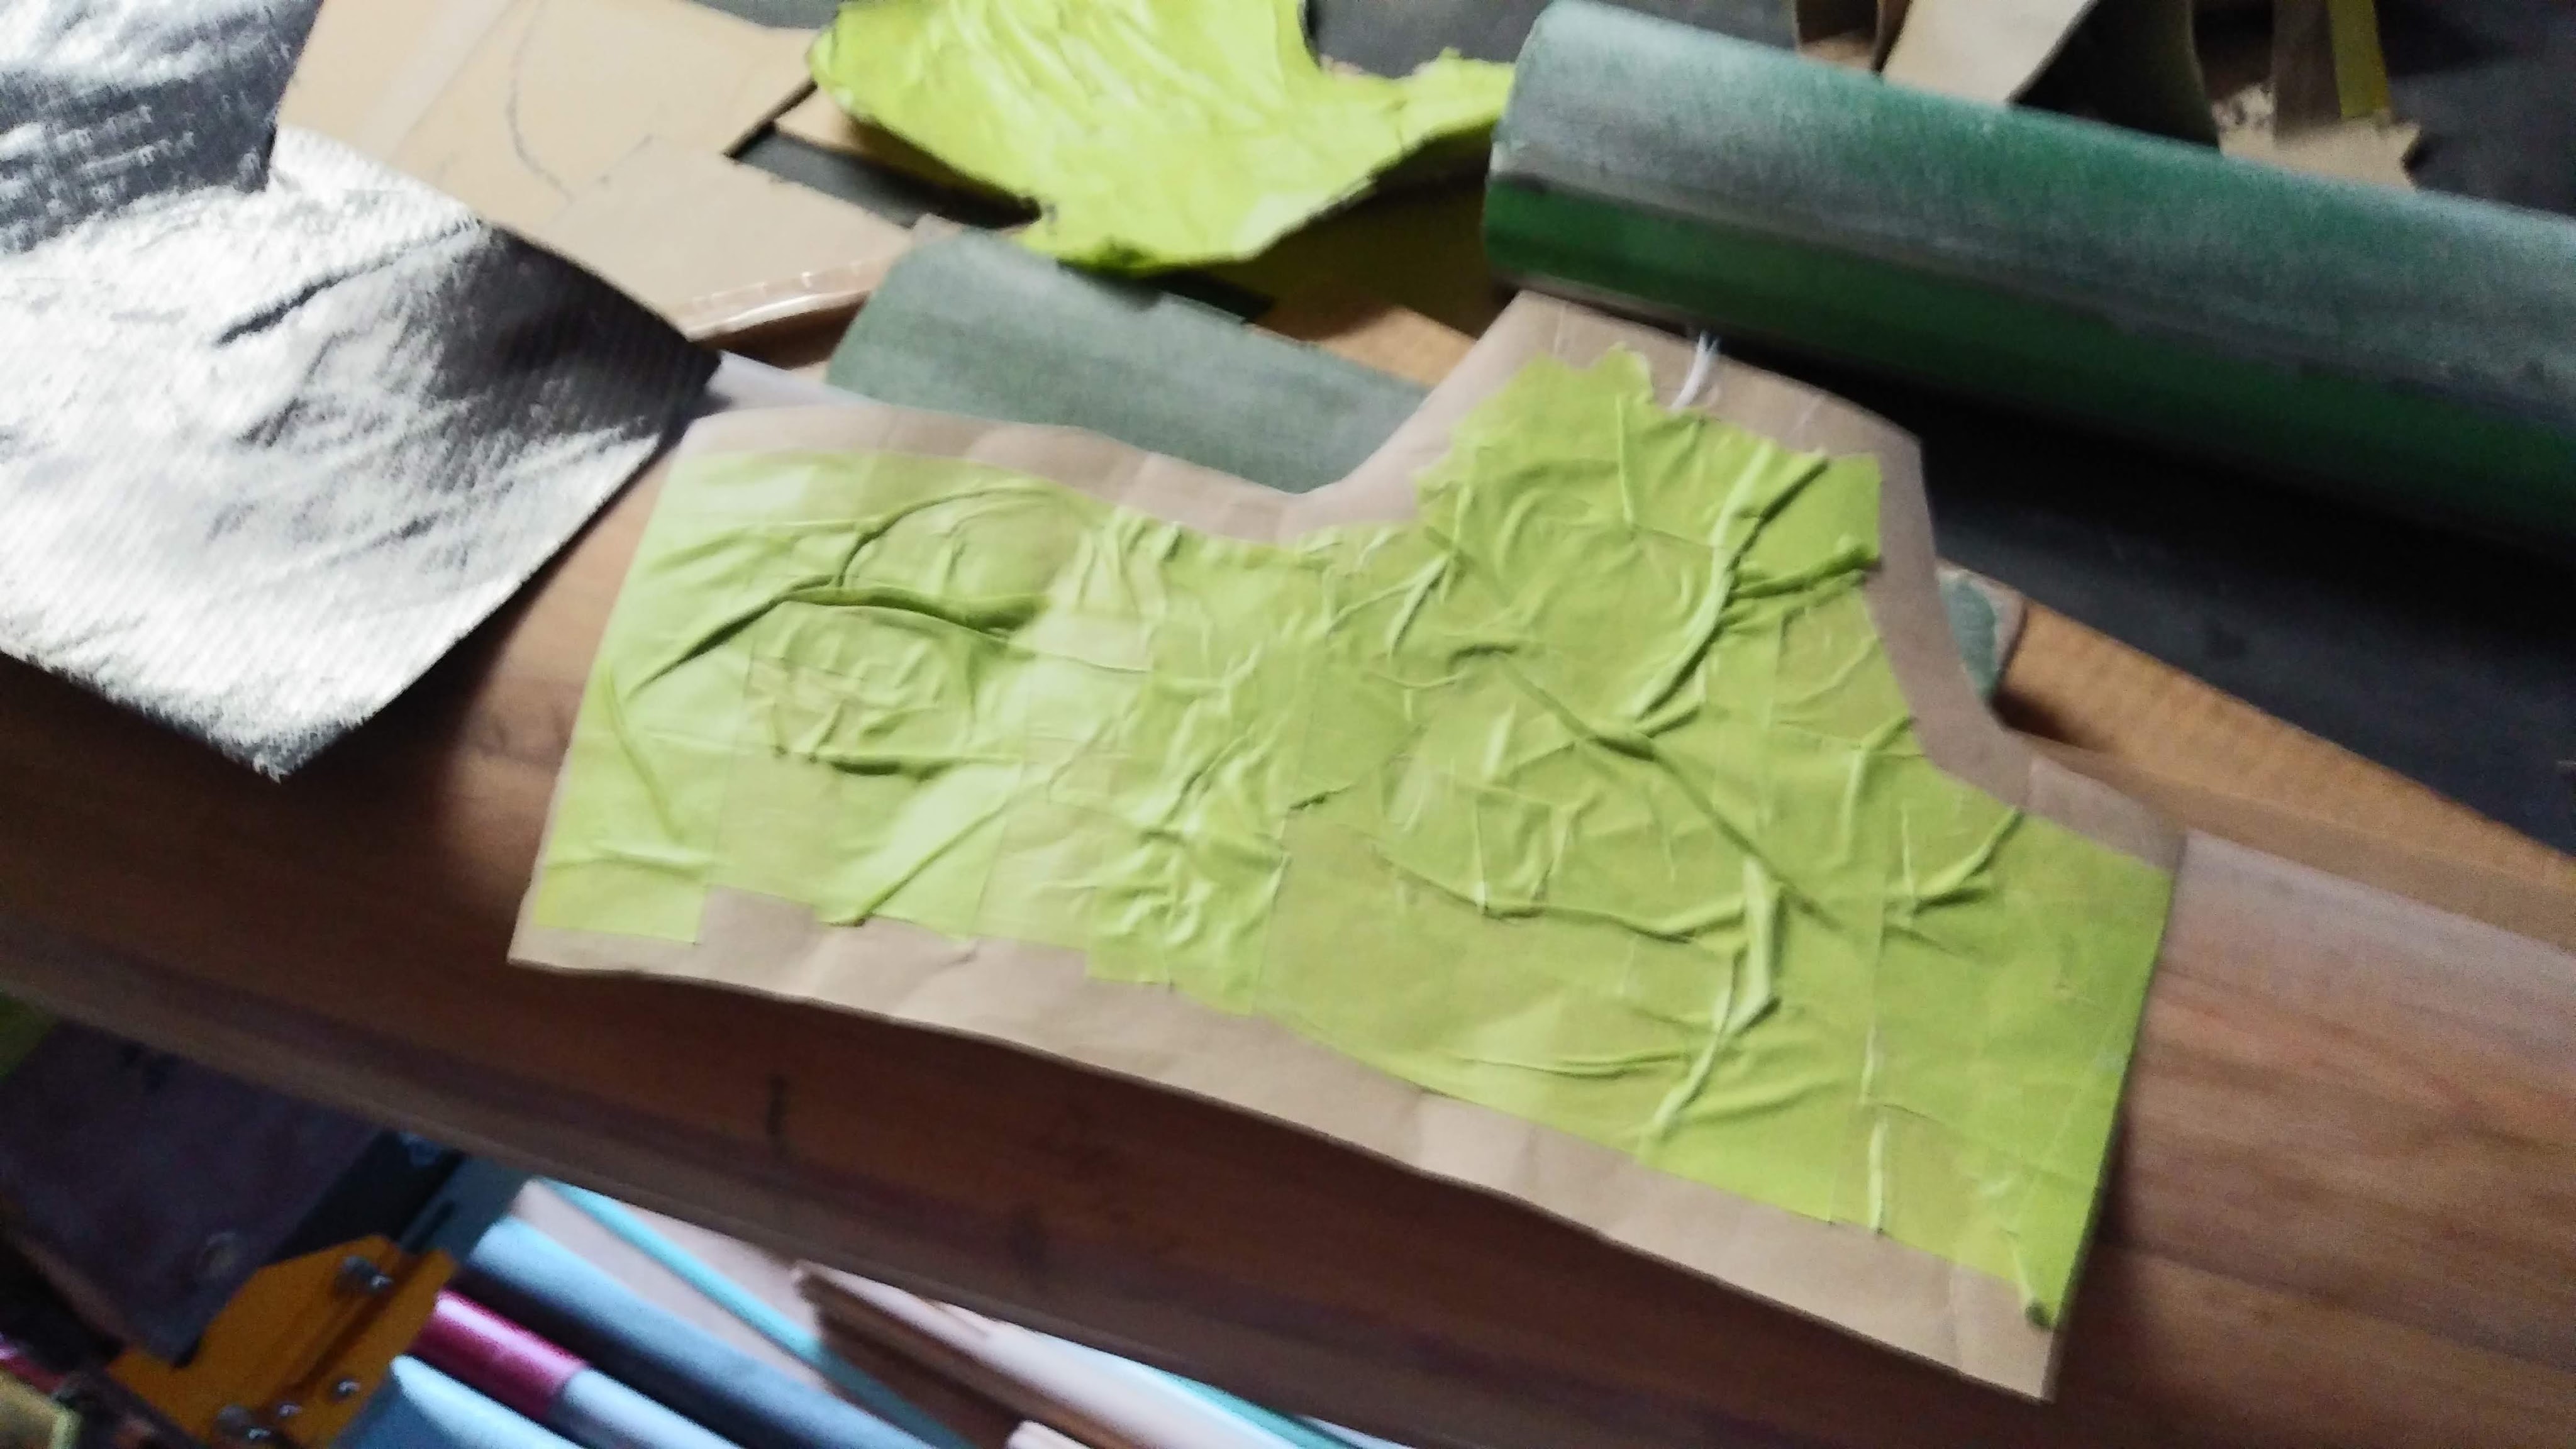
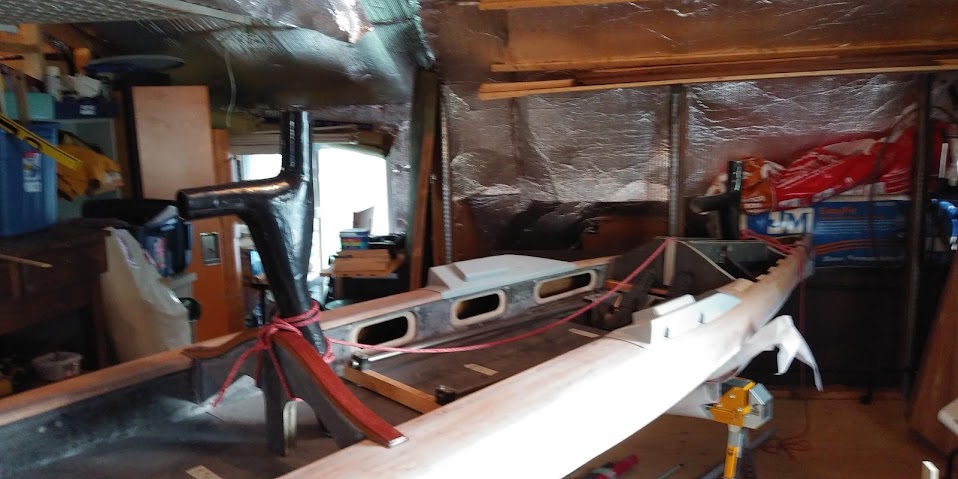
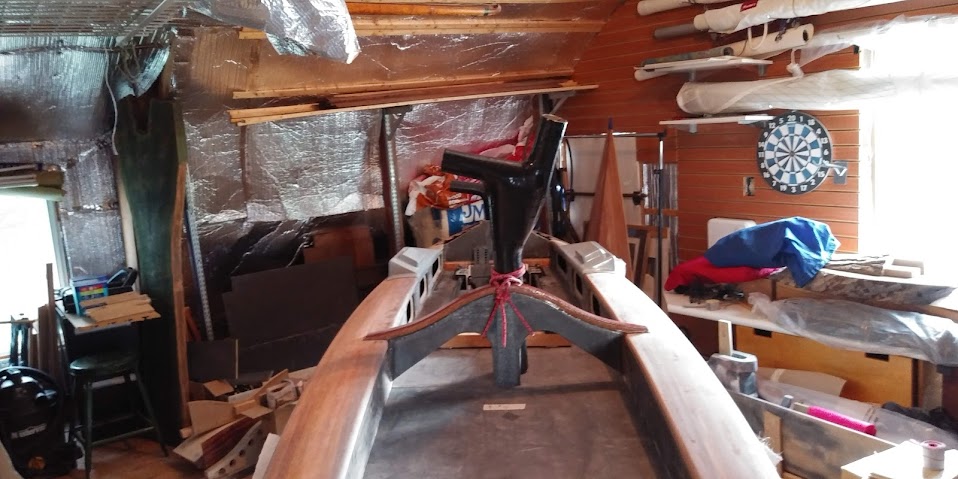
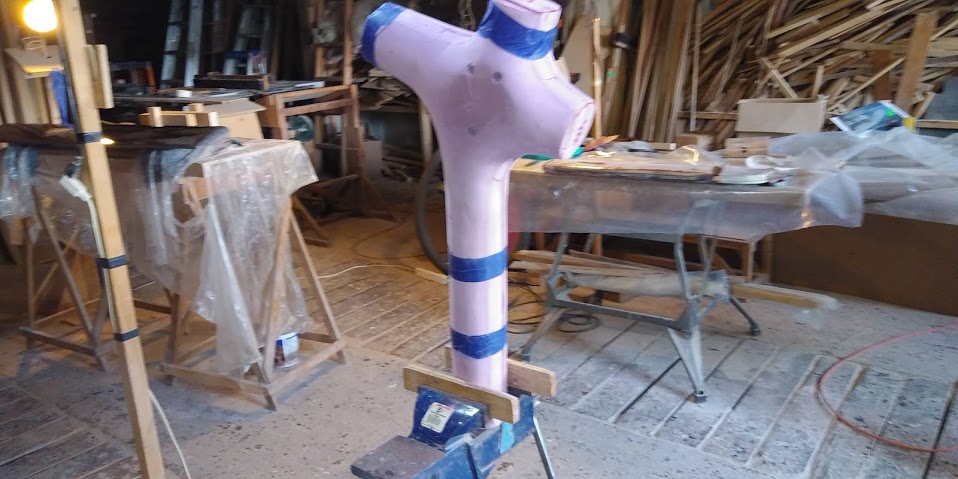
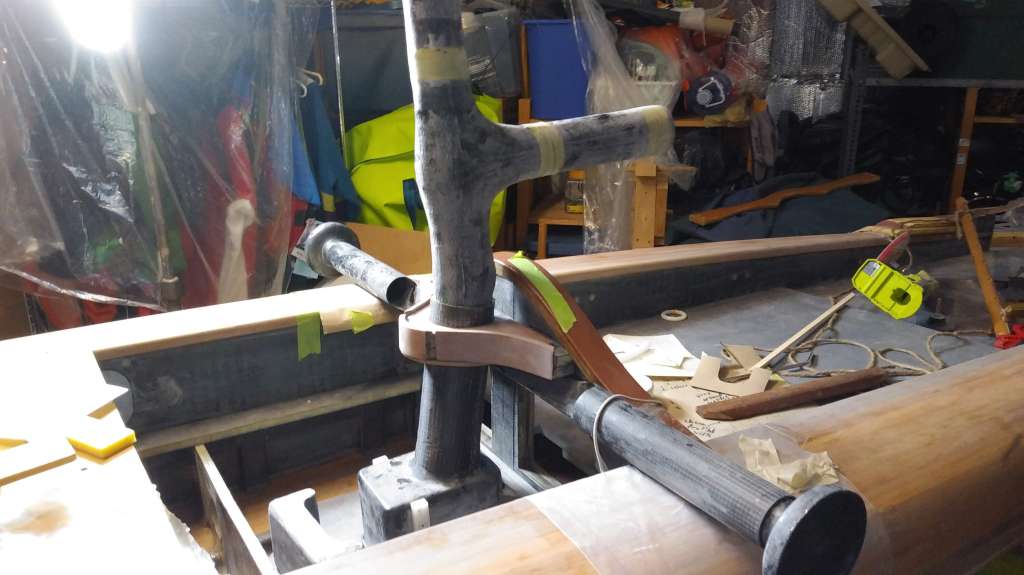
Another part recently fabricated is the top portion of the mast support for the mainmast. I chose to mimic the arched curve in the central bulkhead and to laminate a wood rim onto this part. The part itself is joined into the bulkhead with two mortise and tenon joints – but I had to bear in mind that with carbon/foam panel construction some extra reinforcement is necessary. The top and bottom of the part received an extra layer of carbon fibre to act against compression of the tenons and the tenons themselves got an extra layer of carbon fibre around all sides. This involved rounding them at the corners and then cutting the carbon fibre cloth on the bias to allow it to conform to the corners. Finally, there is a reinforcing plate in the rear of the central bulkhead which will be screwed to the tenons – however, I had to remember to put a wooden dowel in the centre of each tenon during the initial layup, so the screw would have something solid to “bite” into rather than just foam.
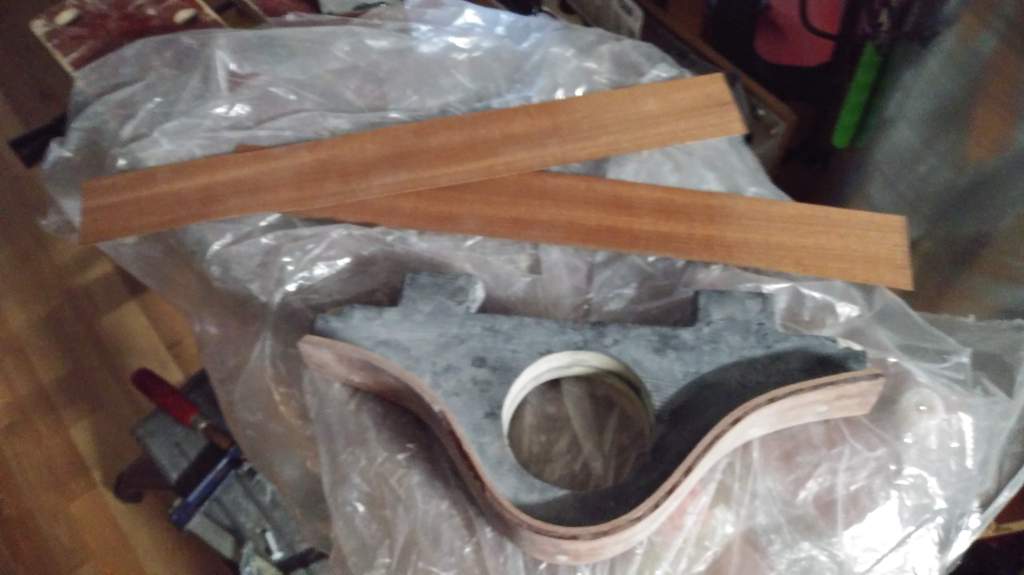
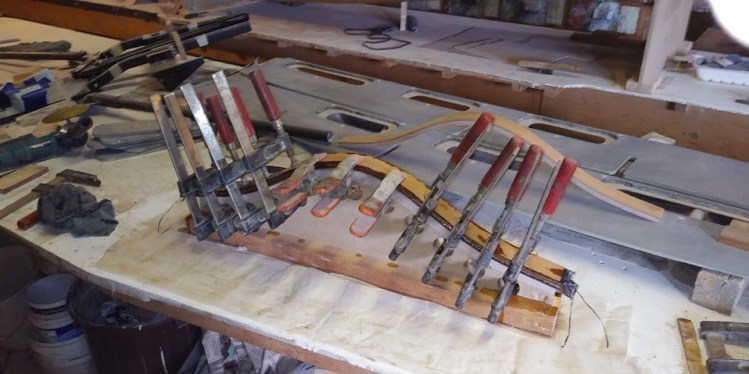
I used some veneer that Skip gave me to make this laminated edging. It is a lovely “ribbon” mahogany that was left over from the days when Skip worked at Hudson Boats (rowing shells) and they switched over to making only composite boats, so the veneer was all surplus. 6 layers, with 2 layers of carbon fibre straddling the middle two veneers, made a very stiff shape which I epoxied to the partner and lined up with some neat plastic “nails”. However, the clamps left some small marks on the surface, so I put two layers of veneer over the top to cover them and the plastic nail-heads.
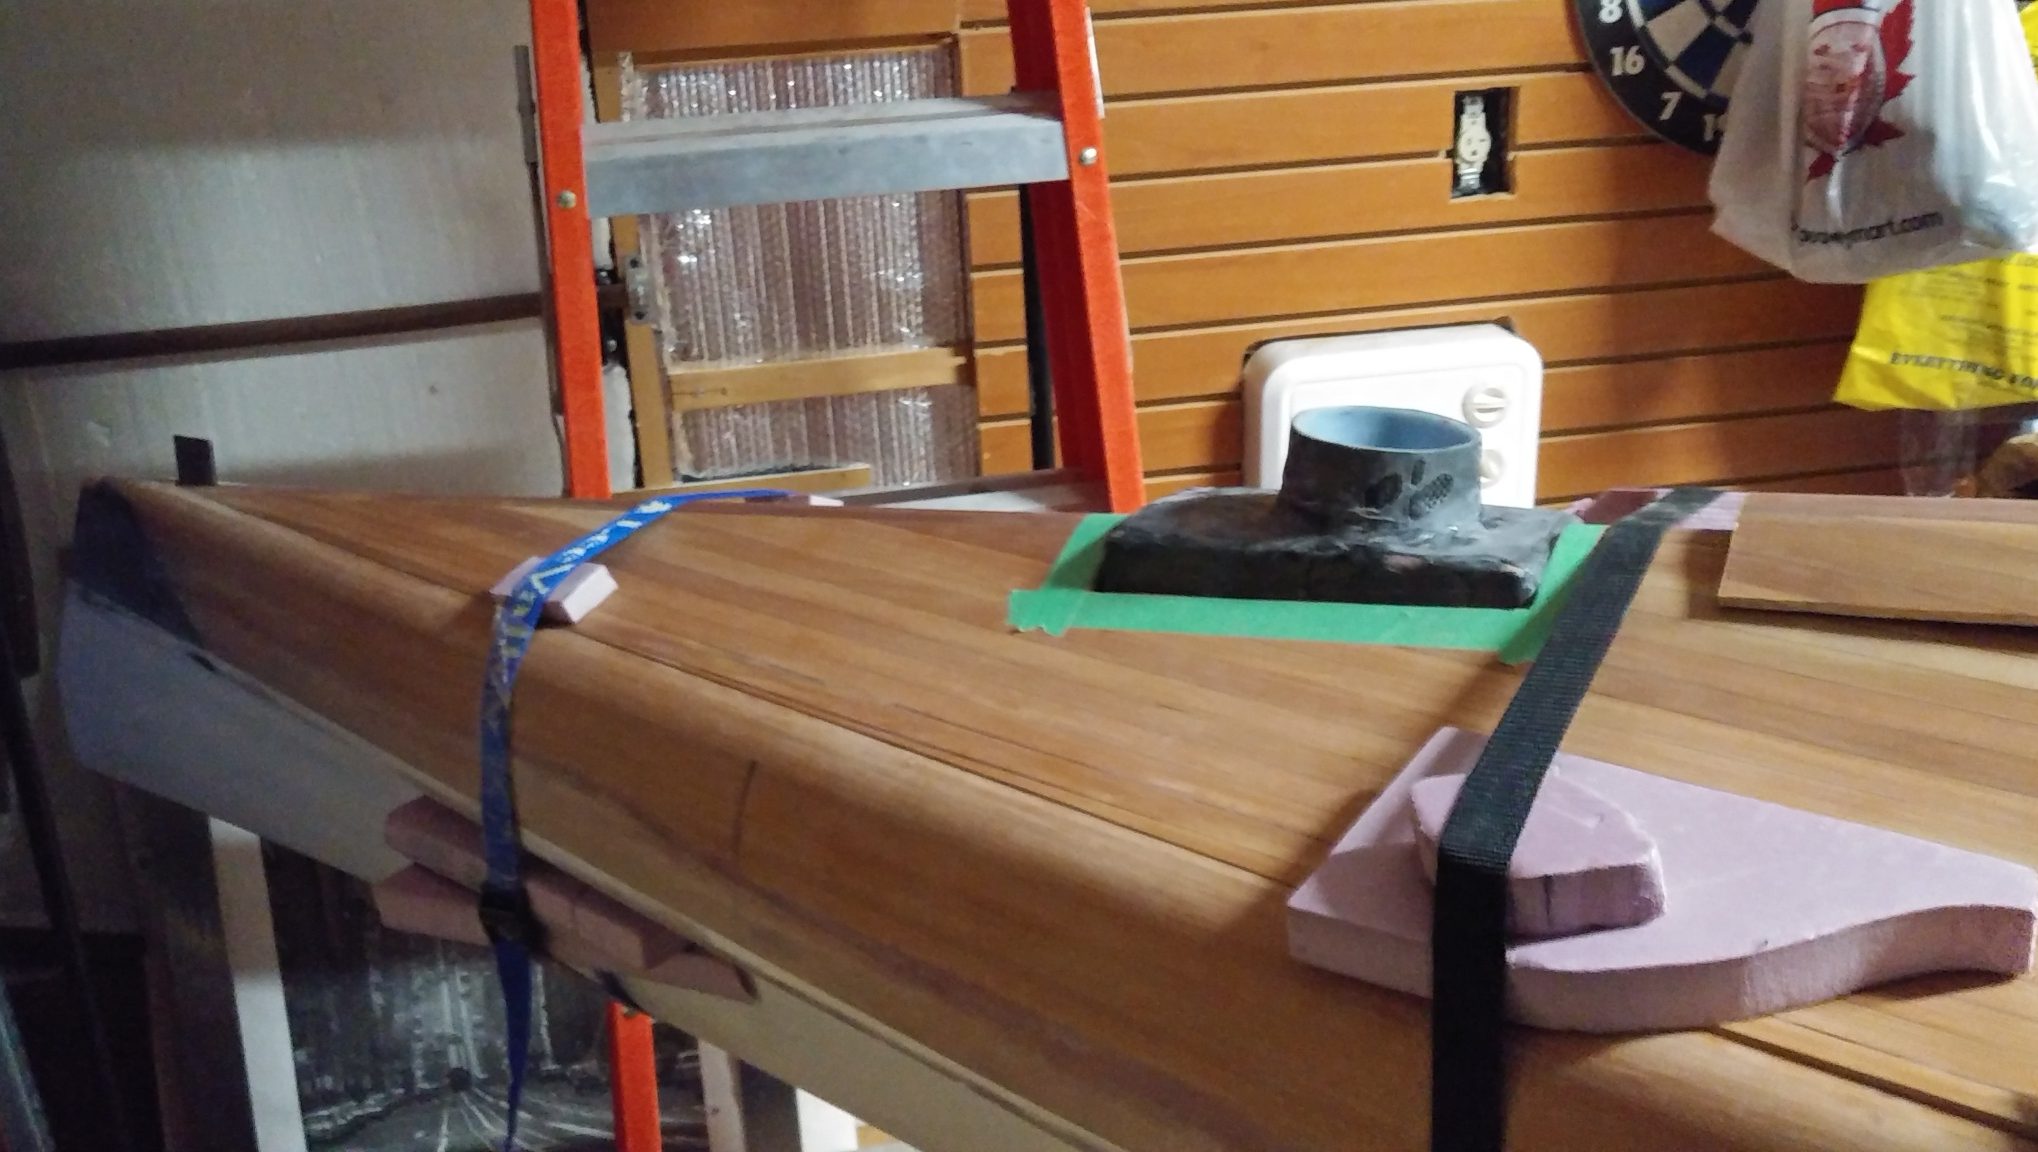
Here’s the part temporarily installed against the central bulkhead:
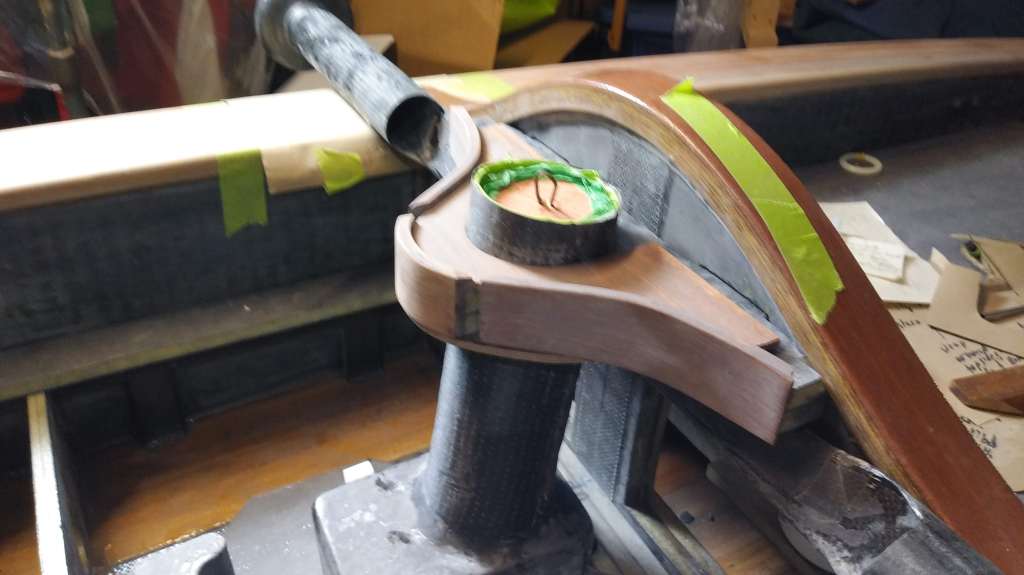
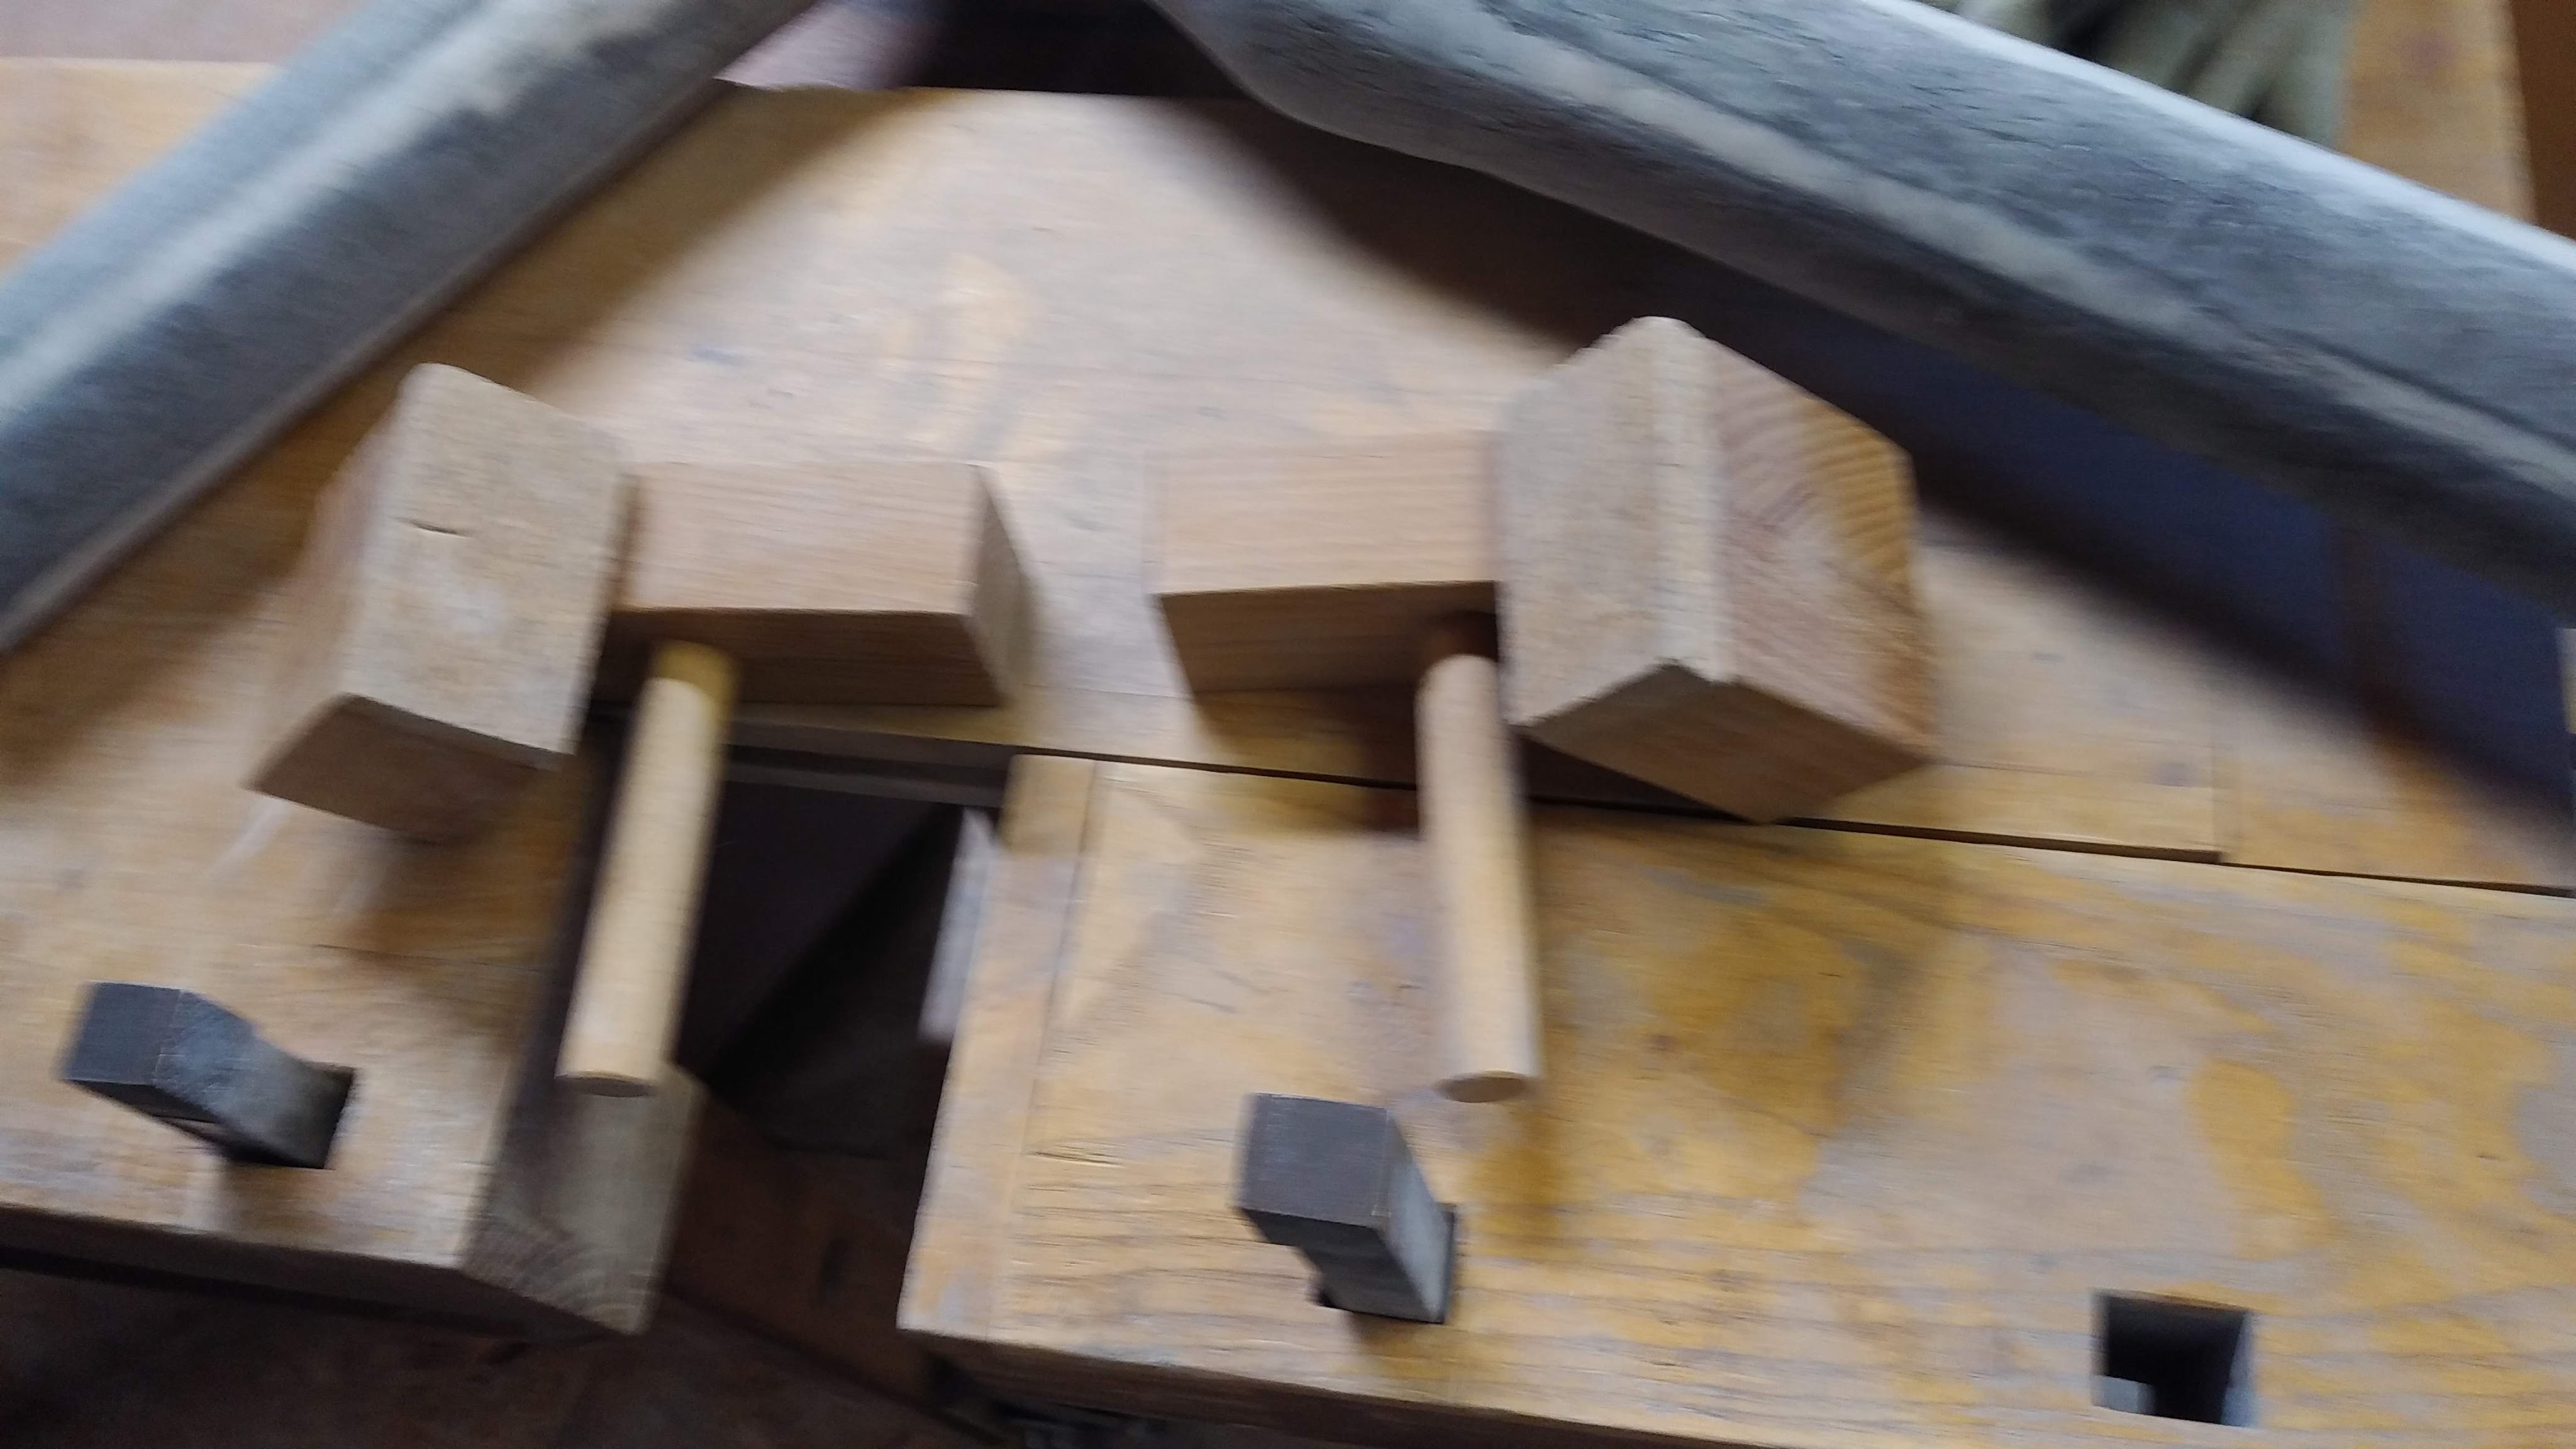
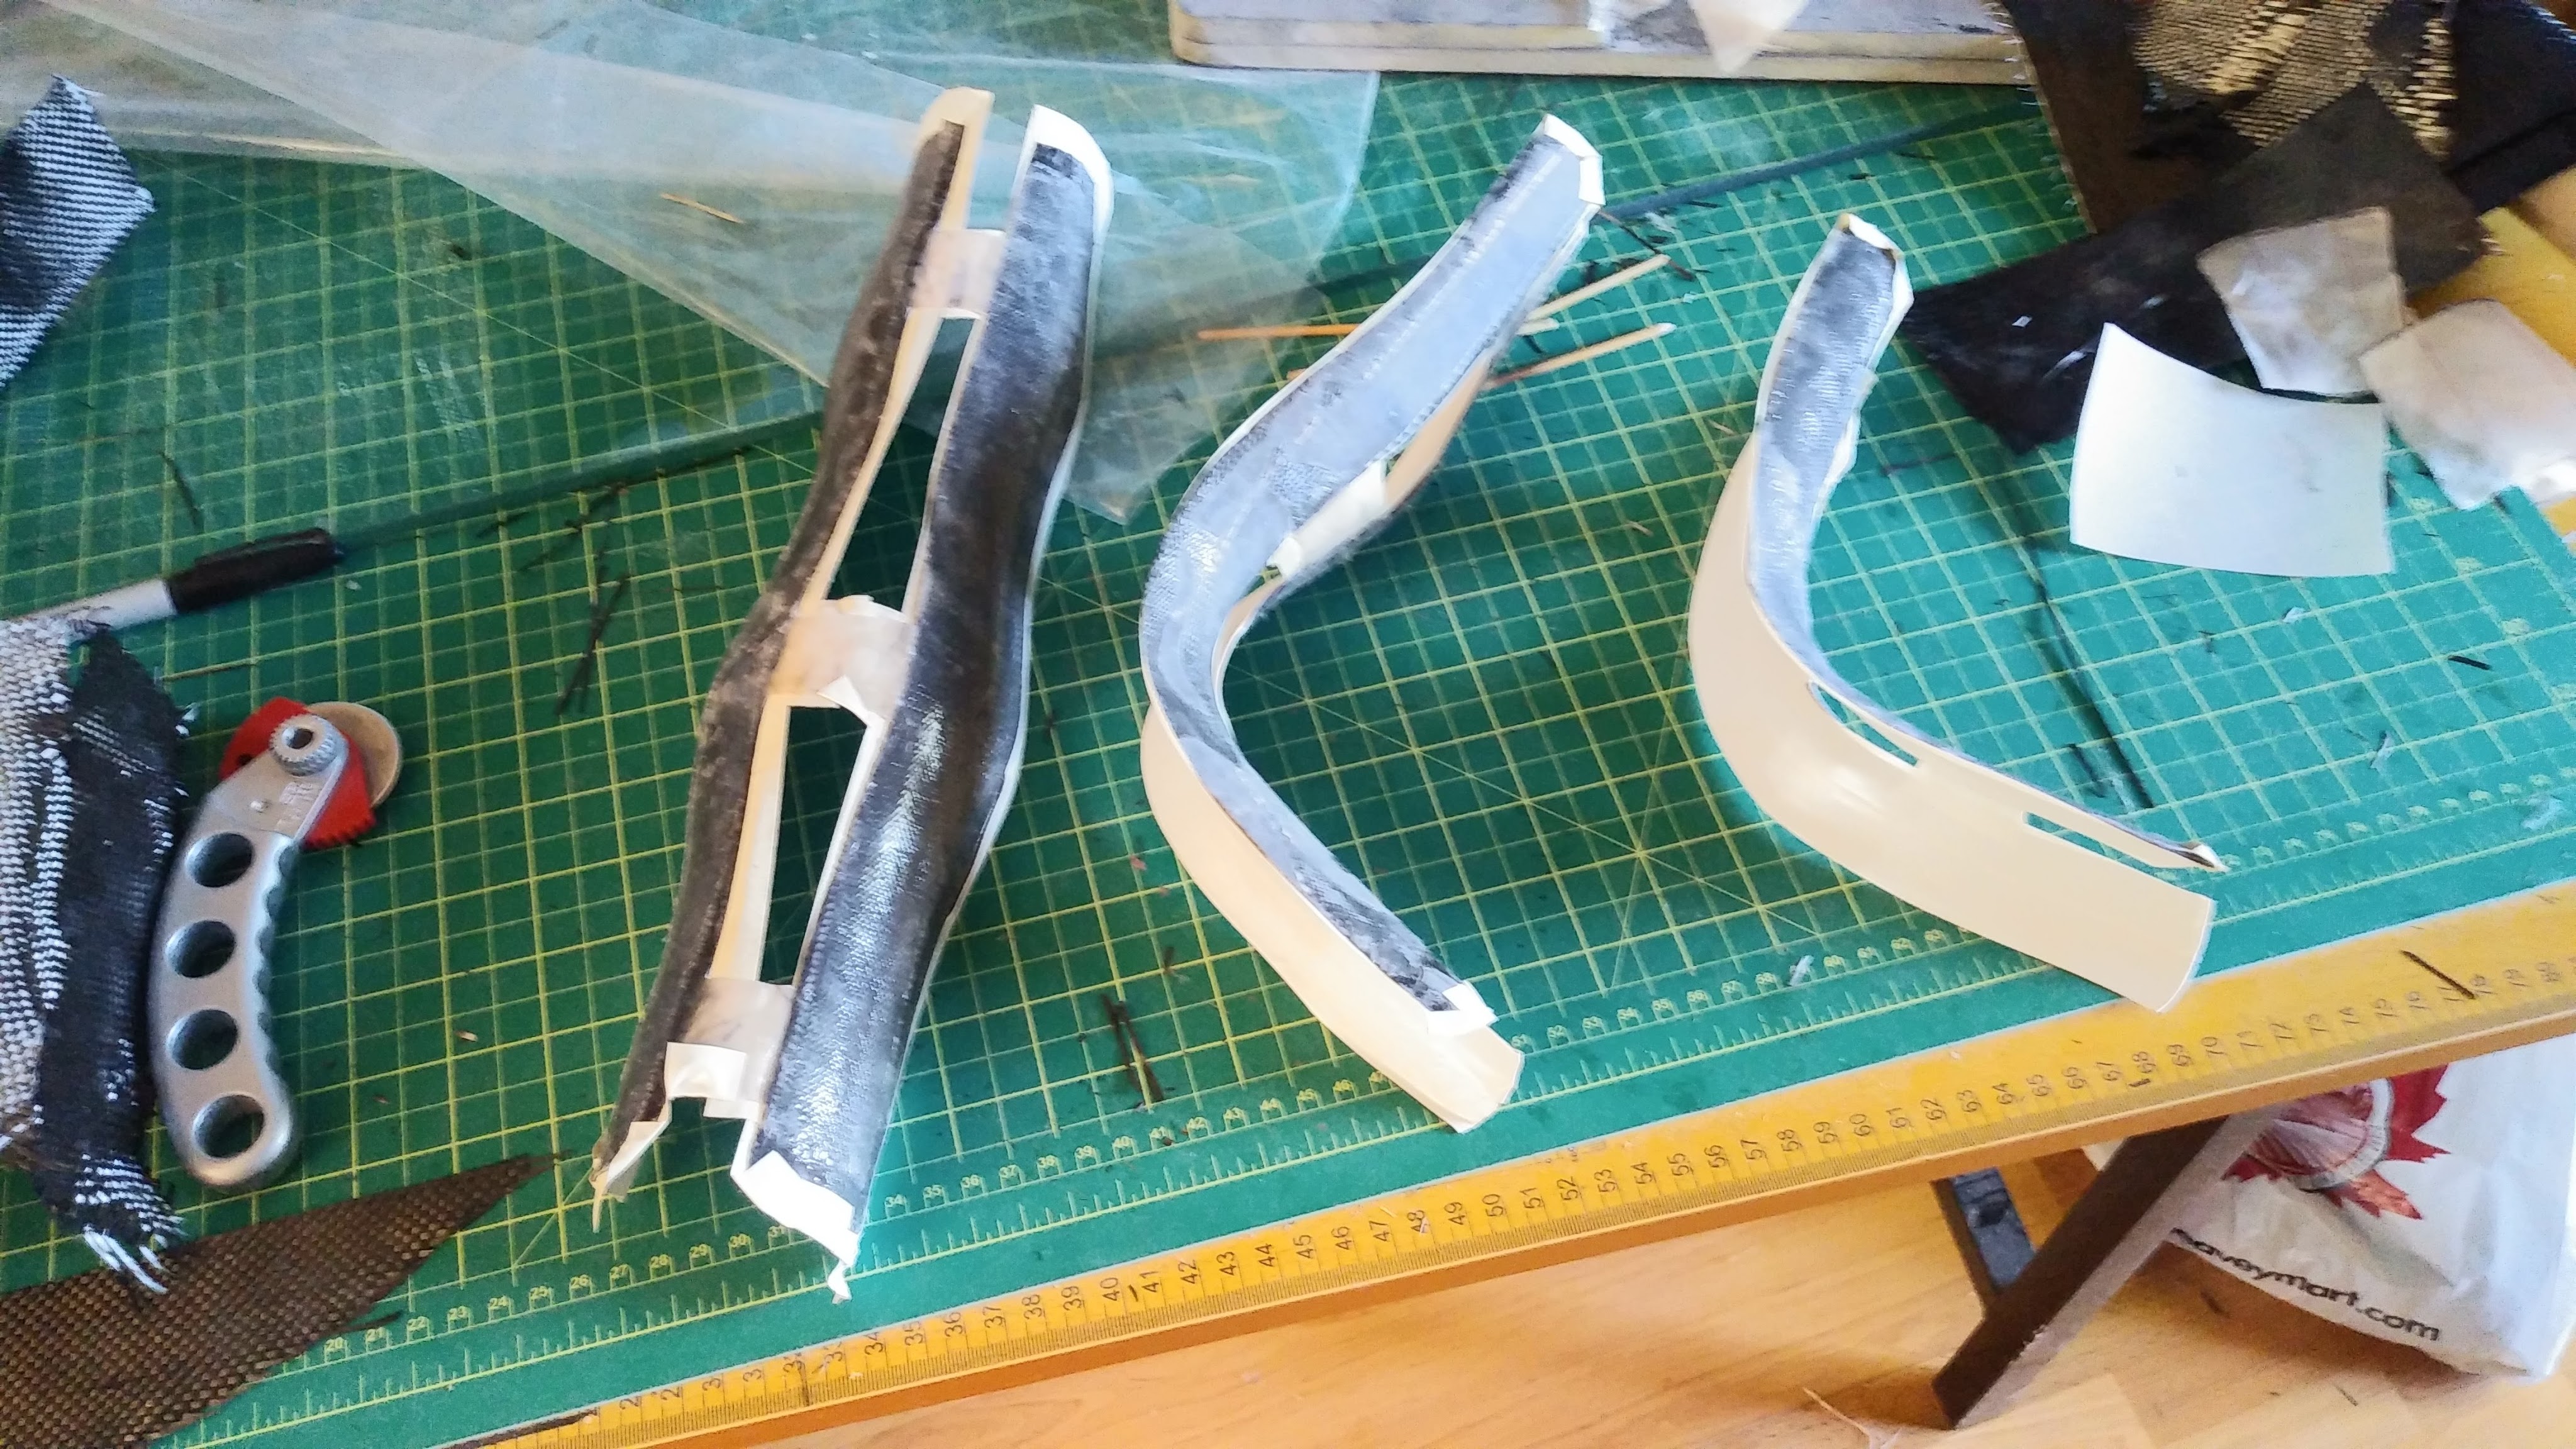
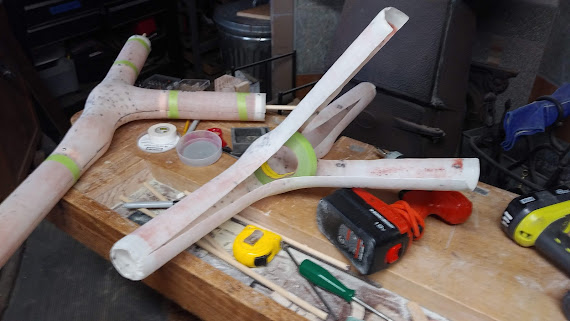
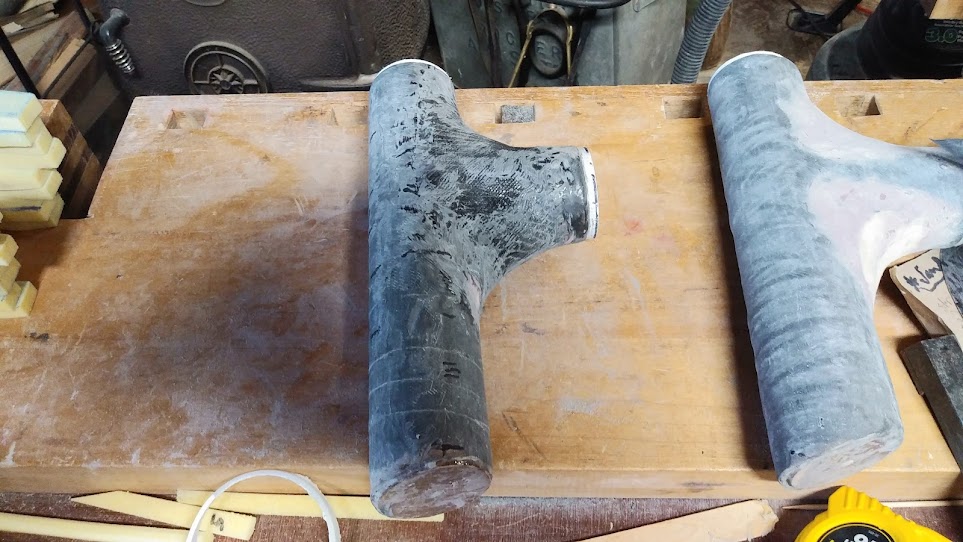
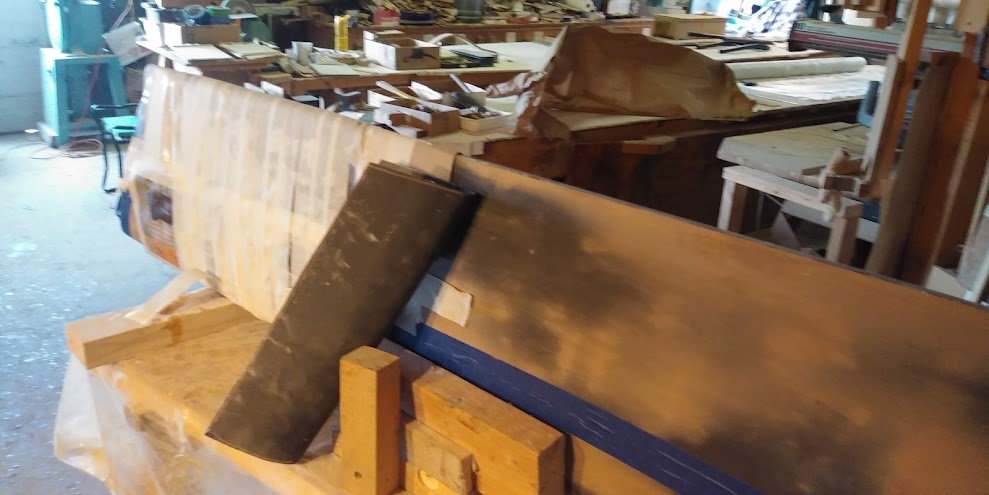
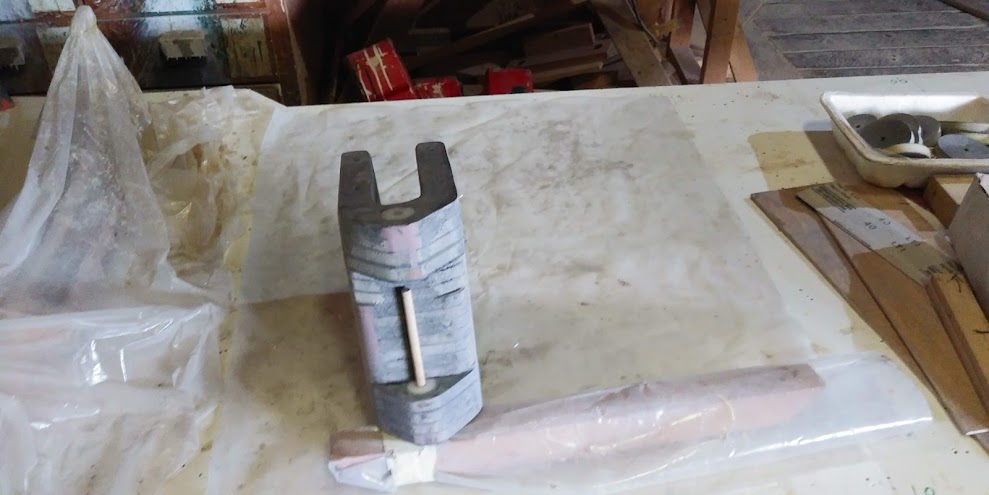
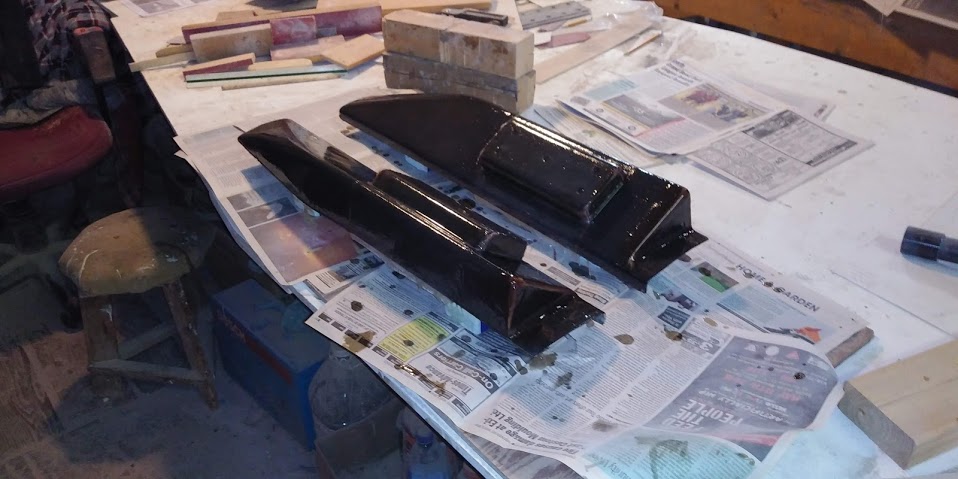
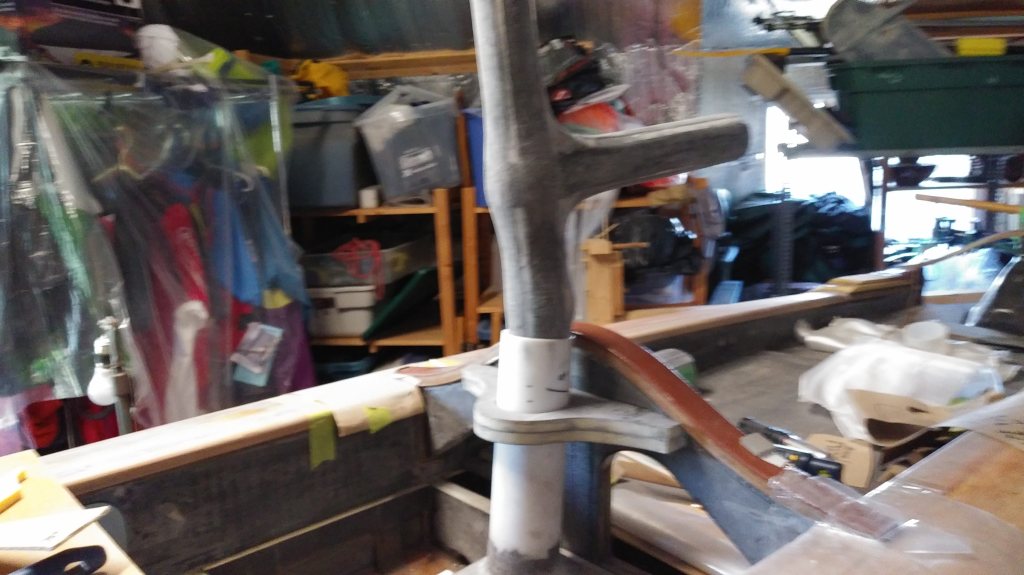
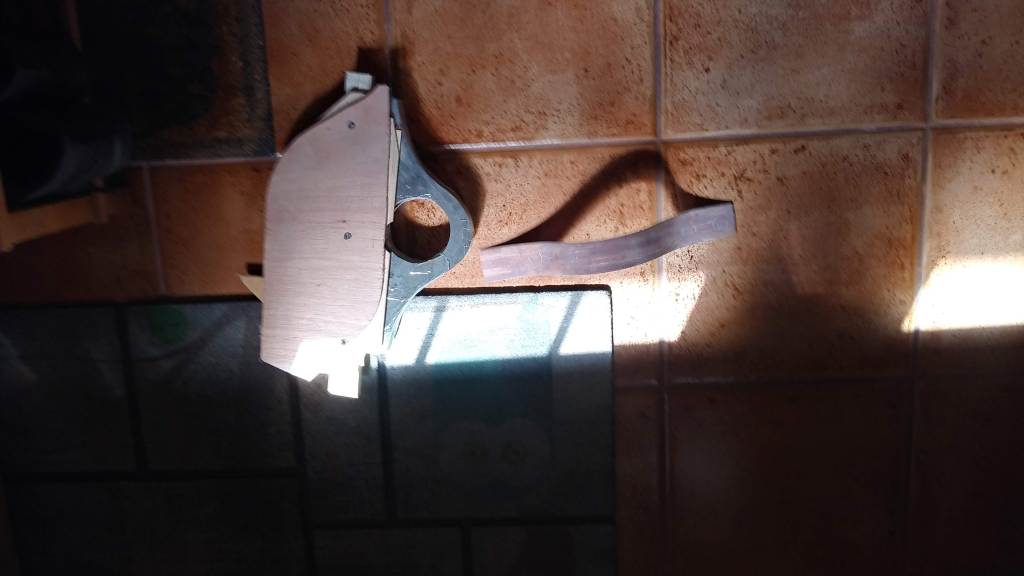
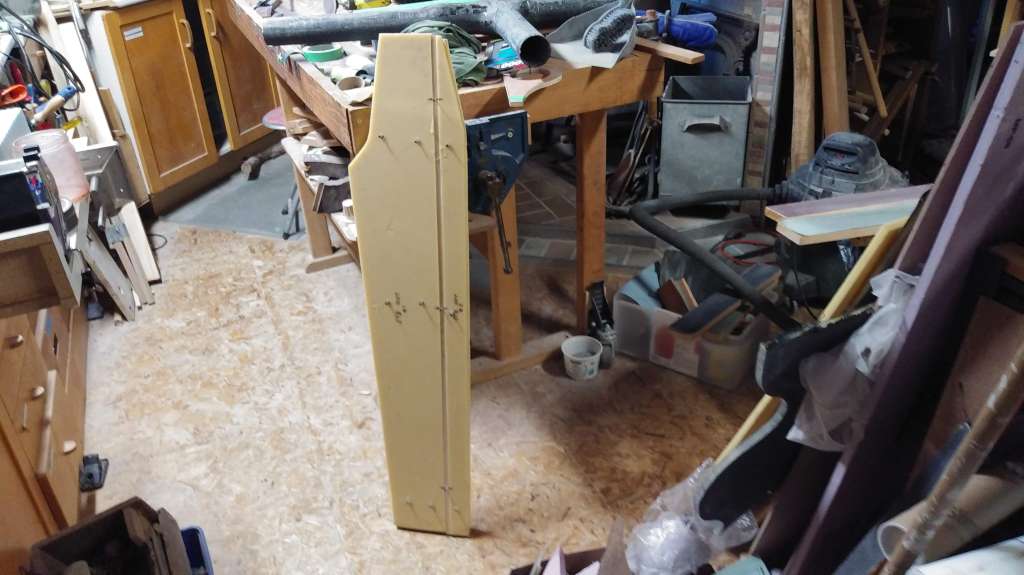
The mainmast, with its Delrin collar will fit in where the temporary wooden plug is filling the tube (green tape and a loop of wire so it doesn’t get stuck!). The carbon fibre tube at right angles to the boat and passing under the mast support is the spar/housing for the leeboards (one on each side) and is hollow to allow a rope purchase system to hold the leeboards in position when sailing (one down and one up), allowing them to swivel to be adjusted while sailing, and letting them be removed and stowed if necessary. Each leeboard incorporates a cone that gets pulled more or less tightly into the end of this spar/housing. This took an inordinate amount of time and effort to plan and fabricate! Here’s the entire assembly in its component pieces and then installed for a trial fitting:
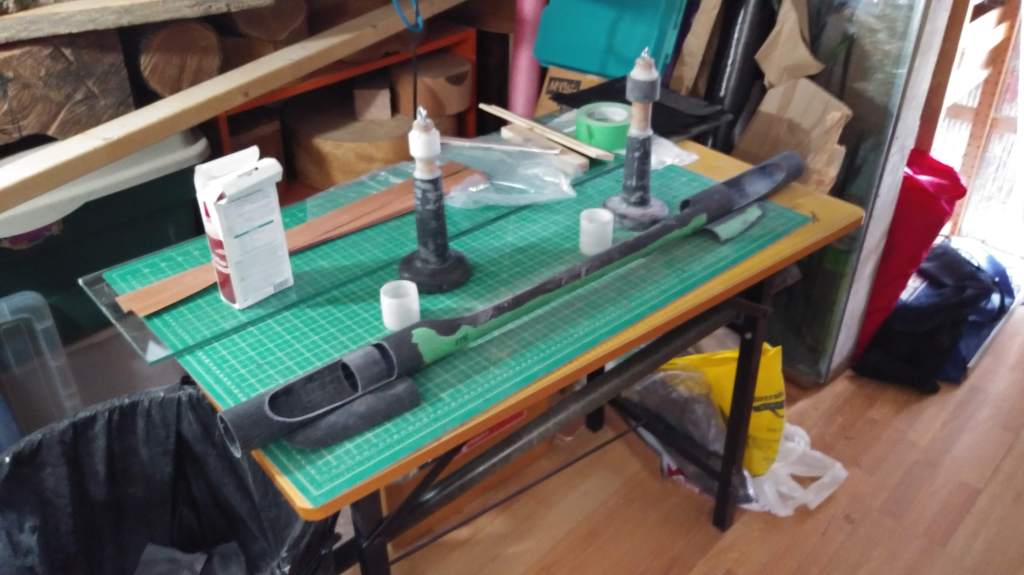
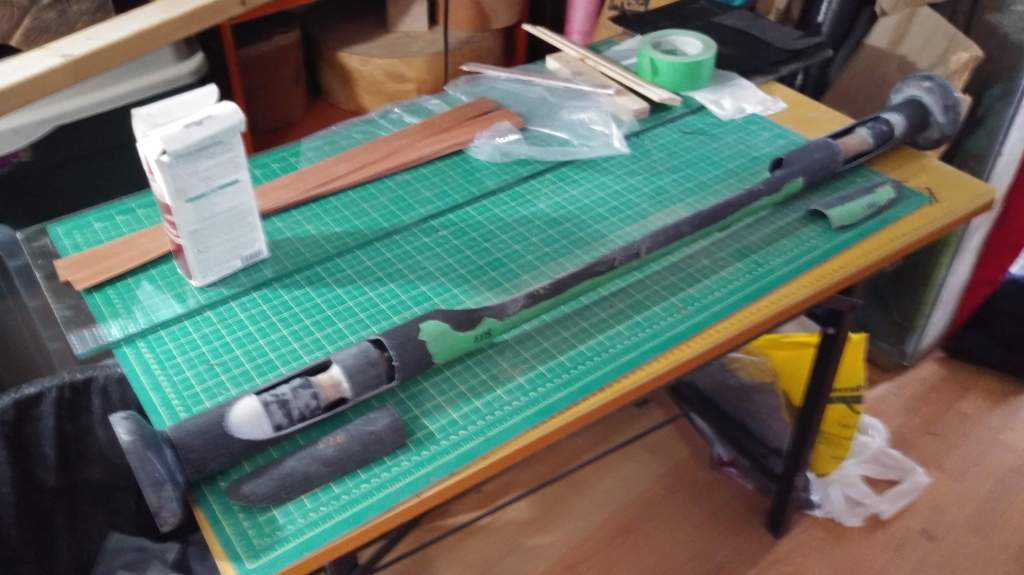
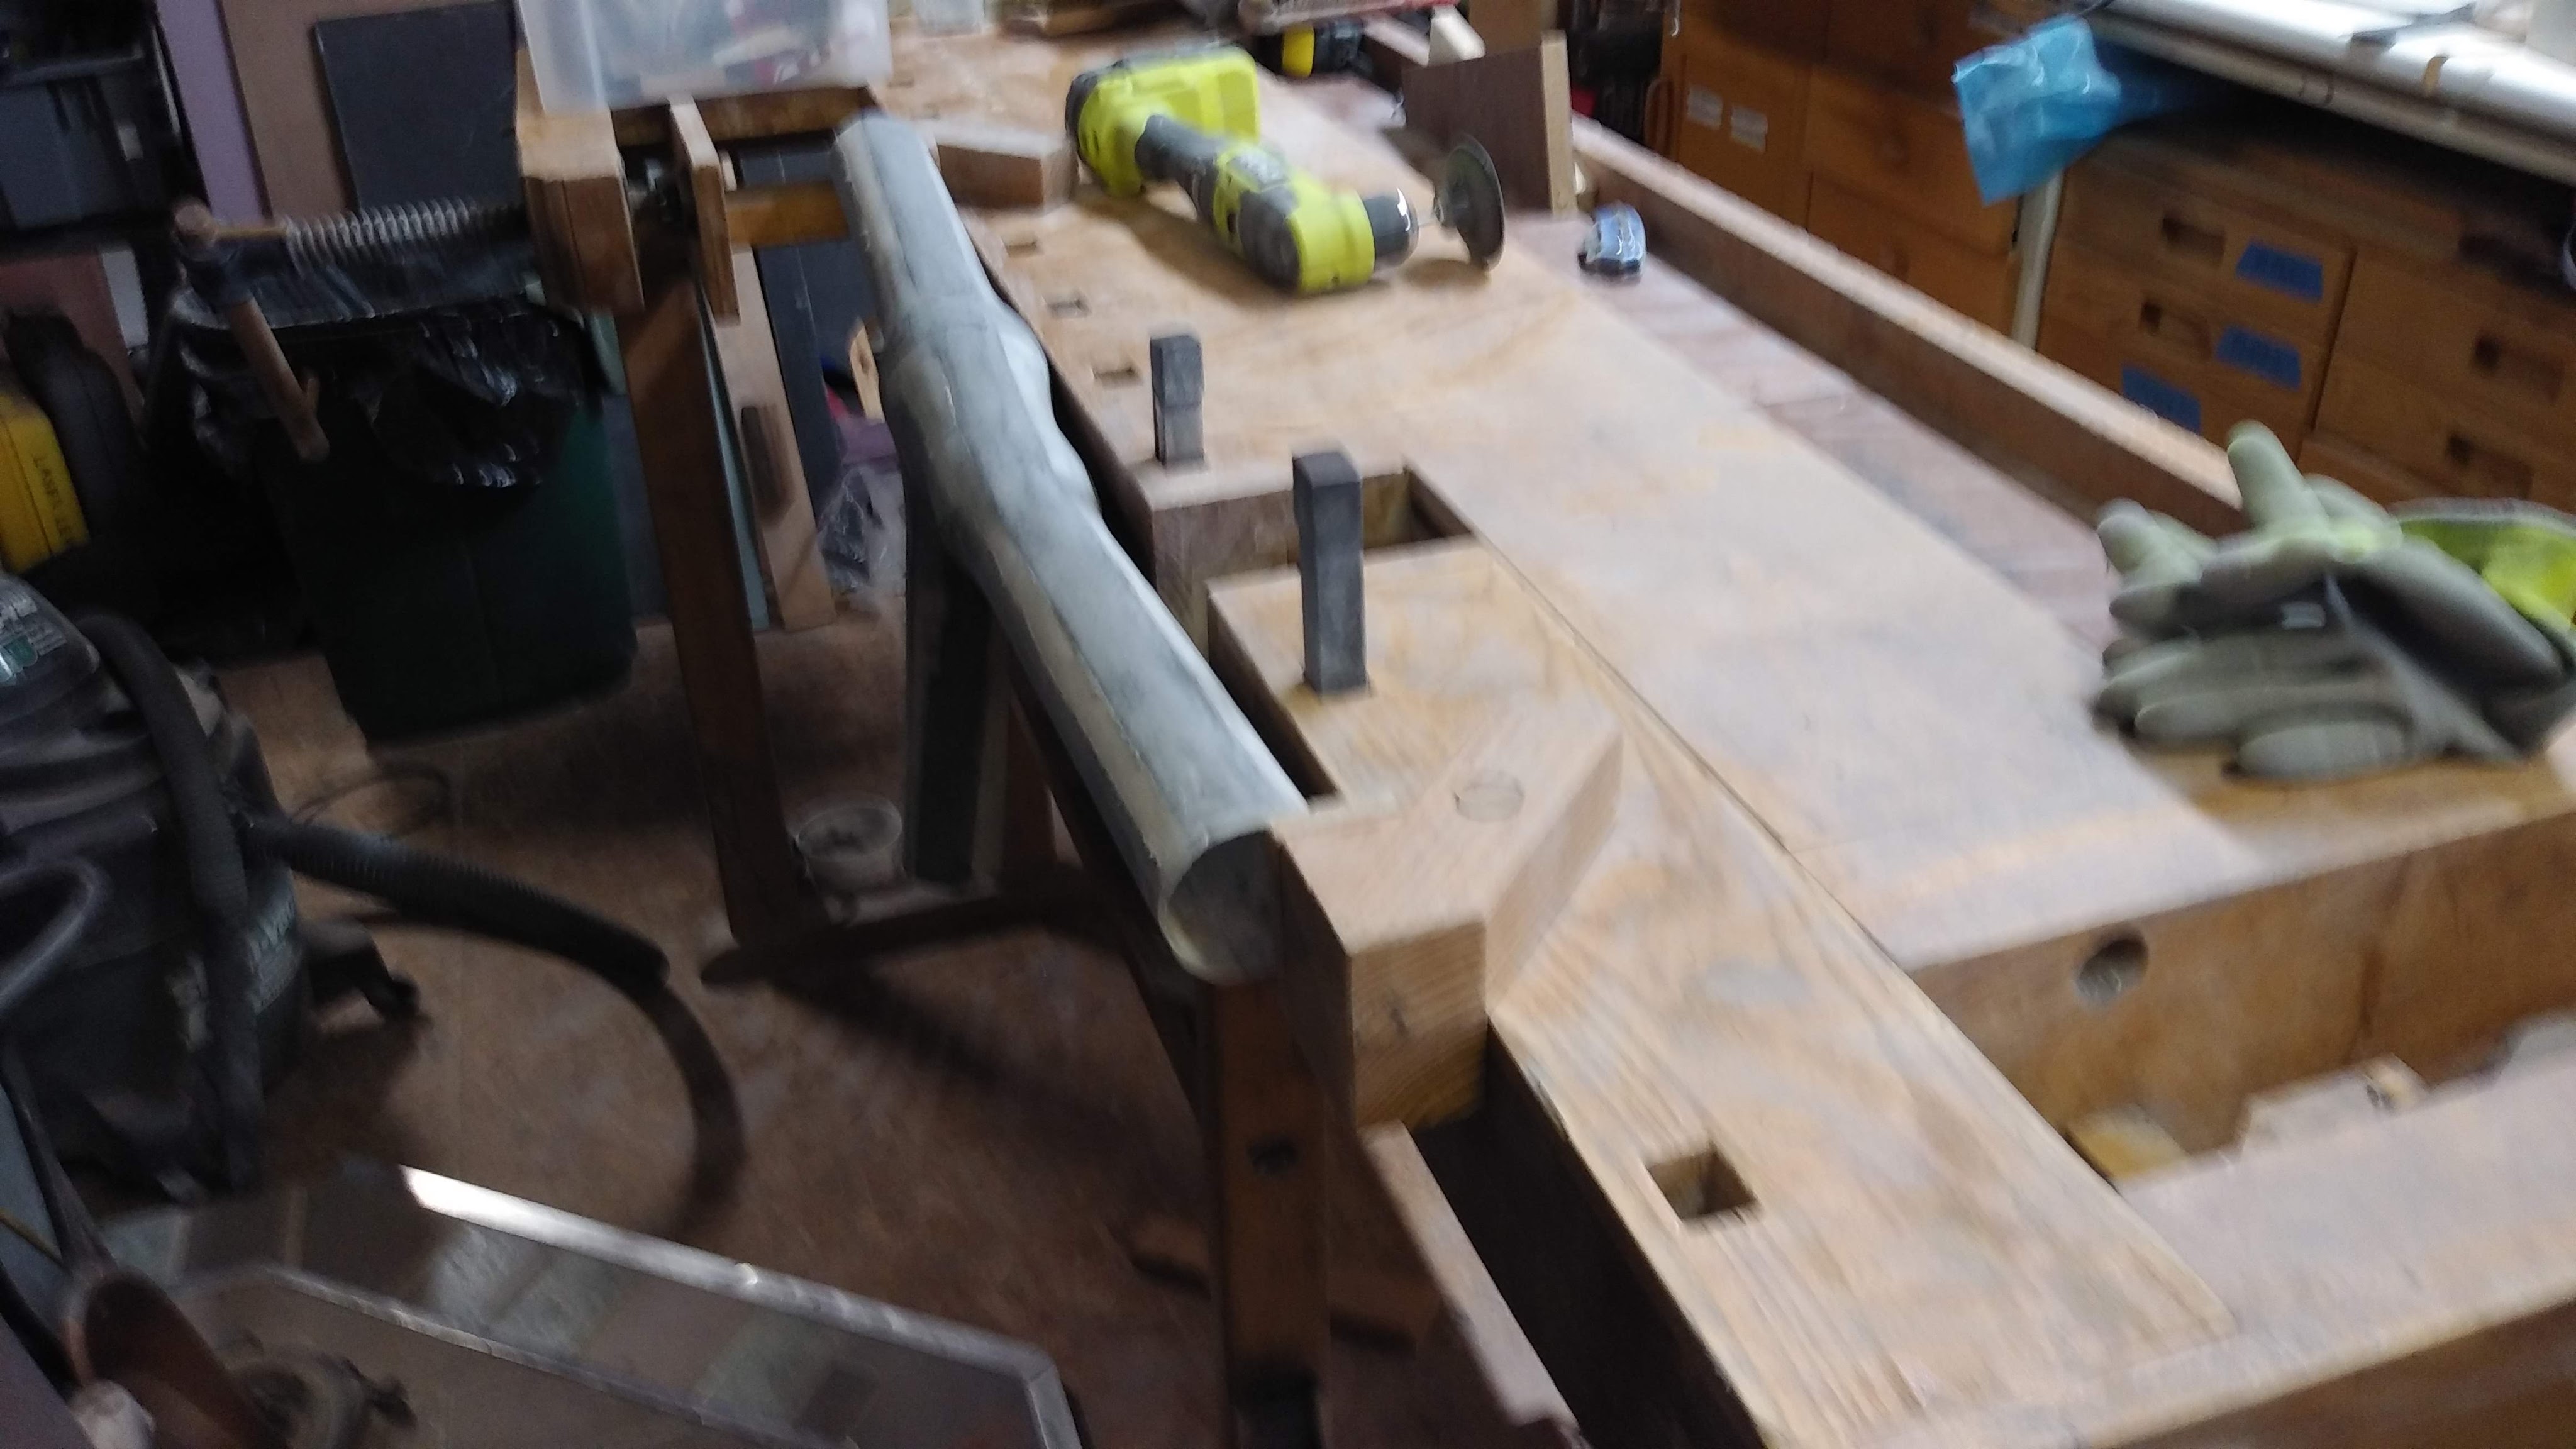
This is what I have been finding all along the way in this project – almost all of the parts have to be custom fabricated and there’s a lot of preliminary thinking and trial and error fitting before many of the parts can be installed. I have found it’s a lot safer to test fit several parts to see that they all fit together with one another before I make a final start on the epoxying. At the early stages of the building Skip and I went through all of the possible places where things were going to have to be attached and made sure there were good solid wood blocks epoxied in place under the deck or side-walls. Strip-plank building is light and strong, but it needs special measures everywhere you want to attach a fitting! I am hoping that when the floorboards are finally fastened down (they form waterproof floatation chambers under the floor) all the many requisite bits and pieces are firmly fixed in place… keep your fingers crossed!
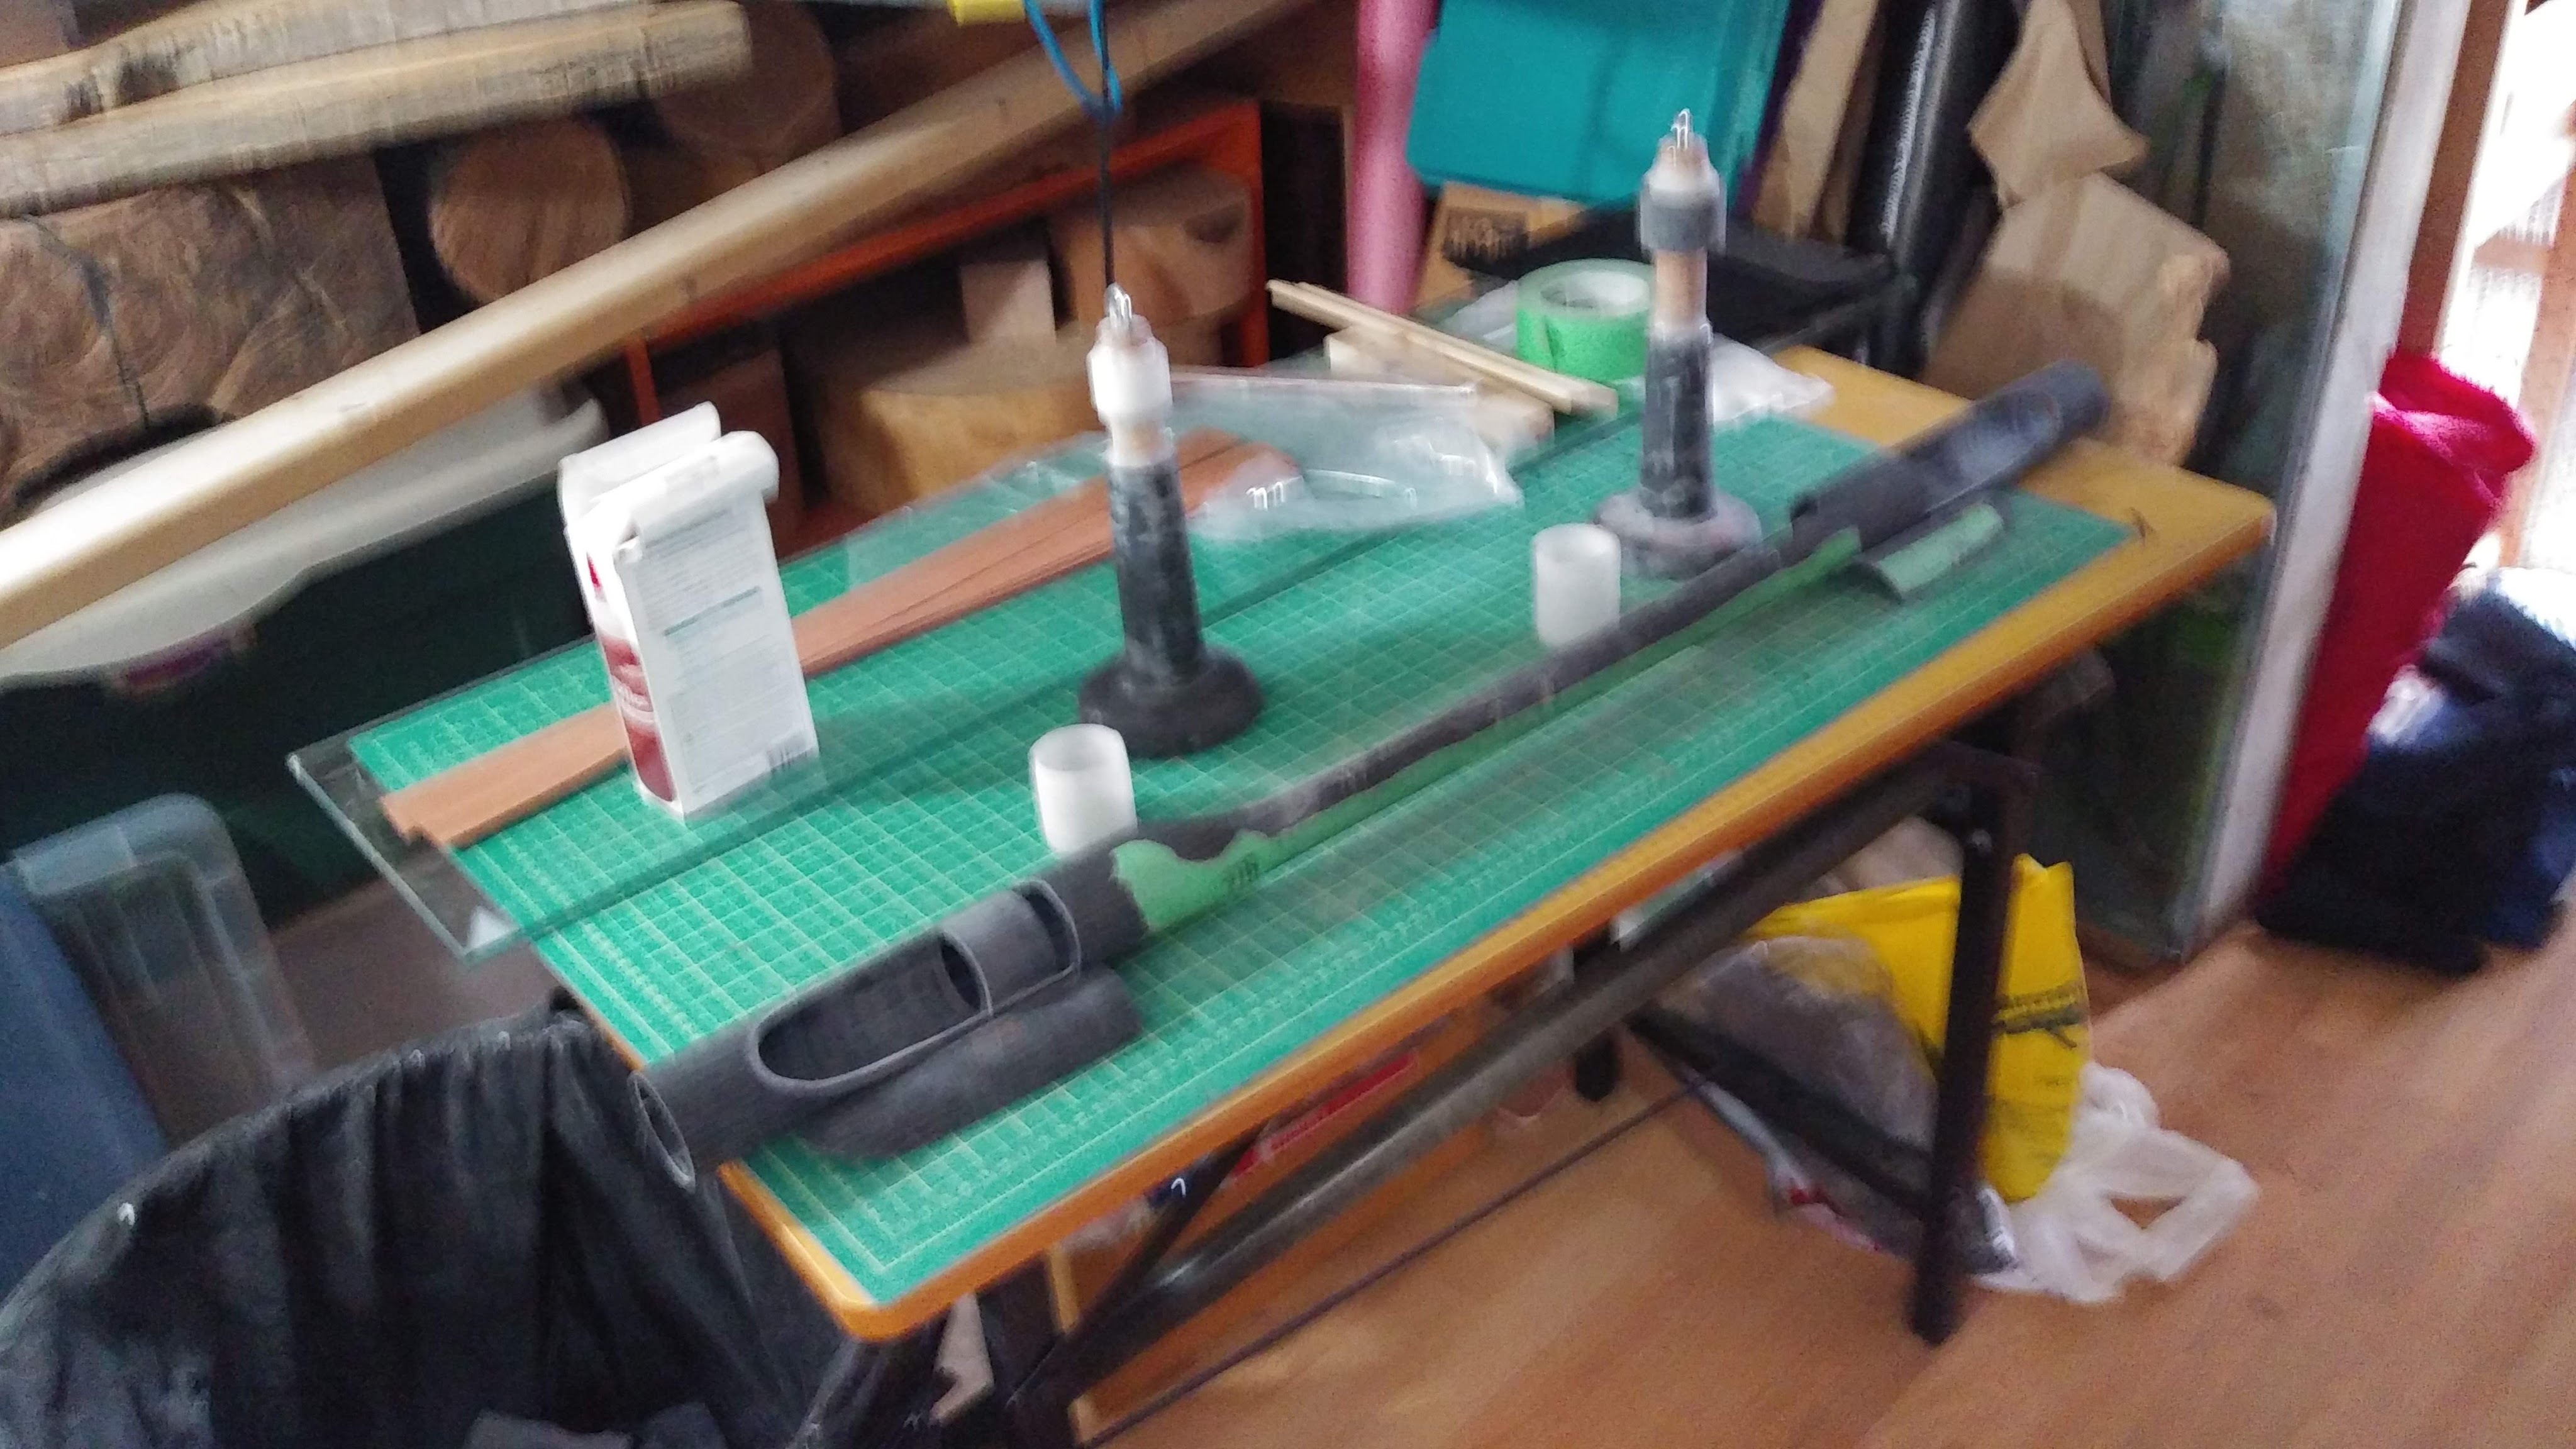
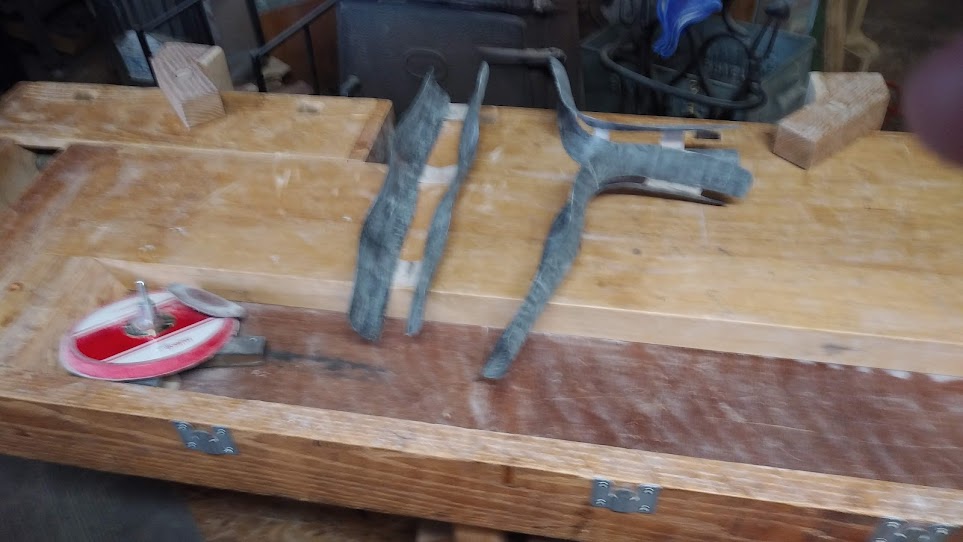
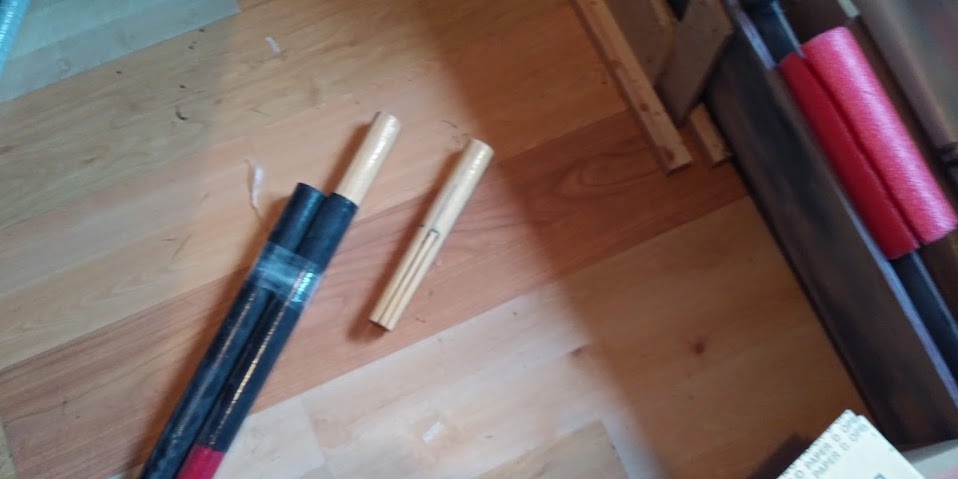
With a view to ensuring that nothing that is being done now will cause problems later on down the line I have started planning how I am going to rig the sails and the control lines and sheets. I started rigging the booms by inserting them into the rotating partners and then taping parts in approximate positions and running light strings through the blocks to simulate the sheets and control lines etc. An early casualty in this process was the tiller (or how I thought I was going to control the rudder. It would have ended up simply too long… so next I thought of separate steering sticks, a common way to steer sailing canoes. The picture below shows a typical arrangement.
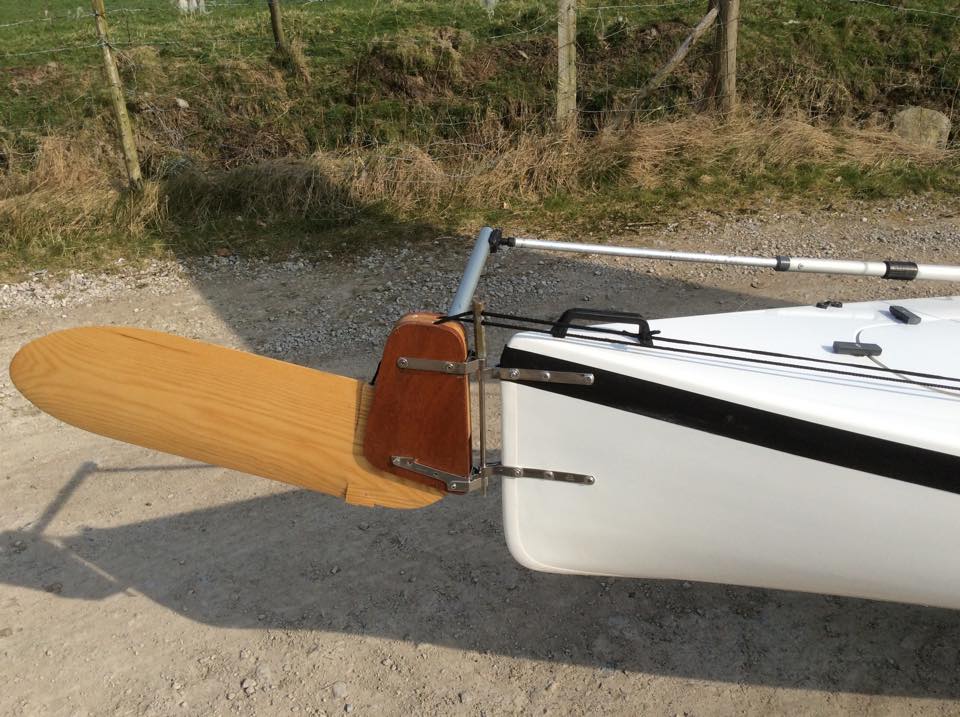
These work in the push- pull manner but depending on which tack you are on a push can make the boat head up towards the wind or head down away from the wind. One has to get used to the new arrangement. Some boats even have a steering stick for either side – which I seriously considered – having them crossed over in the middle with a loose yoke. This way a push on either side would be heading up, as in a regular tiller system. This picture is from a very nice sailing canoe (Shearwater) made in the UK (unfortunately) but I doubt whether the rowing system and sliding seat could have been grafted onto it.
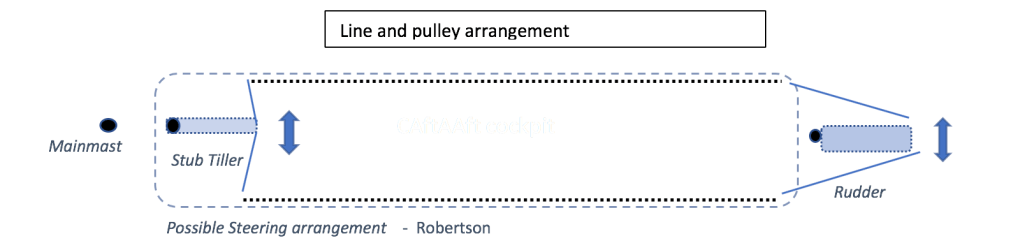
However, the mainsail and mainsheet (line controlling the mainsail) is back here, as well as a big dry-bag with most of my stuff and I could just see the sheet getting hopelessly caught up in either of the steering sticks…the jury’s still out but I am now leaning towards a linkage system with a thin line attached to either side of the rudder head and going forward along either side of the rear part of the cockpit to a shortened tiller behind the mainmast and pivoting at its forward end which effectively makes the steering back to normal: (if sitting to windward), a push heads you up into the wind and a pull lets you bear away from the wind. After all, I am hoping to sail the Greta T like a dinghy rather than a sailing canoe. Here’s a schematic diagram of my tentative arrangement for steering. The line would run in a small light-weight tube along the cockpit/deck side. The stub tiller would pivot from the backside of the central bulkhead and have doubled hiking sticks on its forward end.
So, the tinkering continues amid the big jobs of fitting the mast partners and the fore deck and making the support and attachment structure for the leeboards and the under the floor reinforcements for the rowing apparatus and sliding seat.
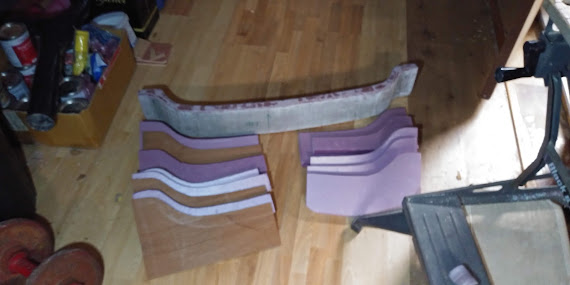
Next up – laminating the leeboards using a vacuum bag! The Old Man goes high tech!
Thanks for your interest and to all those who have sponsored and are awaiting the start of this much delayed journey… have patience, please.
(Written last year but unfortunately never published)
Well… that’s what I was going to say last year… and while it’s no less valid now, I look on it at present with quite a bit of chagrin in light of all the has happened since then. While I can console myself with all that I have accomplished in building the Greta T I’m under no illusions about how much more needs to be done.
Next up – The Old Man gets on with his recovery AND he finally laminates the leeboards!!!
* Magnusson, Margareta. The Gentle Art of Swedish Death Cleaning. Canongate Books. Edinburgh. 2020