As the building of the Greta T progresses, I have had some observations that I’d like to share with you.
This project started in the winter of 2020-21 and many, many batches of mixed epoxy later I would like to extol the benefits of eating lots of yoghurt: yoghurt tubs (the three-pack size from Costco) make excellent mixing cups for a batch of epoxy! If you are careful, they can be re-used several times (tip: put a string in the bottom which will adhere to any remaining epoxy and then can be used to pull out the left-over epoxy once it has hardened, leaving the container almost ready for use again -thanks to Skip).
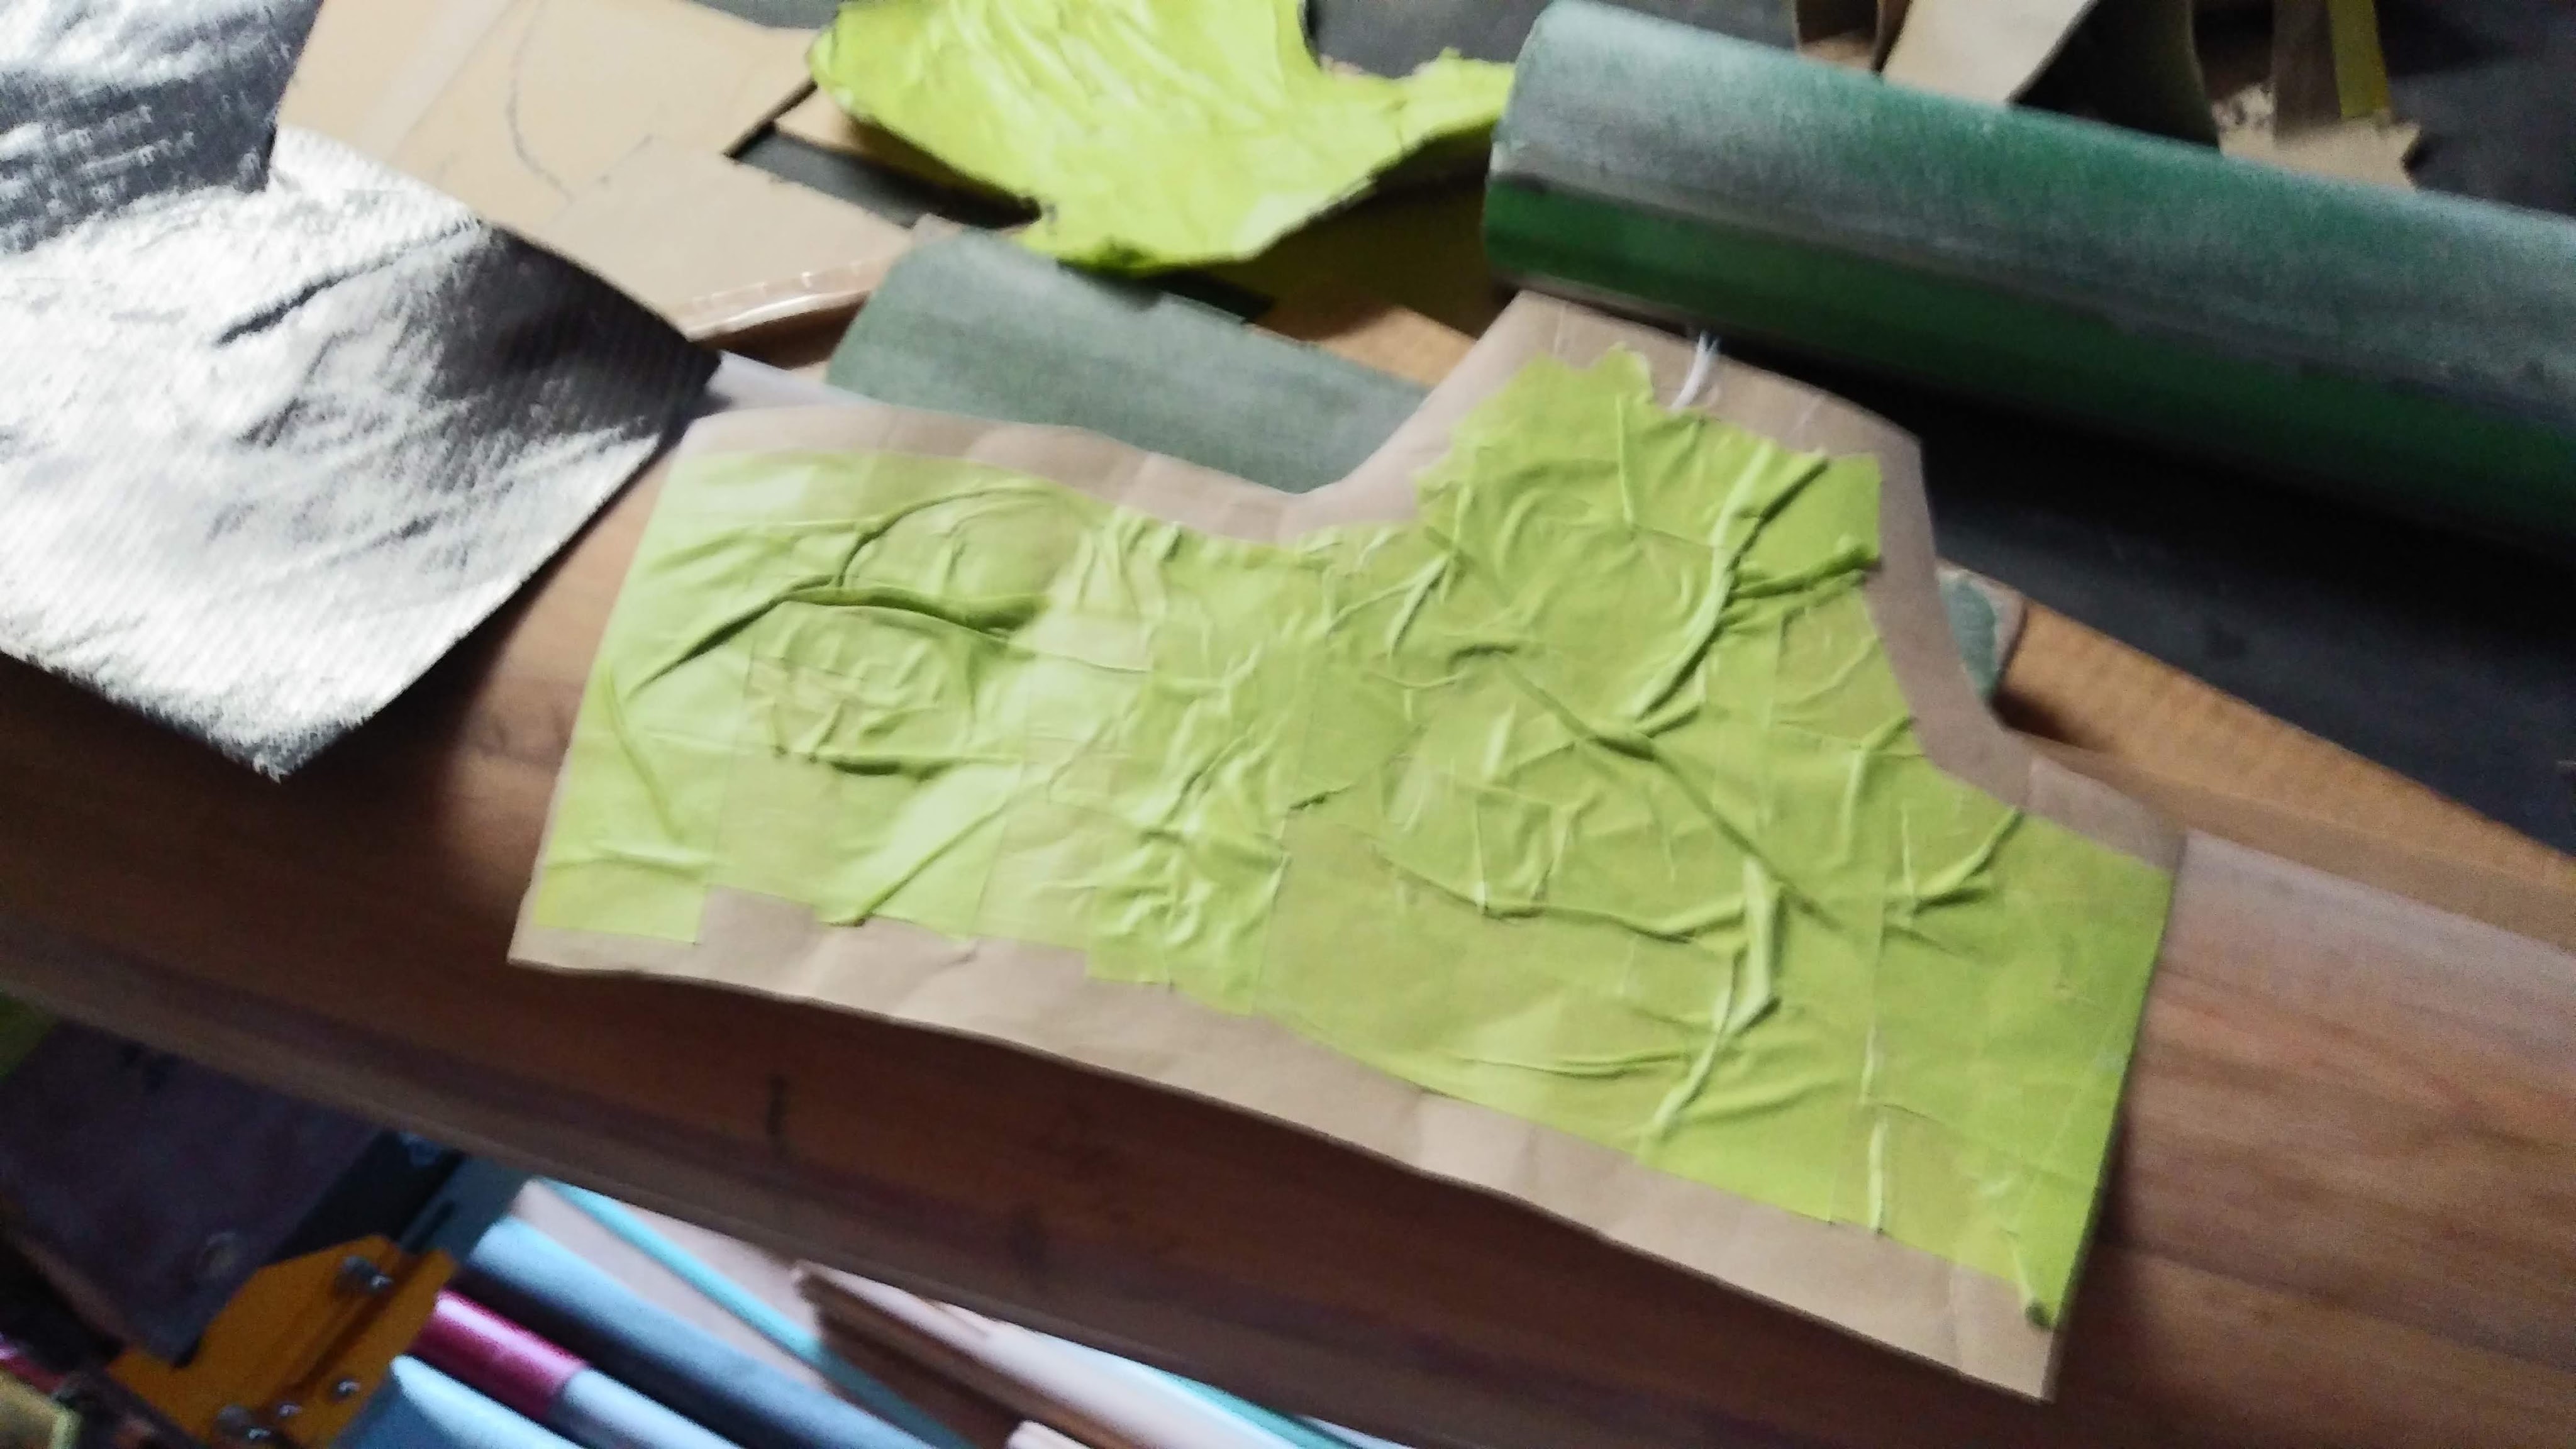
Many of the pieces of the boat that I have had to build have required cutting out some pretty weird shapes in fibreglass or carbon fibre cloth to laminate along the curves… in particular, the new angled mast partners have “bulbs” or widened portions where I felt the stresses would be greatest ( a nice gentle curve distributes the pressure more uniformly than sharp corners).

In order to compress the laminates for good bonding I have resorted to tubes cut in half length-wise for the straight portions and lots of stretch-wrap over long narrow strips of peel ply for the bumpy bits. At this stage I have just added 6 length-wise strips of “uni-directional carbon fibre for stiffness.
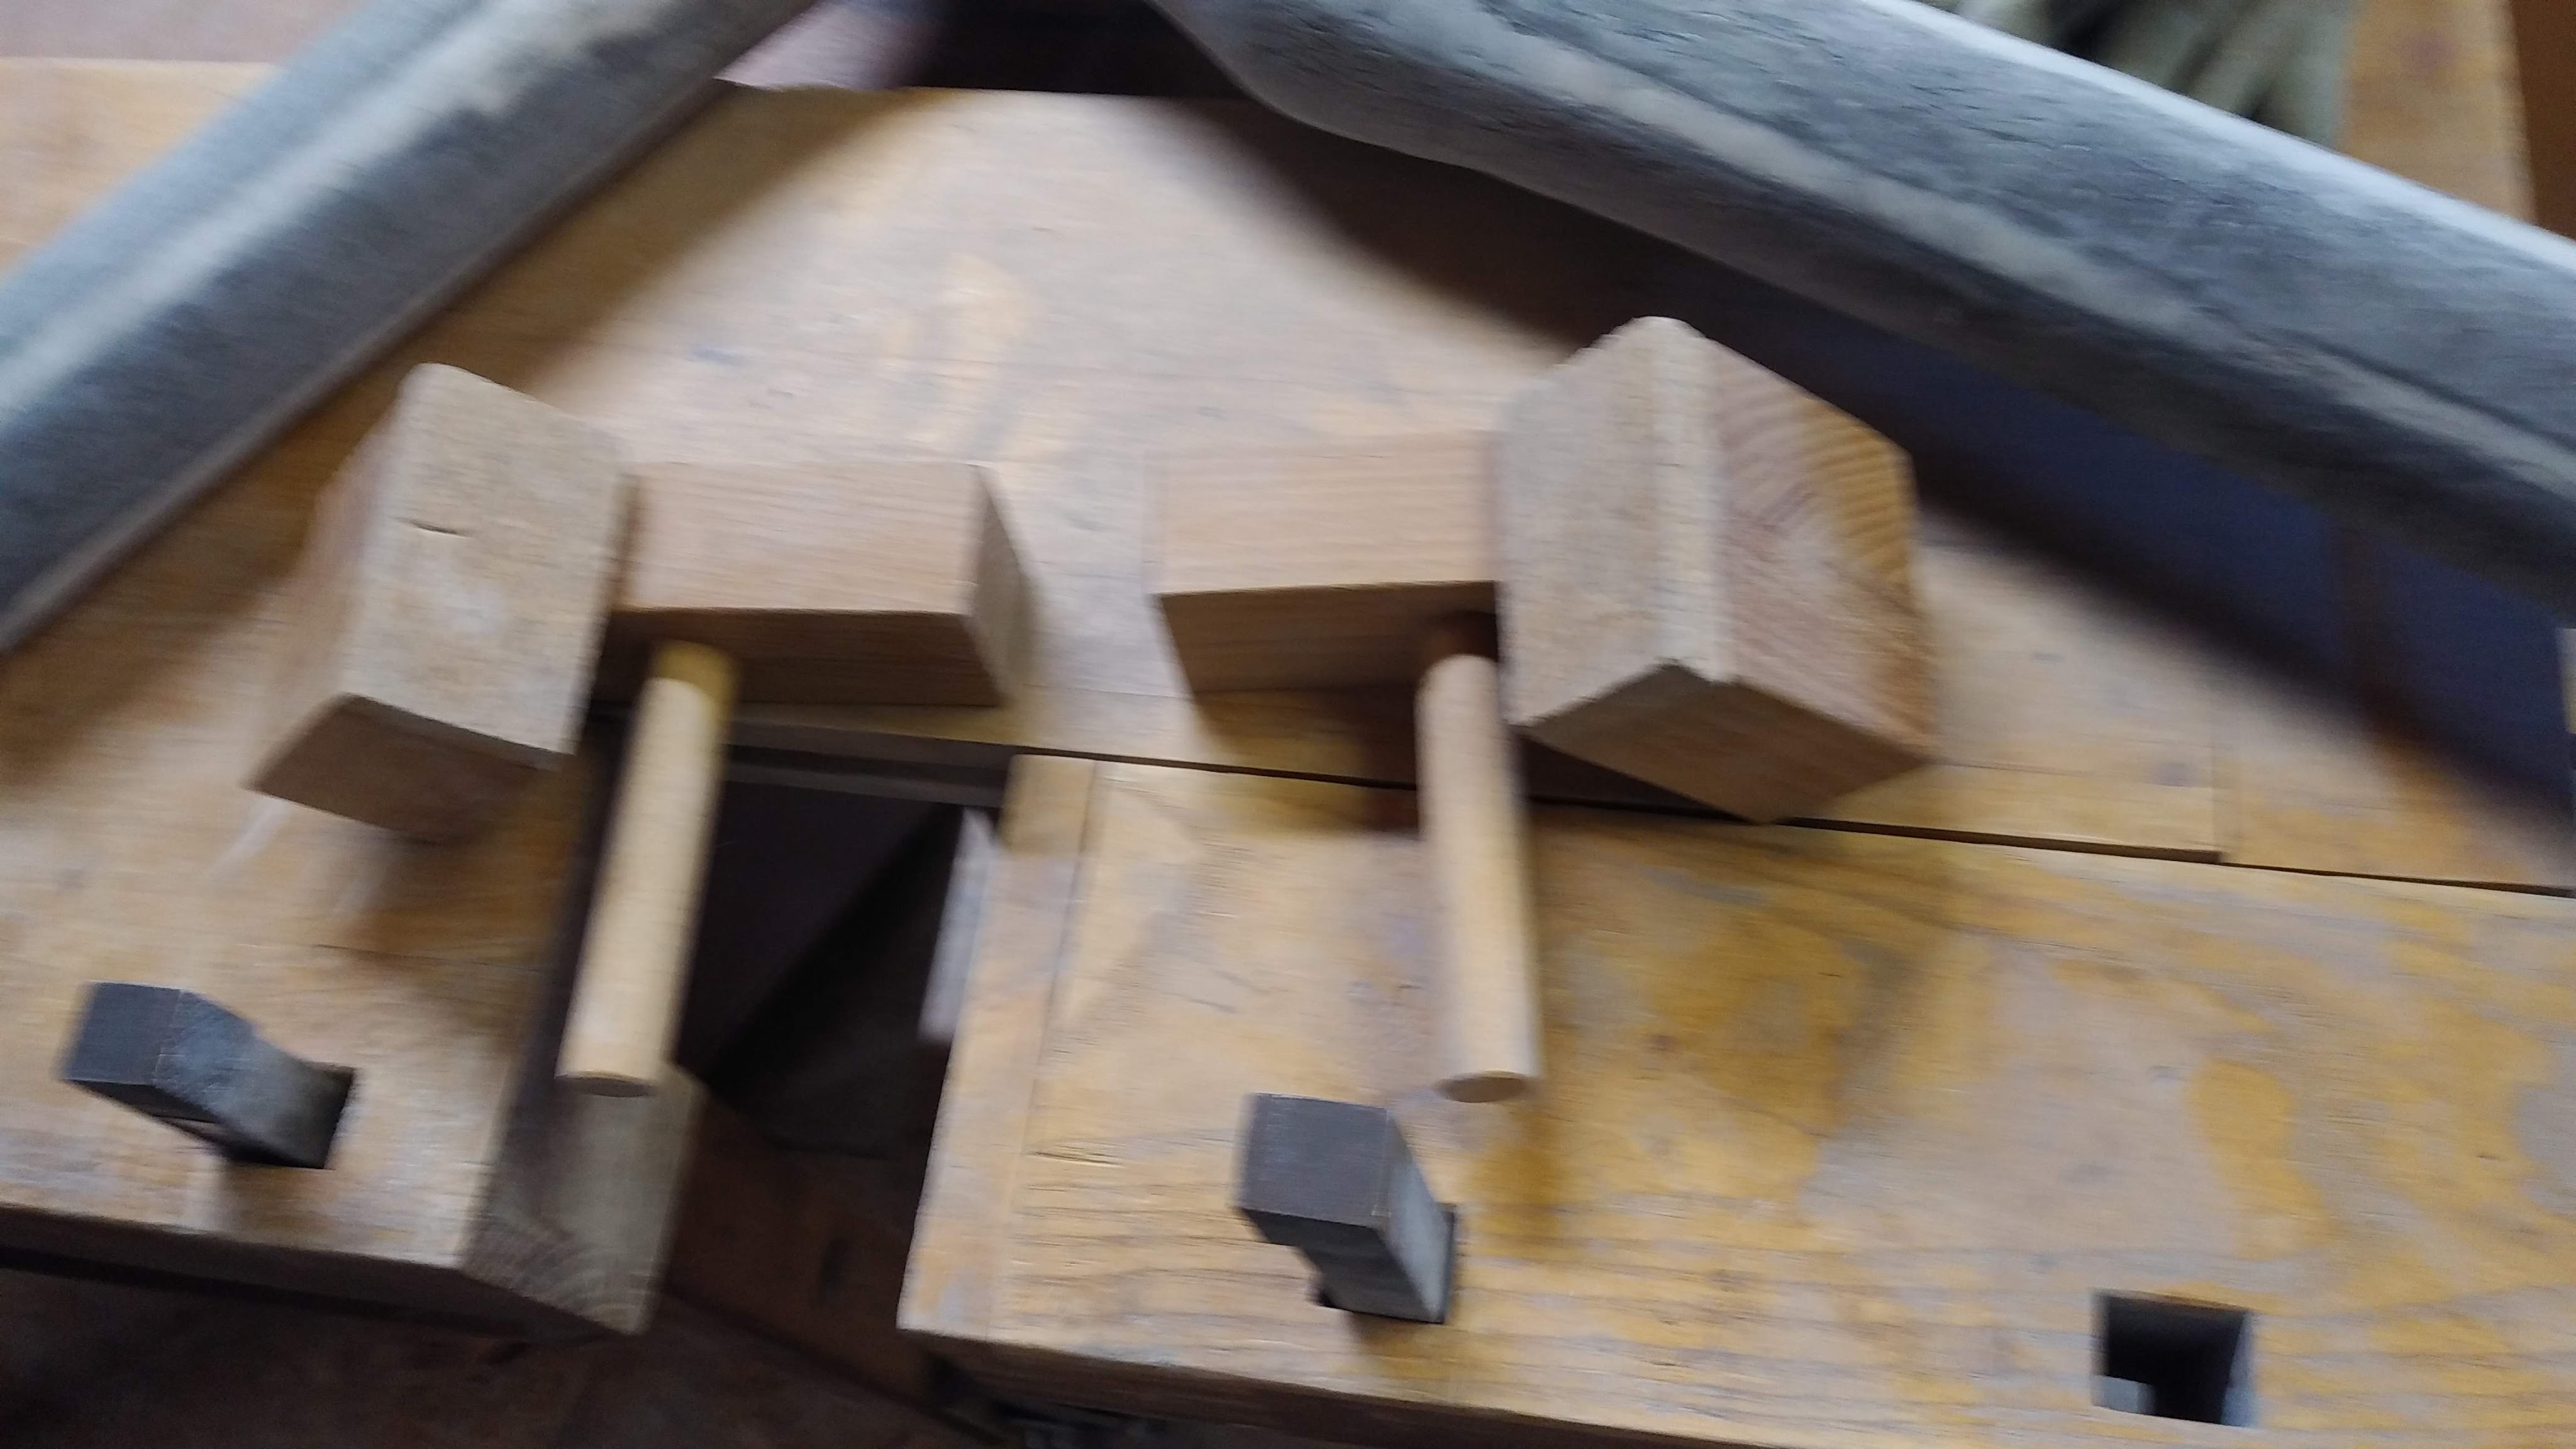
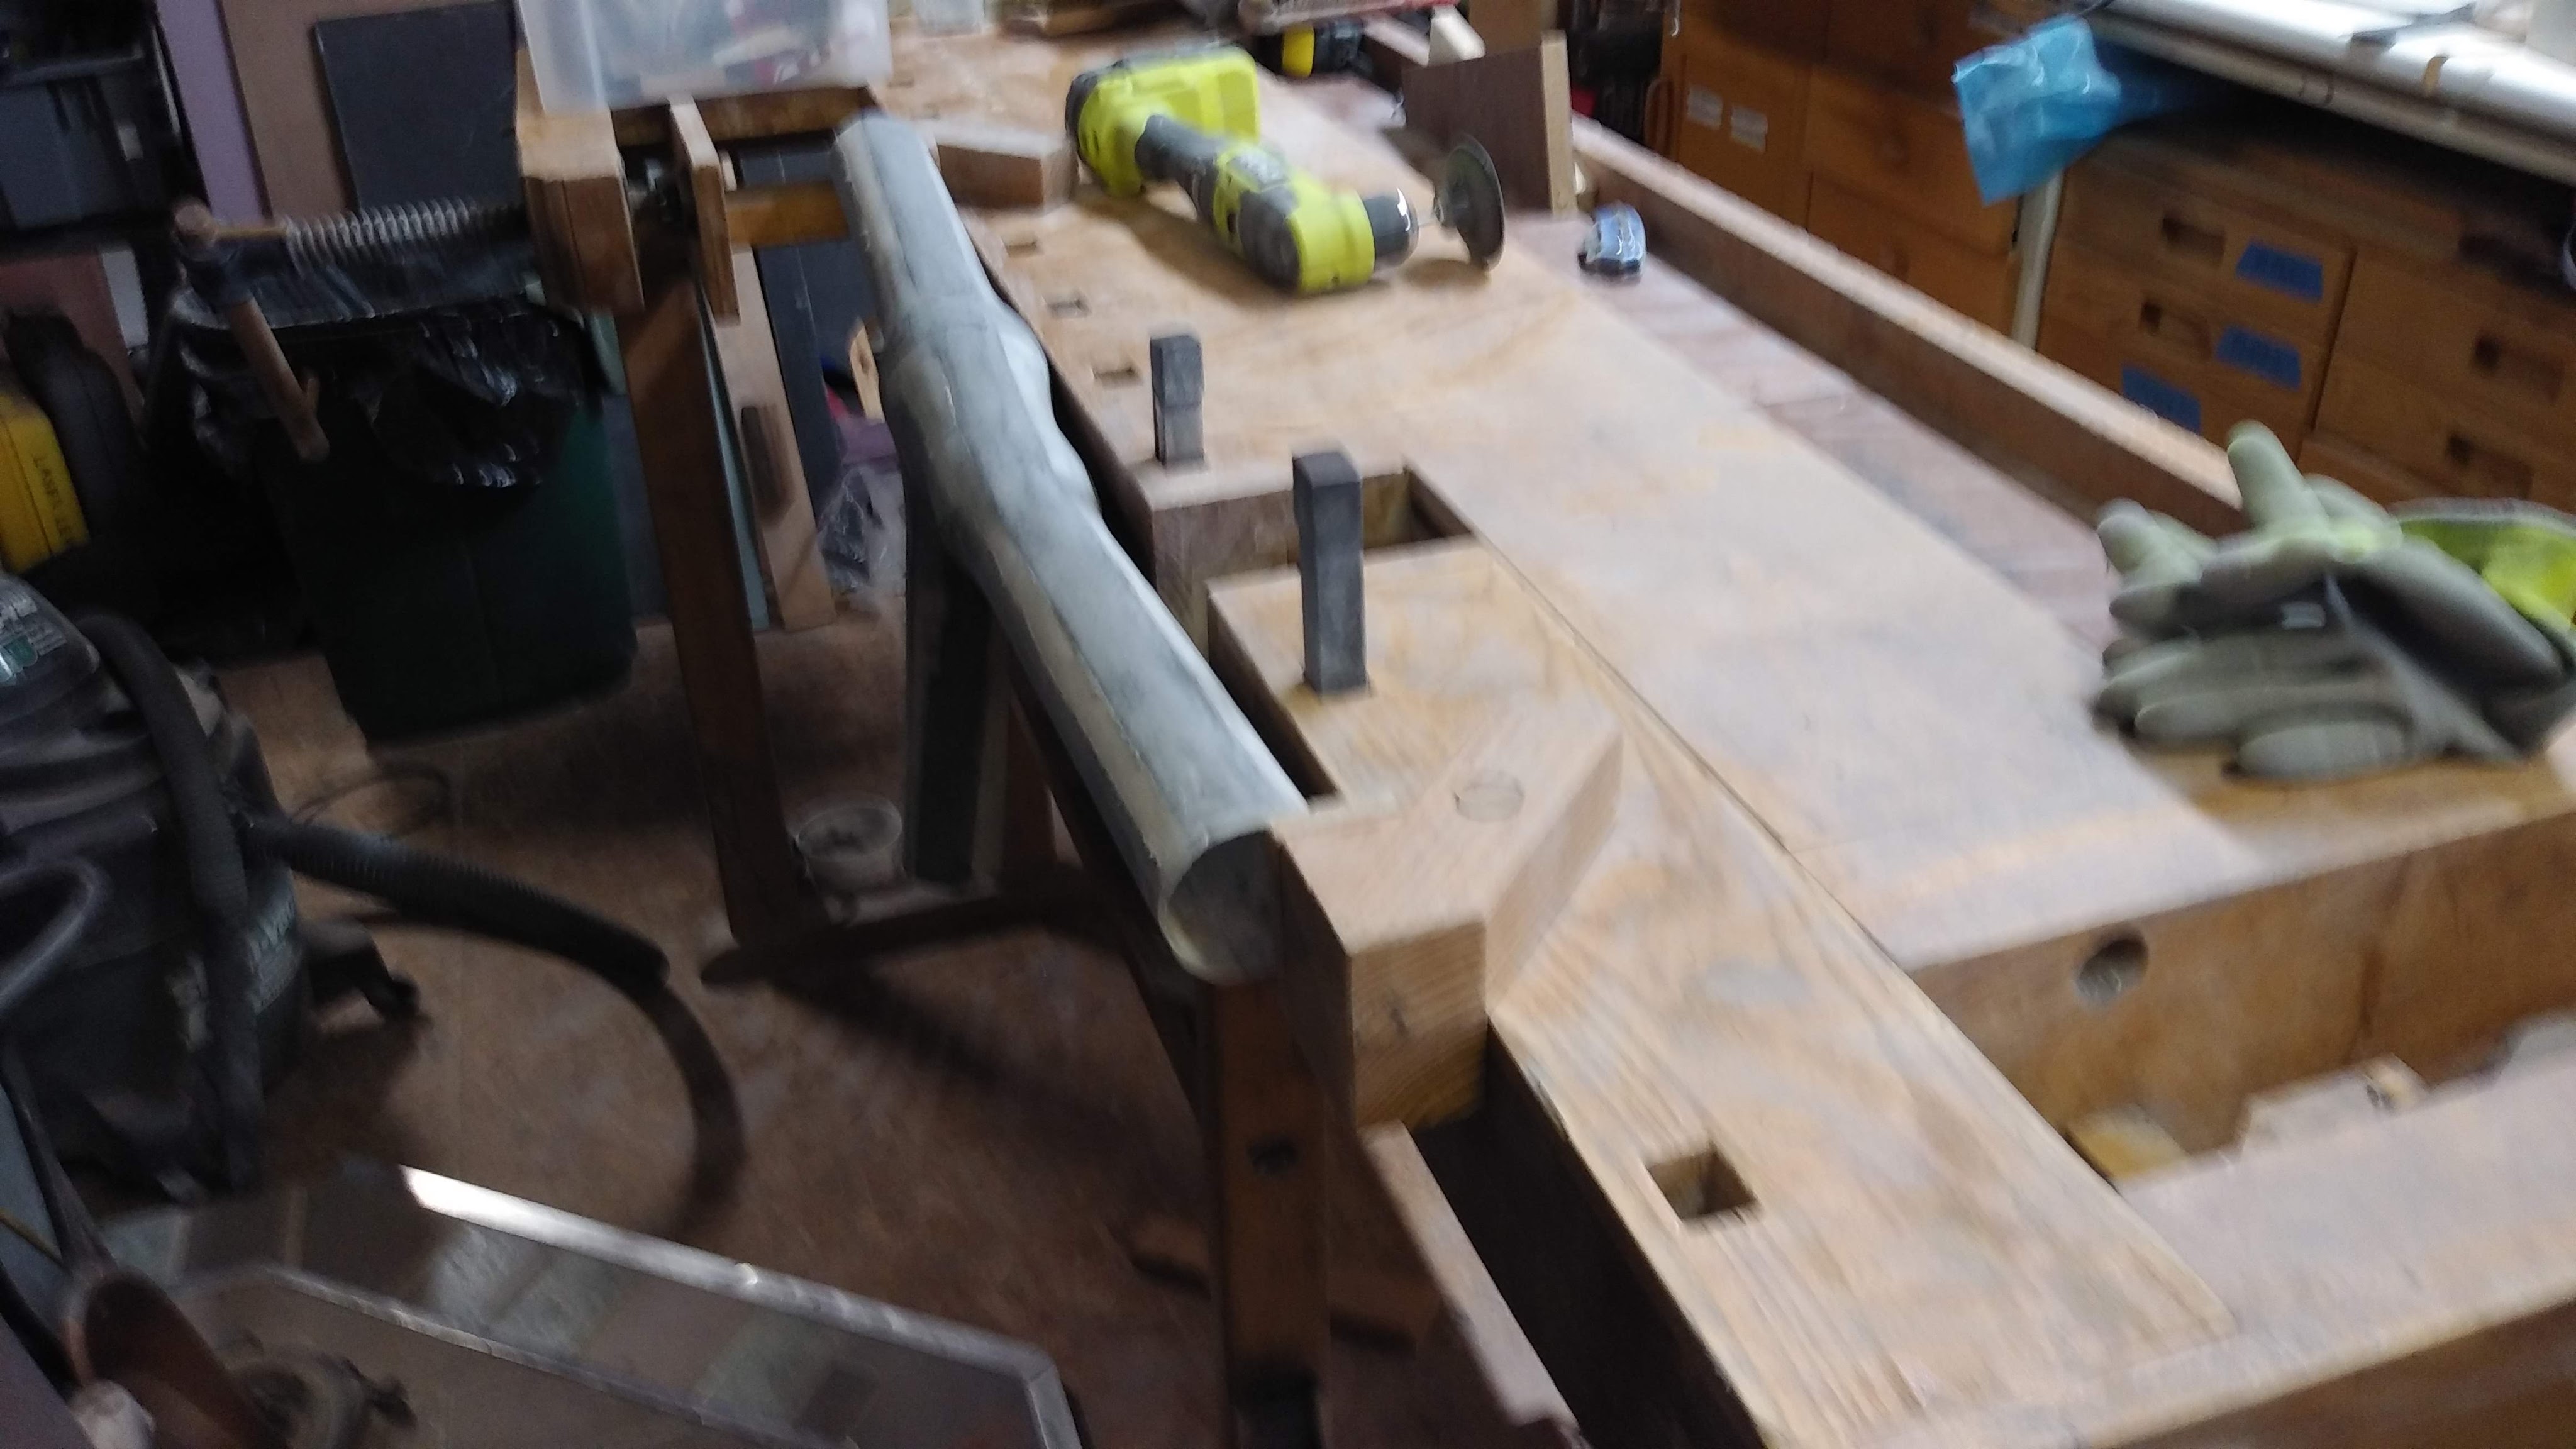
To hold some of the parts for this boat has required some inventiveness as they don’t always easily fit into a standard woodworking vise. At various times I’ve used rope and string, weights, and angled blocks. However one that has proved invaluable many times has been a set of angled bench “dogs” that I made from wood a number of years ago following a pattern I found in Fine Woodworking magazine (despite my best efforts I can’t find it in their archives and so can’t give credit where credit is due – it’s a genius idea!) these two pictures show what they look like and holding the awkward mast partner shape on the face of my workbench. Alongside them I popped up the traditional cast iron bench dogs that I routinely use for woodworking.
Although I have made many mistakes along the way, fortunately most of them have been fairly easy to correct. It does tend to slow down the pace of progress, however. Here’s an example:
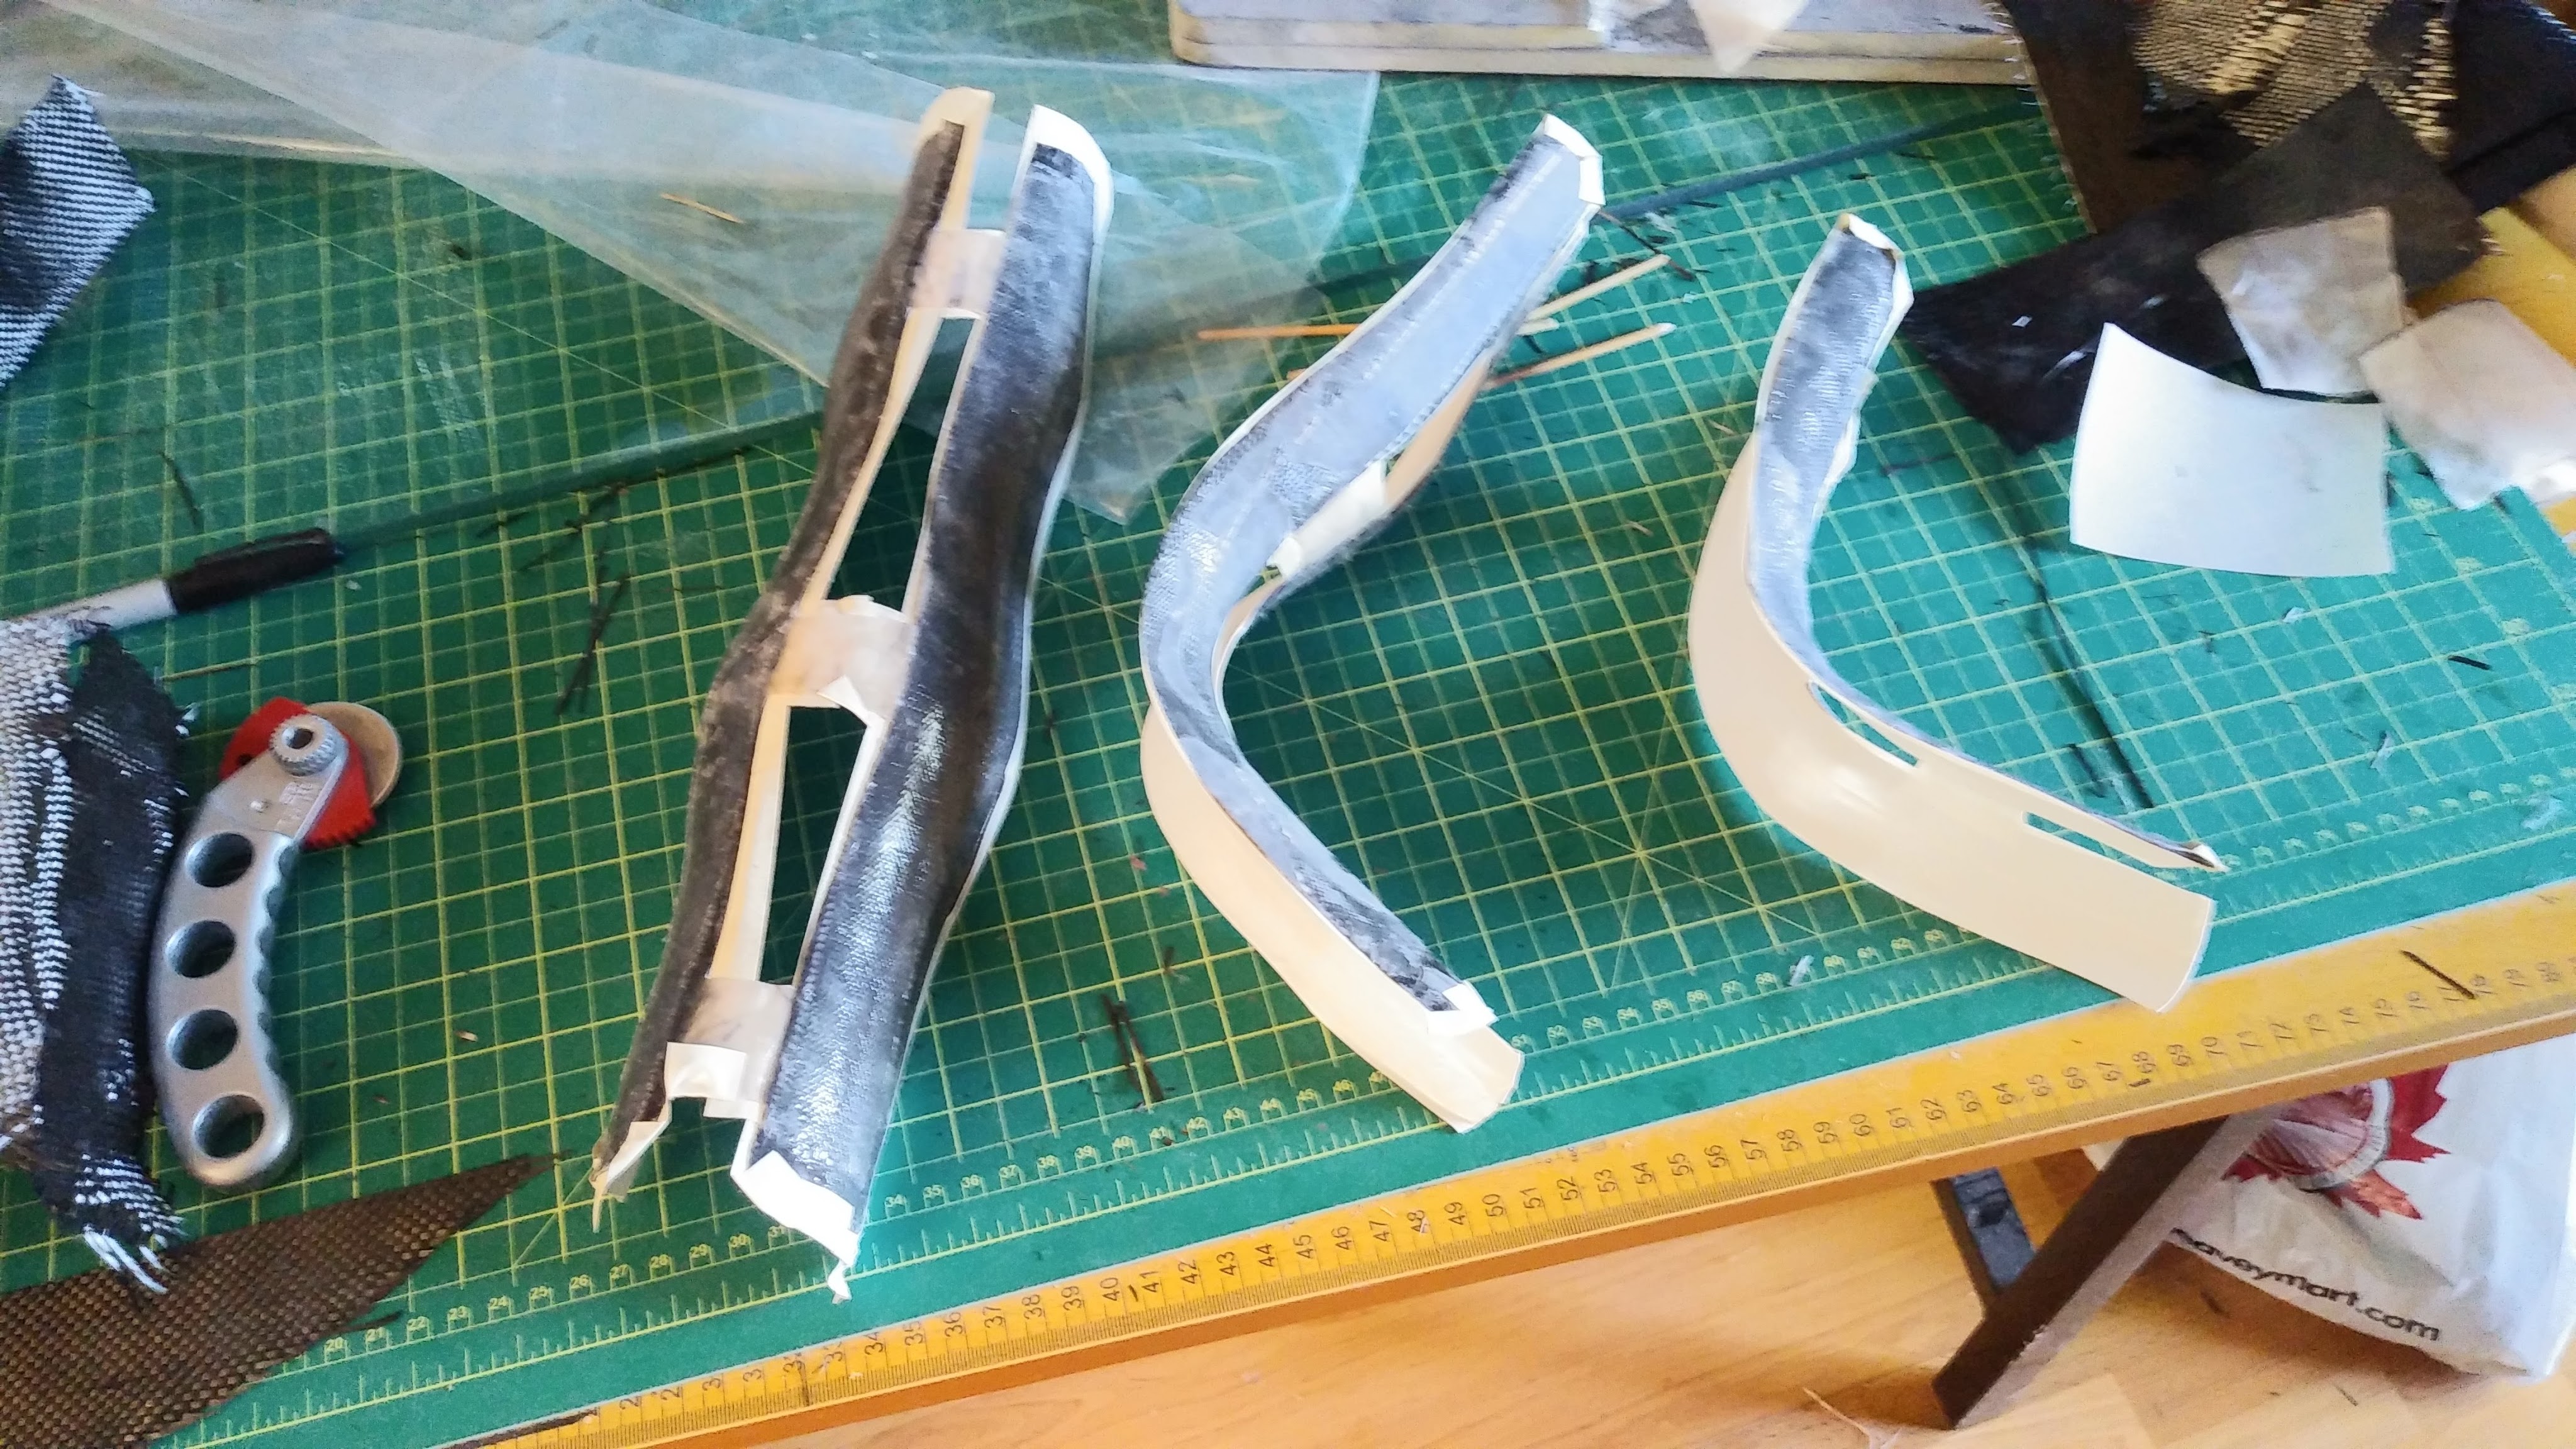
I made these shapes as a cast directly off the mold for the mast partners and used them to shape the inserts (to provide a stopper and rotation plate for the masts and booms) for the partners. What I failed to realize was that these shapes would also allow me to apply just the right pressure in the right spots to compress the laminates I was adding on the outside to build up the mast partners. After having a lot of trouble with the first one and having to patch up areas where the laminate wasn’t compressed enough (you can’t cut uni-directional carbon fibre on the bias to help it around curves!!!), I had an “AHA!” moment and realized that these were just the shapes I was trying to wrap tightly and they could be used on the outside with stretchy tape to squeeze the laminate close to the form at the trouble spots. After a little modification (I made them stiffer by adding another couple of layers of fibreglass) and then I lined them carefully on the inside with electrical tape to prevent them sticking to the peel ply covering the laminate.
This went much better the second time with only one area needing repair!
Finally, why is building this boat so darned hard?
I think I exasperated poor Skip Izon by all the “non-standard” things I wanted to be in the Greta T. Things like the forward-facing rowing system and the tilting/rotating masts not to mention the self-draining cockpit floor and open transom. He was a pretty good sport about it all – but I think he, like a few of my sailing friends, is reserving judgement until it all gets finished and put to the test… which is the crux of the problem – it is taking a long time to figure these things out, figure out how to make them and make sure they all work and fit together and then to get it finished. Here’s an example:
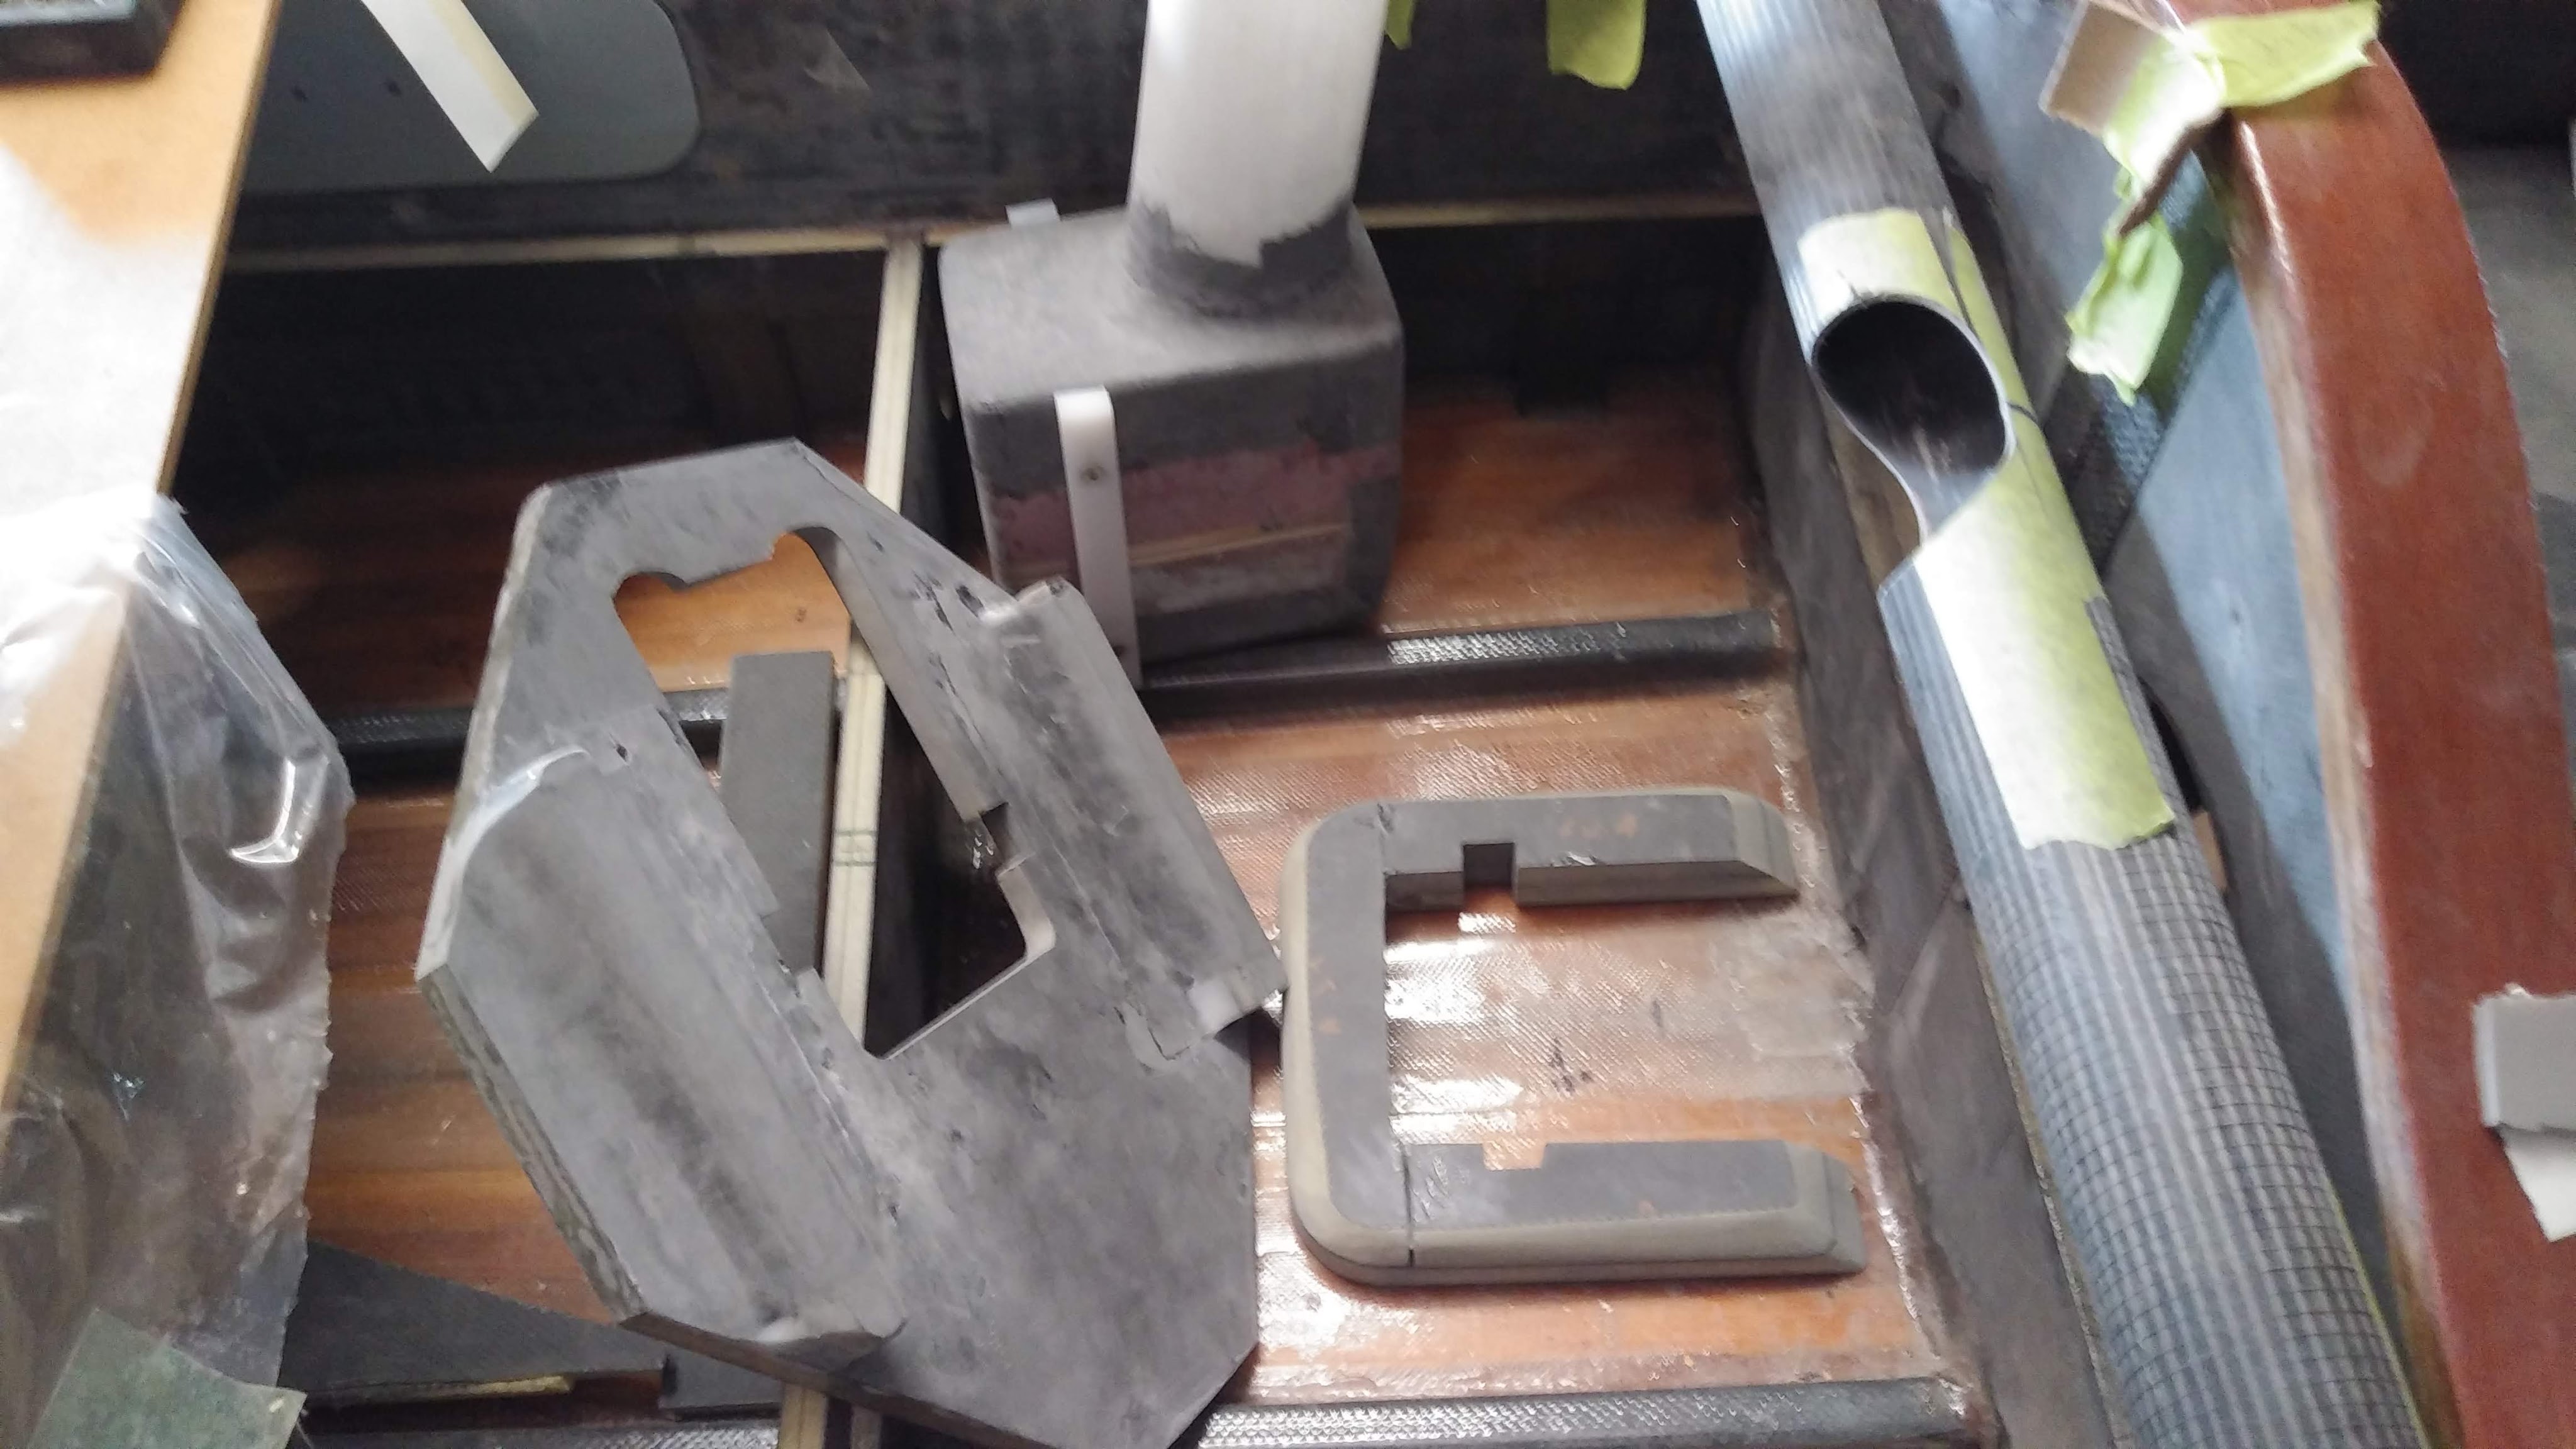
This is the mainmast “step”, or the housing that the main mast sits in and which prevents the mast from shifting as the sail puts pressure in all directions on it (the floorboard has been removed, but will be permanently fixed on top of it – the box with the tube drops down through a hole in the deck and the two plates attach to structural parts of the boat to hold the box rigidly).
Of course, for a rotating mast this has to be some kind of tube supported by other parts of the boat such as the deck (think of a Laser)… but, on the Greta T there is no deck where this mast is and furthermore, part of the fitting is angled to allow the unique mast tilt to windward when sailing downwind, so the support tube has to be angled. OK, so this is still “do-able” but there’s no real guarantee the tilting mast thing is going to work exactly as planned – I have the word of a Swedish designer and boat-builder, Jurgen Sass, (https://sassdesign.net/Helsa%20Rediviva%2050-50%20eng%20pdf.pdf ) that it does, but he was too busy to give us any instructions… To hedge my bets somewhat I decided to make the mast steps “removable” and easily swapped out to hold an upright standard mast… you can see where this is heading, can’t you!??? It’s a good thing I am bald as I would have tugged what few hairs I might have had remaining at this stage of my advanced years, completely out.
I have made “cartidges” that slide into place and are held down by a plate on the top (in the foremast, this plate forms part of the deck); on the mainmast, this plate fastens to the floor with reinforcements underneath. The challenge has been to keep the fit snug and supported on all sides, but not too tight that the cartridges can’t be swapped out for ones to hold the masts in an upright position if that proves necessary. The carbon tube going from side to side is the start of fitting the leeboard supports.

Another area is “retrofitting” attachments for the leeboards. These are boards that drop down at the sides of the boat to stop sideways drift while under sail and channel the force from the sail into forward motion. Unfortunately, we decided late in the build that the dagger board system (through a slot in the centre of the boat) wasn’t going to work with the sliding rowing seat. However, we were well past the stage where we could have installed “tubes” through the hull to house the new leeboards. So I have had to come up with an add-on that will be strong and keep the point of attachment/pivoting as low as possible.
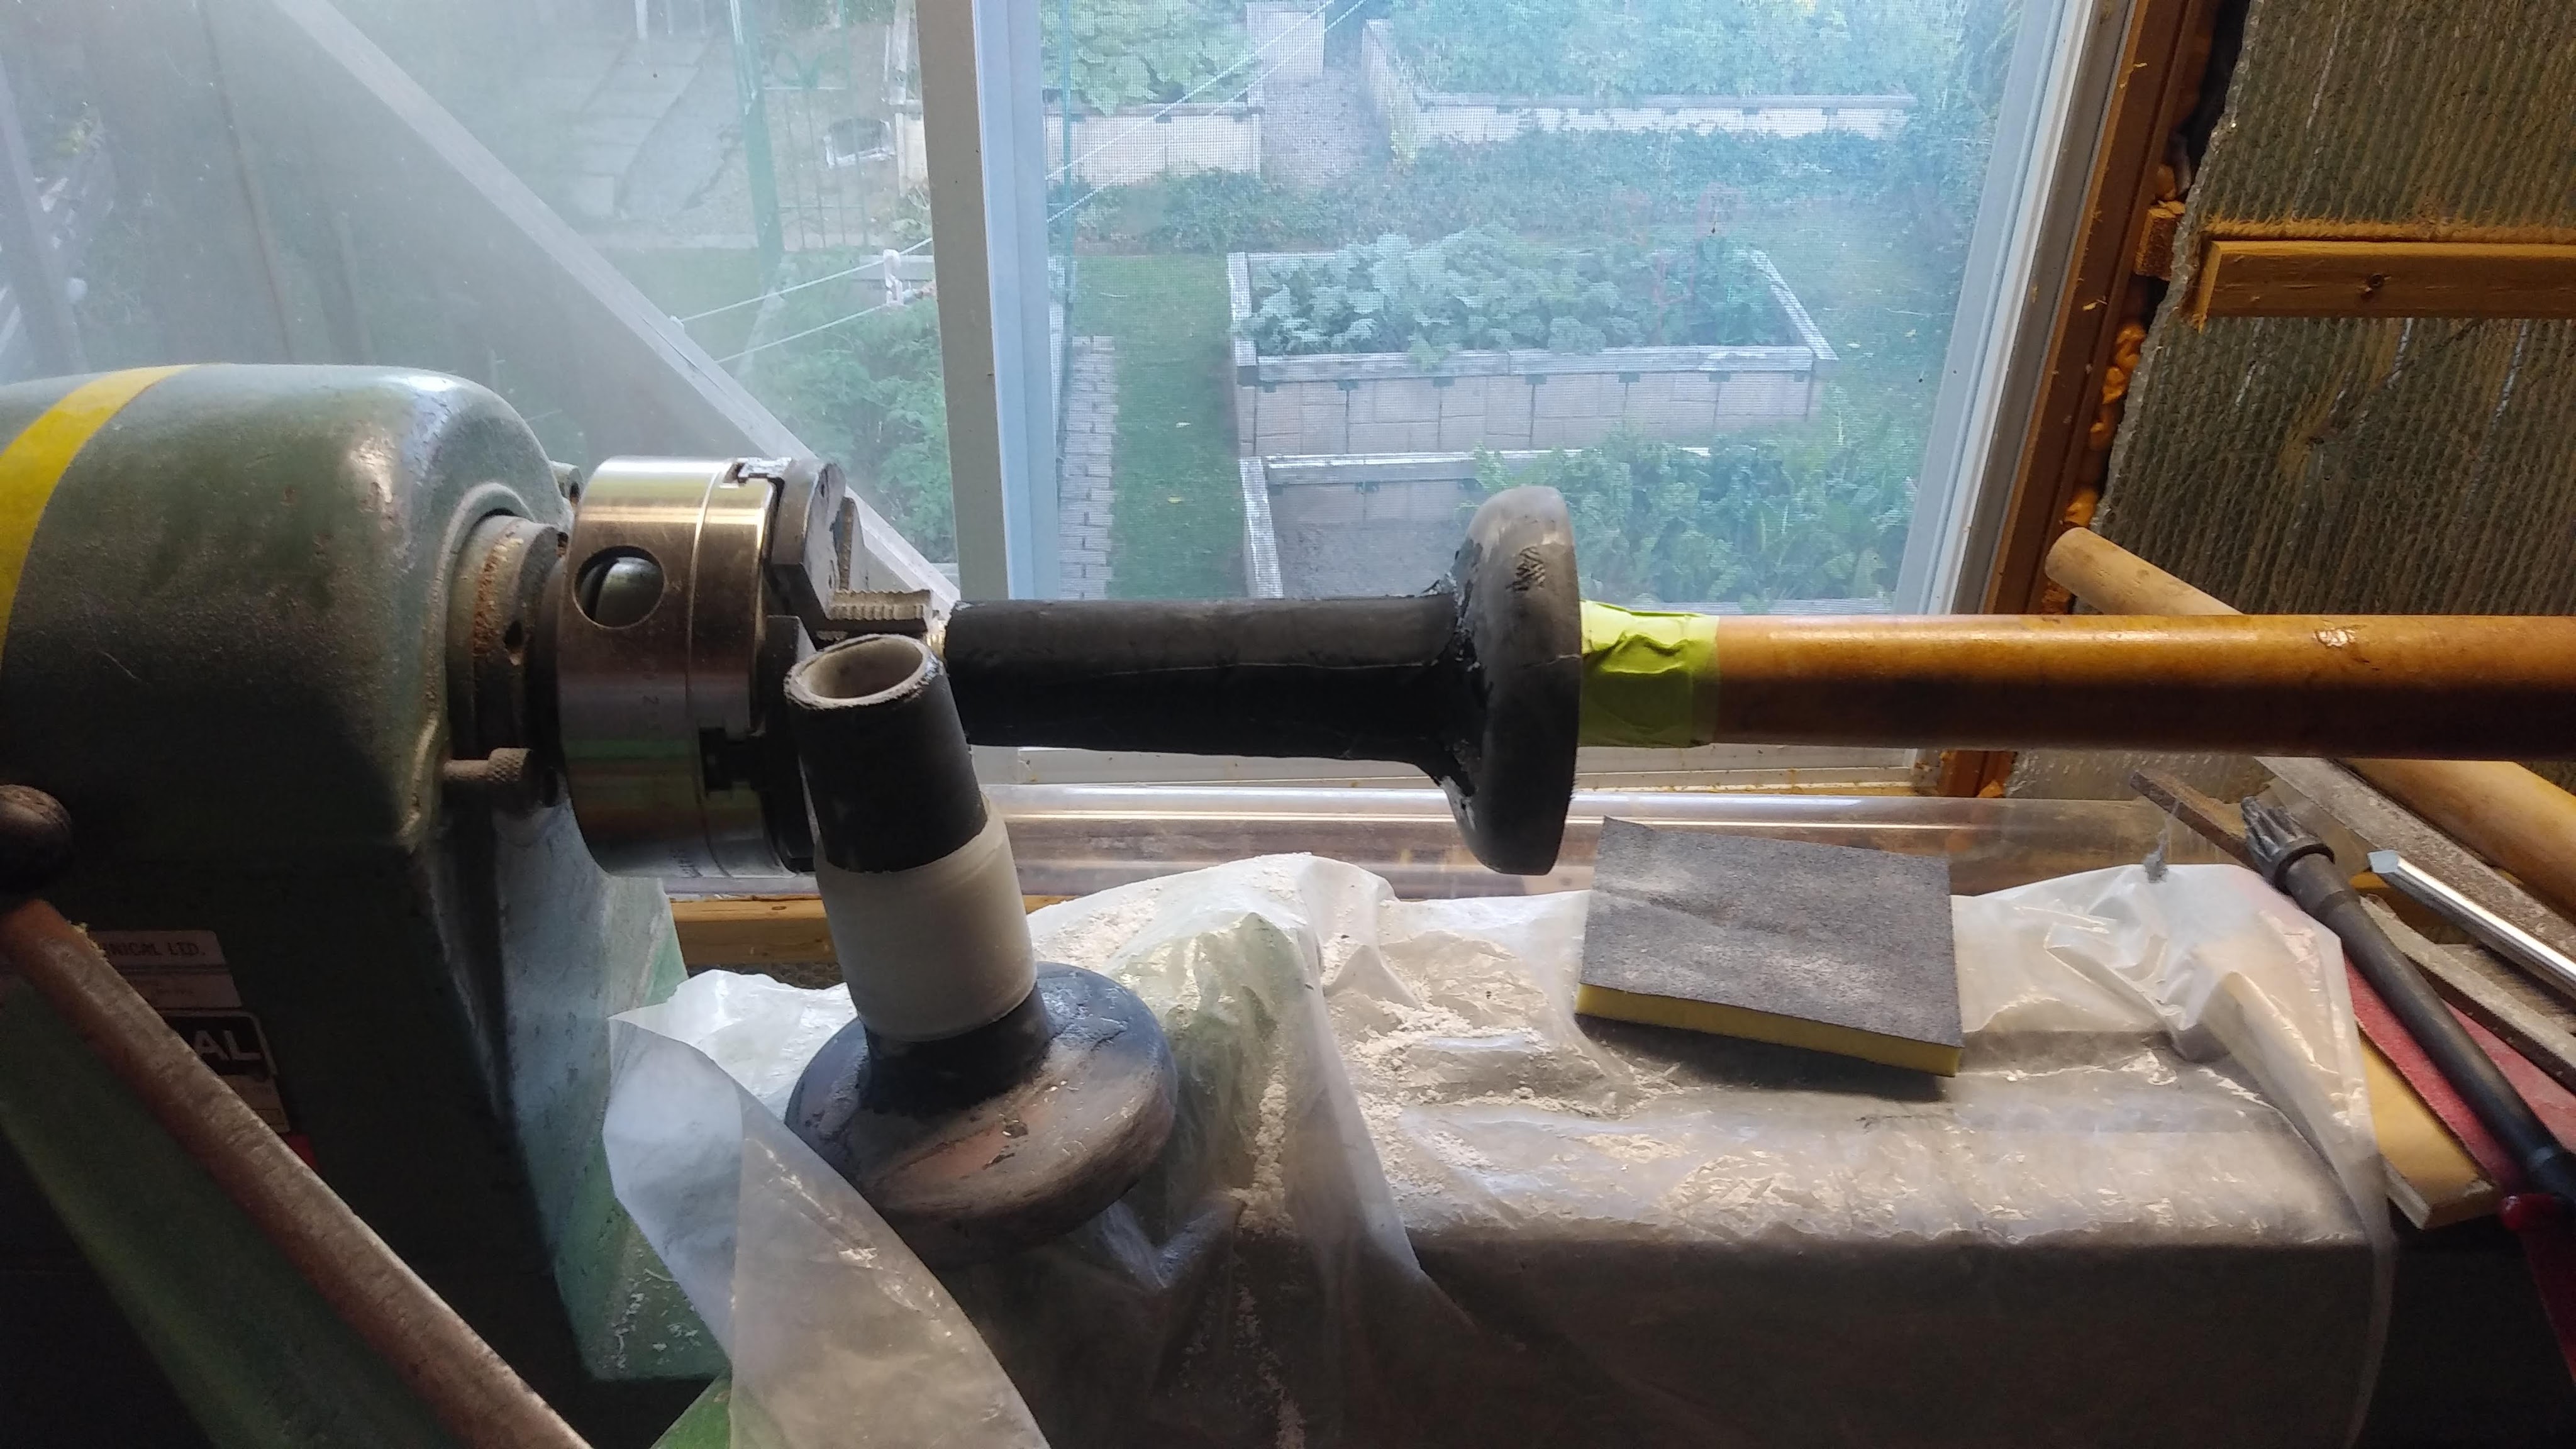
In an effort to save weight rather than using a piece of metal tubing I made a mold and laminated two pivots from carbon fibre. After truing them up on the lathe I laminated the shaft with a special fabric (Dynel) set in epoxy with graphite powder added to make a low friction hard wearing surface as these two parts (once they are ‘glassed into the leeboards) will be under a lot of pressure and wear as they rotate. These pieces will be laminated solidly into the structure of the leeboard. The piece not on the lathe has a nylon collar that I turned for low friction as well.
Here is the leeboard holder (with the cones inserted) which has had plastic “bushings” inserted inside to allow the leeboards to swivel, but with enough friction that they stay in place while sailing. This will be adjustable by pulley and rope system pulling them inboard and as the supports are conical, it will allow variable pressure to keep them in place. I also wanted the leeboards to be easily removed from the boat in case it is needed going through the locks of the Trent Severn Waterway.
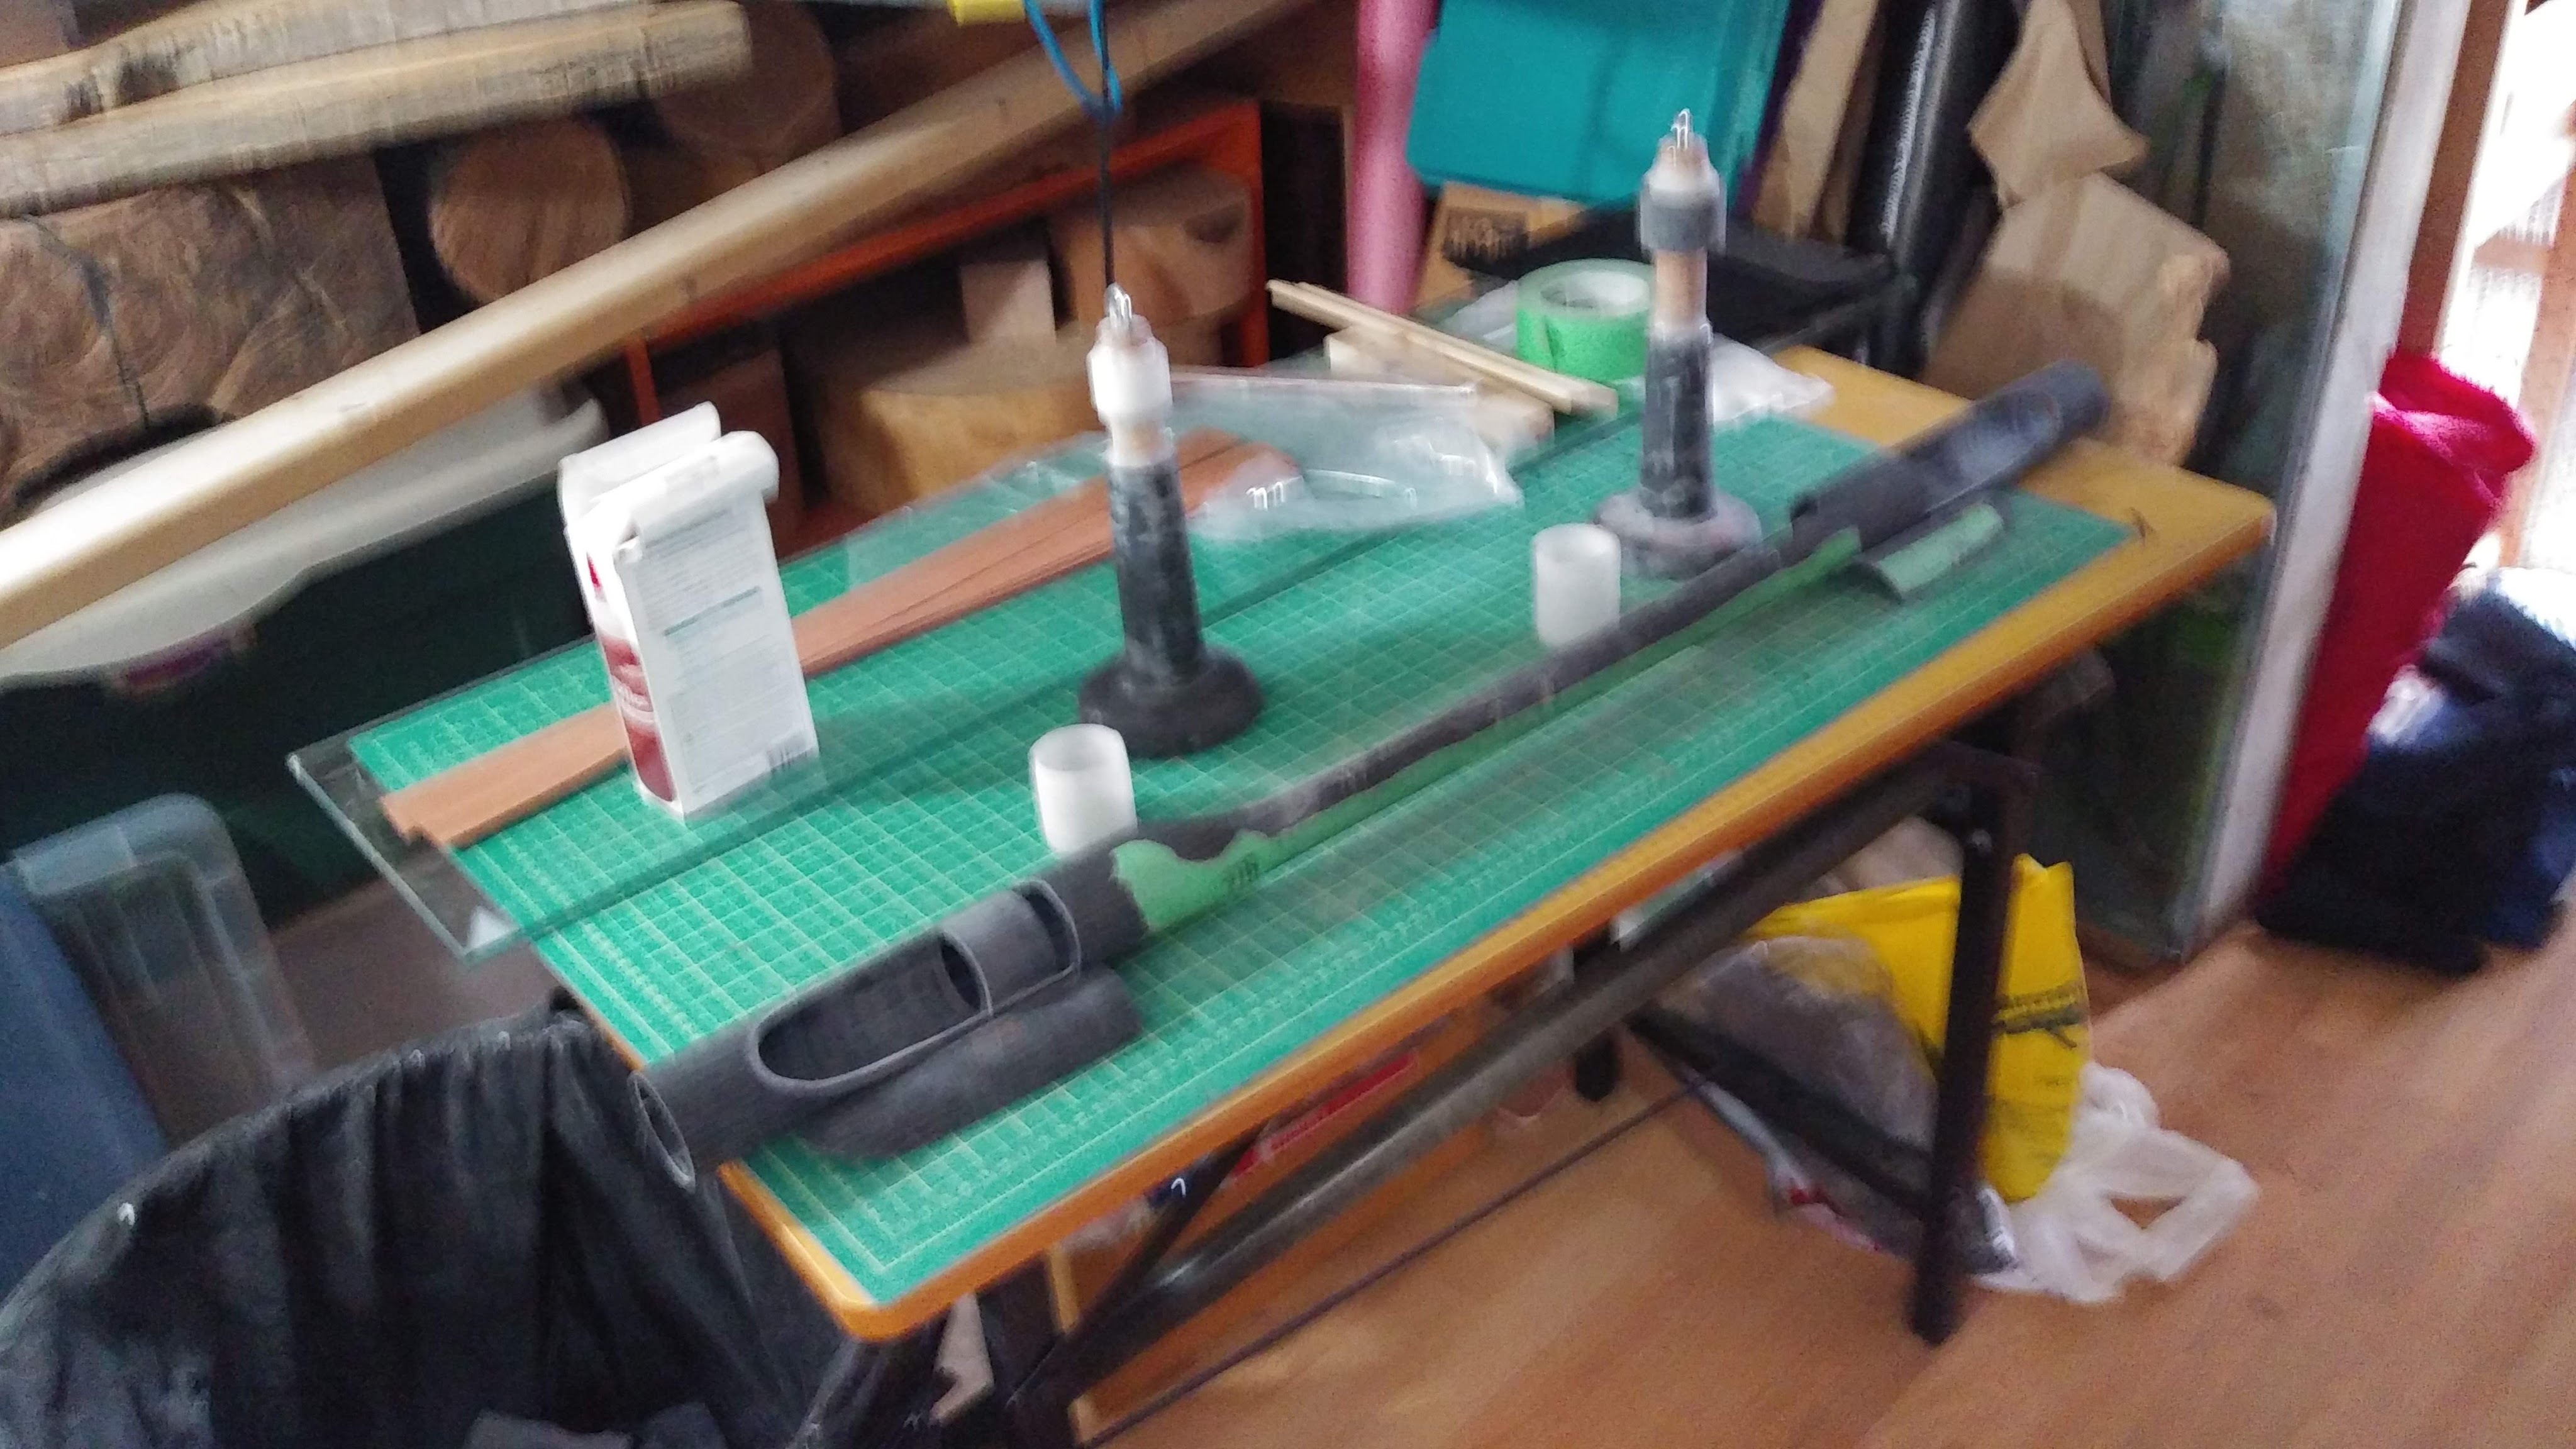
Here’s a picture of the support for the leeboard and one of the leeboards (as yet un-laminated and stiffened with carbon fibre).

I am thinking of forming a society of masochistic boat builders ( the acronym SOMBBIR suggests itself – the IR is for Ian Robertson as I suspect there will only ever be the one member).
In the words of Bill Patterson (the creator of the cartoon strip Calvin and Hobbes) :
“You can’t just turn on creativity like a faucet. You have to be in the right mood.
What mood is that?
Last-minute panic.”
https://www.goodreads.com/quotes/tag/procrastination
And so, still short of last-minute panic, and reminding myself to try to keep a sense of humour about this whole endeavour, I continue to plug away at the Greta T . I have had to accept now that realistically it is unlikely that I can get on my trip this year… a good outcome would be to get the boat in the water and test it in the Autumn. I have re-installed the rowing system on my canoe and plan to get out for rowing training once or twice a week.
Thanks to all those following this saga and to those who have generously donated to the WWF. Please continue to watch this space.
